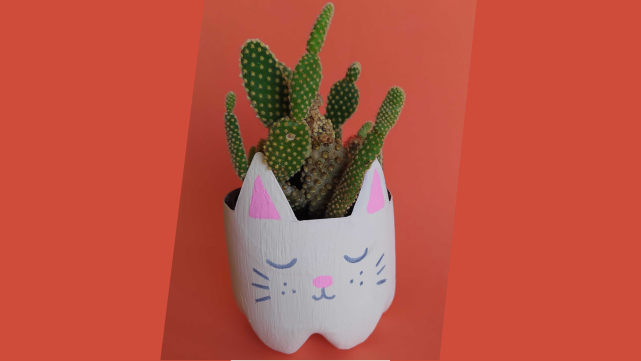
Craft a plastic bottle cat vase
Transform a recycled plastic bottle into a cat-shaped vase by cutting, painting, and decorating; learn recycling, basic sculpting, and arranging flowers with adult help.


Step-by-step guide to craft a plastic bottle cat vase
Step 1
Wash the plastic bottle with soap and water and dry it completely.
Step 2
Use a pencil to mark a line around the bottle where you want the vase height to be and mark two triangles at the top for the cat ears.
Step 3
Wrap masking tape over the pencil lines to make a clear cutting guide.
Step 4
With adult supervision ask the adult to cut along the taped lines to remove the top and shape the two triangular ears.
Step 5
Cover the cut rim and ear edges with masking tape to make them smooth and safe to touch.
Step 6
Paint the outside of the bottle in your chosen cat color using acrylic paint or paint markers.
Step 7
Let the paint dry completely before touching the vase.
Step 8
Glue googly eyes and a foam nose onto the dried bottle to make the cat face.
Step 9
Use a marker to draw the cat mouth and whiskers on the front of the vase.
Step 10
Tie yarn or ribbon around the bottle neck to make a cute collar and tuck or glue the ends so they stay in place.
Step 11
Place a small jar or cup inside the bottle to act as a water liner for fresh flowers.
Step 12
Fill the jar with water and arrange your fresh flowers or add artificial flowers into the liner.
Step 13
Take a photo of your cat vase and share your finished creation on DIY.org
Help!?
What can we use if we don't have googly eyes, a foam nose, acrylic paint, or a small jar for the water liner?
If you can't find googly eyes or a foam nose, cut eyes and a nose from paper or felt and glue them on in the step that adds the face, use washable tempera or craft markers instead of acrylic paint for step 5, and substitute a small plastic cup or recycled medicine bottle as the water liner for step 11.
The bottle cracked while cutting and the edges are jagged—how can we fix that and keep it safe?
If the bottle cracks or edges are sharp after step 4, have an adult recut slowly with a sharp craft knife along the masking tape guide and then cover all cut rims and ears thoroughly with extra masking tape as described in step 5 to make them smooth and safe.
How can we adapt this project for younger kids or make it more challenging for older children?
For toddlers, skip step 4 and have an adult pre-cut the ears so the child can focus on step 5 painting and step 8 sticking on face features, while older kids can use paint markers in step 5, add decoupage or a clear varnish, or create more detailed whiskers and collar designs in step 9.
What are some fun ways to personalize or upgrade our finished cat vase?
To enhance your cat vase after step 6, add patterned washi tape or decoupage over the paint, replace the small jar in step 11 with a battery tea light to make a lantern version, or glue sequins and a custom name tag to the yarn ribbon collar from step 9.
Watch videos on how to craft a plastic bottle cat vase
5 Unique DIY Vases from Waste Glass Bottles | Easy & Beautiful Home Decor
4 Videos
5 Unique DIY Vases from Waste Glass Bottles | Easy & Beautiful Home Decor
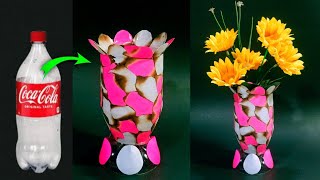
Amazing DIY Recycle Plastic Bottle flower vase Craft | Recycled Material for school projects
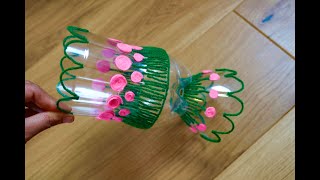
Plastic Bottle Flower Vase Craft - DIY - Home Decor Ideas
Plastic Bottle Flower Vase Craft - Paper Flowers - Home Decor Ideas
Facts about recycled crafts for kids
♻️ Upcycling turns something old into something new and better — making a bottle into a vase is classic upcycling.
🐱 Cats have lived with people for about 9,000 years, so decorating a cat-shaped vase taps into a long love of feline friends.
🥤 Plastic bottles can take hundreds of years to break down in nature, so reusing them reduces waste.
✂️ Crafting with an adult teaches safe cutting, creative problem-solving, and basic sculpting skills.
🌼 Even a single stem in a small homemade vase can brighten a room and boost your mood.
How do I make a plastic bottle cat vase step by step?
What materials do I need to make a recycled plastic bottle cat vase?
What ages is a plastic bottle cat vase craft suitable for?
What are the benefits of making a recycled plastic bottle cat vase?
