Conduct a Tinkercad Workplane Tour
Give a guided Tinkercad workplane tour: move and rotate the view, place and adjust shapes, explain tool functions, and demonstrate workspace navigation.


Step-by-step guide to conduct a Tinkercad workplane tour
How to Use Tinkercad for 3D Printing (Step-by-Step Beginner's Guide)
Step 1
Open your web browser, go to Tinkercad, and sign in to your account.
Step 2
Click the "Create new design" button to open a fresh workplane.
Step 3
Hold the right mouse button and drag to orbit the view around the workplane so you can see it from different angles.
Step 4
Scroll the mouse wheel or use the zoom buttons to zoom in and out on the workplane.
Step 5
Hold the middle mouse button or two-finger drag on your trackpad to pan the view across the workspace.
Step 6
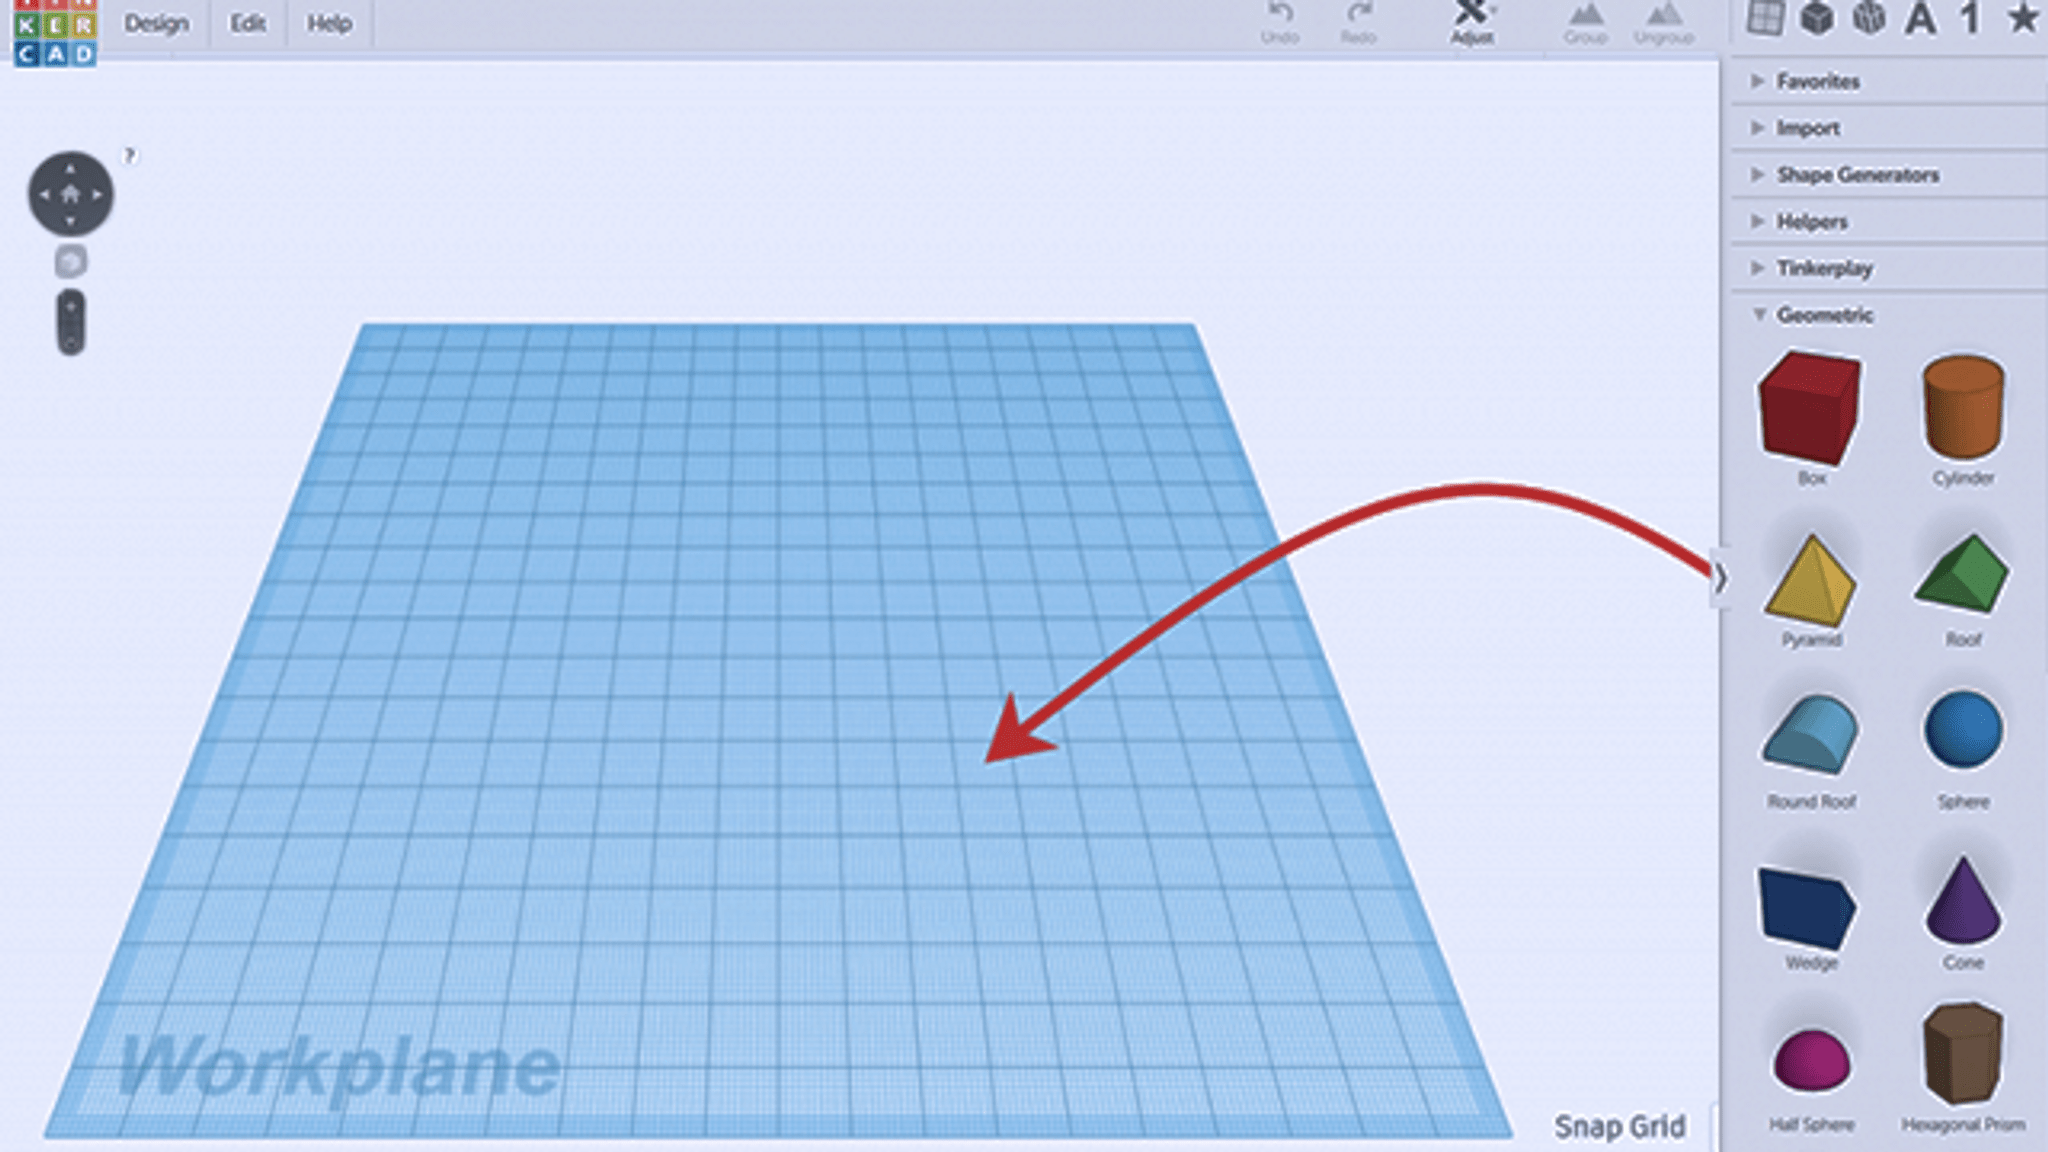
Click the Workplane tool and then click a face or spot on the grid to set a new workplane orientation.
Step 7
Drag a Box shape from the Shapes panel onto the workplane.
Step 8
Click the box and point to or say aloud what the size and height fields show in the shape properties panel.
Step 9
Click a corner handle of the box and type new width and length numbers to resize it precisely.
Step 10
Use the curved rotation handles on the box and type an angle to rotate the box to a specific degree.
Step 11
Press Ctrl+D or click the Duplicate button to make a copy of the box.
Step 12
Hold Shift and click each box to select both objects at the same time.
Step 13
Click the Align tool and choose center alignment to line the two boxes up perfectly.
Step 14
Click the Group button to join the aligned boxes into a single object.
Step 15
Take a photo or screenshot of your finished Tinkercad tour creation and share it on DIY.org.
Help!?
I don't have a mouse—how can I orbit, pan, and zoom the workplane like in steps 3–5?
Use the on-screen View Cube and Orbit tool or two-finger gestures on a trackpad to orbit and pan, and use the zoom buttons or pinch-to-zoom to zoom in/out as alternatives to the right/middle mouse buttons described in steps 3–5.
The Align or Group buttons are disabled or my boxes won't line up—what should I check?
Confirm you selected both boxes by holding Shift as in step 12 so the corner handles appear, then use the Align tool (step 13) and click Group (step 14); if precise size typing doesn't apply, click the size field and press Enter.
How can I adapt this Tinkercad tour for younger or older kids?
For younger kids, simplify to dragging a single Box onto the workplane and taking a screenshot (steps 8 and 15), while older kids can set exact width/length, rotate by degrees, duplicate, and create complex grouped models using steps 11–14 or export for 3D printing.
What are simple ways to enhance or personalize my finished design before sharing on DIY.org?
After grouping your aligned boxes (step 14), add colors or extra shapes from the Shapes panel, use the Workplane tool to orient new parts, and take a screenshot with a short caption about your design before sharing on DIY.org (step 15).
Watch videos on how to conduct a Tinkercad workplane tour
Master the Workplane Tool in Tinkercad
4 Videos
Master the Workplane Tool in Tinkercad
![TinkerCAD - Tutorial for Beginners in 10 MINS! [ FULL GUIDE 2024 ]](https://img.youtube.com/vi/QIn9c5TjrKk/mqdefault.jpg)
TinkerCAD - Tutorial for Beginners in 10 MINS! [ FULL GUIDE 2024 ]
TinkerCAD Tutorial For Beginners to 3D

Match Tinkercad Angles Workplane Align & More to 3D Print in Minutes!
Facts about 3D modeling and CAD for kids
🖥️ Tinkercad runs entirely in your web browser—no software install needed, so you can design anywhere with internet.
🏗️ Designs in Tinkercad are built from simple shapes (boxes, cylinders, spheres) — like digital LEGO bricks you can resize and mash together.
🛠️ Autodesk acquired Tinkercad in 2013, and it’s widely used to make beginner-friendly models for 3D printing and learning CAD.
🔁 Rotating and orbiting the workplane view helps you inspect every side of a model—just like turning a real object in your hands.
🖨️ To 3D-print a model you usually export it as an STL and make sure it’s a solid (no invisible holes) so printers can read it correctly.
How do I conduct a Tinkercad workplane tour with my child?
What materials do I need for a Tinkercad workplane tour?
What ages is a Tinkercad workplane tour suitable for?
What are the benefits of doing a Tinkercad workplane tour?
