Capture Wildlife in Action
Make a simple wildlife camera hide using a smartphone, cardboard, and tape; set it near animal paths to photograph and observe animal behavior.


Step-by-step guide to Capture Wildlife in Action
Wildlife Conservation - Habitat - Educational Video for Kids
Step 1
Choose a quiet spot near an animal path or a place animals visit often to set your camera hide.
Step 2
Ask an adult to check the chosen spot for safety and permission to place the hide.
Step 3
Flatten the cardboard on a table so it is easy to work with.
Step 4
Use the pencil and ruler to draw a rectangle the size of your smartphone plus about 2 cm on every side.
Step 5
Cut out the rectangle with scissors carefully.
Step 6
Fold the cut cardboard into a sleeve shape so the phone can slide inside.
Step 7
Tape the sleeve edges so the shape stays snug and secure.
Step 8
Cut a small hole in the front of the sleeve where the phone camera lens will peek through.
Step 9
Tape leaves or brown paper to the outside to camouflage the hide to match the area.
Step 10
Ask an adult to slide the phone into the sleeve with the camera lens lined up with the hole.
Step 11
Ask the adult to set the camera to time-lapse or video mode for continuous recording.
Step 12
Ask the adult to mute the phone so it stays quiet during recording.
Step 13
Ask the adult to place the hide near the animal path and then step away quietly at least five meters to wait.
Step 14
Return after the recording time is done and review the photos or video with the adult.
Step 15
Share your finished wildlife camera hide and your best animal photos or videos on DIY.org.
Help!?
What can we use instead of thick cardboard or a smartphone if those are hard to find?
If you don't have thick corrugated cardboard for step 3, use a flattened cereal box or poster board, and if you don't have a smartphone for steps 4–6 and 9–11, use an old phone or compact digital camera that fits inside the sleeve.
What should we do if the camera lens doesn't line up with the hole or the phone keeps slipping out?
Before placing the hide (step 11) have an adult slide the phone in (step 10) and test the lens alignment, then enlarge or re-cut the hole and add extra tape or folded cardboard at the sleeve edges (steps 5–6) so the phone is snug and won't slip during recording.
How can we change the activity for younger kids or make it more challenging for older kids?
Younger children can decorate and help camouflage the hide (step 8) while an adult does the measuring, cutting, folding, and camera setup (steps 3–11), and older kids can precisely measure the sleeve, add an internal stabilizer, or experiment with interval time-lapse settings (steps 4–9).
How can we improve or personalize our wildlife camera hide after following the basic instructions?
To enhance the hide, add a small clear plastic window over the camera hole for lens protection, glue on extra natural camouflage like collected leaves or textured brown paper (step 8), and keep a wildlife log when you review photos or videos (step 13) to track which animals visit.
Watch videos on how to Capture Wildlife in Action
Wildlife Conservation | Explained in 3 Minutes #04
4 Videos

Wildlife Conservation | Explained in 3 Minutes #04

Wildlife Animal Adventure 🦜 Learn about Animals at the Zoo! Educational Animal Videos for Kids
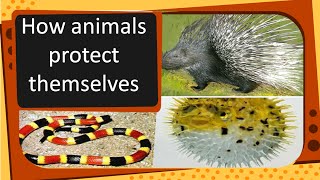
Science - How animals protect themselves - English

Wildlife Conservation for Kids | What Is Wildlife Conservation? | Twinkl USA
Facts about wildlife observation and nature photography
📷 Camera traps use motion sensors or infrared to take photos without scaring animals away.
🌙 Many modern smartphone cameras have night modes or long-exposure tricks that help capture nocturnal animals.
🐾 Wild animals often follow the same 'game trails' again and again, so placing your camera by a path boosts your chances of photos.
段 A simple cardboard hide helps you blend into the scene and reduces movement and glare that might spook animals.
🧭 Scientists rely on thousands of camera-trap images to study where animals live, how many there are, and what they do.
How do I set up a simple wildlife camera hide using a smartphone?
What materials do I need to make a wildlife camera hide with cardboard and tape?
What ages is the wildlife camera hide activity suitable for?
What safety tips should I follow when using a homemade wildlife camera hide?
