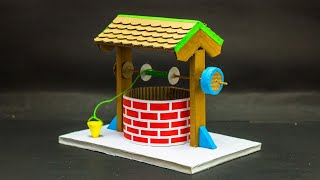
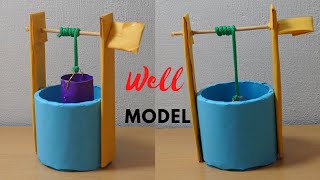
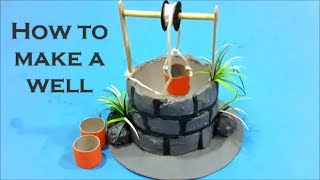
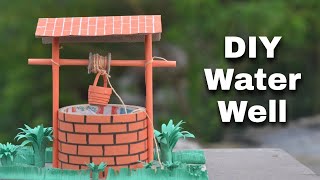
Build Your Own Well
Build a small model well using cardboard, sticks, string, and a cup to lift water safely, learning about pulleys and simple machines.


Step-by-step guide to Build Your Own Well
Step 1
Gather all the materials and set them on a flat workspace.
Step 2
Ask an adult to fill the bowl with water and place it next to your workspace.
Step 3
Cut a square about 15 cm by 15 cm from the cardboard to make the base.
Step 4
Tape the empty toilet paper roll upright in the center of the cardboard base to make the well wall.
Step 5
Glue two popsicle sticks upright on opposite sides of the roll to act as posts.
Step 6
Let the glue dry completely before you move to the next step.
Step 7
Lay the pencil across the tops of the two popsicle stick posts so it can act as an axle.
Step 8
Tape each end of the pencil to the posts so it stays in place when you turn it.
Step 9
Use the scissors to make a small hole near the rim of the plastic cup.
Step 10
Thread one end of the string through the hole and tie a secure knot so the cup hangs by the string.
Step 11
Tie the other end of the string to the middle of the pencil so the cup hangs down and can be wound up.
Step 12
Lower the cup into the bowl of water by letting the string unwind from the pencil.
Step 13
Turn the pencil to wind the string and lift the cup full of water to the top of your well.
Step 14
Share your finished well and a photo of your build on DIY.org
Help!?
What can I use instead of an empty toilet paper roll or popsicle sticks if I don't have them?
If you don't have an empty toilet paper roll or popsicle sticks, trim a paper-towel tube or roll up cardboard for the well wall and substitute wooden skewers or craft sticks taped upright as the posts used in the step 'Glue two popsicle sticks upright'.
My pencil axle won't turn or the cup won't lift—what might be wrong and how do I fix it?
If the pencil axle won't turn or the cup slips when you 'Turn the pencil to wind the string', check that the popsicle-posts were allowed to 'Let the glue dry completely', loosen the tape on the pencil ends so it can rotate, and retie the string knot near the cup hole for a secure hold.
How can I adapt this well build for different ages or skill levels?
For younger children have an adult follow 'Ask an adult to fill the bowl with water' and pre-cut the 15 cm x 15 cm cardboard and make the cup hole, while older kids can replace the pencil axle with a wooden dowel and add a crank or winch from extra popsicle sticks for a more advanced winding mechanism.
How can we extend or personalize the well after we've built and tested it?
Personalize and improve your finished well by decorating and waterproofing the cardboard and toilet paper roll with paint or tape, adding a popsicle-stick roof above the posts, and marking the string with tape to measure how much water the cup lifts from the bowl.
Watch videos on how to Build Your Own Well
School Science Projects | Water Well Working Model
4 Videos
School Science Projects | Water Well Working Model
How To make a well | School project Idea | Well working model project | Science exhibition model
how to make a well - science project ( pulley )
How To Make Well | DIY Water Well | Paper Craft Ideas | Best Out Of Waste
Facts about simple machines and pulleys
🧰 Pulleys are one of the six classic simple machines — they help move or lift loads by changing force and direction.
🪝 A single fixed pulley only changes the direction you pull; a system of pulleys (block-and-tackle) actually reduces how hard you must pull.
💧 People have been digging wells for thousands of years — some ancient wells discovered by archaeologists are around 6,000 years old.
⚙️ A windlass is a hand-cranked drum used on wells and ships to wind rope, acting like a simple rotary pulley.
🧪 Building a tiny well with a cup, string, and a pulley is a safe, hands-on way to learn about mechanical advantage and simple machines.
How do I build a small model well with a pulley to lift water safely?
What materials do I need to build a model well with cardboard, sticks, string, and a cup?
What ages is the build-your-own-well activity suitable for?
What safety tips and learning benefits come with a model well project?
