Build an irrigation system
Build a simple drip irrigation system using recycled bottles, tubing, and stakes to water potted plants and learn about conservation.


Step-by-step guide to build a simple drip irrigation system
Easy garden irrigation system for beginners
Step 1
Gather all the materials and set them on a table or outside workspace so everything is handy.
Step 2
Rinse the recycled bottle and remove the label so it is clean and clear.
Step 3
Cut a length of tubing long enough to run from the bottle down into the plant pot and leave a little extra.
Step 4
Make a hole in the bottle cap using a nail or awl so the tubing can be pushed through.
Step 5
Push one end of the tubing through the cap so a couple of centimeters sit inside the bottle and the rest stays outside.
Step 6
Seal around the tubing and cap with tape or hot glue so no water leaks at the join.
Step 7
Poke a very small vent hole near the top of the bottle body with a nail or pin so air can enter the bottle.
Step 8
Make one or two tiny pinprick holes along the length of the tubing that will sit in the soil for slow drips.
Step 9
Fill the bottle with water up to about three-quarters full.
Step 10
Screw the capped tubing assembly tightly onto the bottle so it is closed.
Step 11
Turn the bottle upside down so water can flow into the tubing.
Step 12
Push the wooden stake into the pot near the plant so it is stable.
Step 13
Attach the upside-down bottle to the stake with tape so the bottle stands above the pot and the tubing hangs down.
Step 14
Gently tuck the tubing end a bit into the soil near the plant roots so water will drip where the plant needs it.
Step 15
Take a photo or write a short note about your irrigation system and share your finished creation on DIY.org.
Help!?
What can I use instead of the clear tubing or wooden stake if I can't find them?
You can substitute aquarium tubing or a sturdy bendy drinking straw for the tubing and use a chopstick, bamboo skewer, or wooden dowel in place of the wooden stake called for in the 'Push the wooden stake into the pot' step.
My bottle is leaking around the cap where the tubing goes through — how do I stop it?
Follow the 'Seal around the tubing and cap with tape or hot glue' step and if leaks persist remove the cap, trim the tubing end, reinsert it, and press a bead of hot glue inside the cap or wrap it tightly with waterproof tape to make a watertight join.
How can I adapt this activity for younger kids or older children?
For younger kids have an adult do the 'Cut a length of tubing', 'Make a hole in the bottle cap', and 'seal around the tubing' steps while kids place the tubing in the soil and decorate the bottle, and for older kids let them make the tiny pinprick holes and measure how long the bottle takes to empty to experiment with drip rate.
What are simple ways to extend or personalize our irrigation system after finishing it?
You can personalize the project by decorating the recycled bottle, add a small clamp or needle valve to the tubing to control flow, connect a second bottle to water another pot, or change the number and size of the pinprick holes in the tubing as described in step 7 to experiment with drip speed.
Watch videos on how to build a simple drip irrigation system
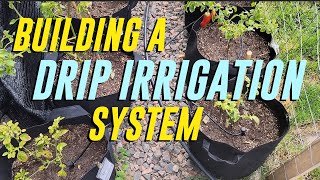
DIY Garden Watering Irrigation System - Simple and Affordable Automatic Watering Solution
4 Videos
DIY Garden Watering Irrigation System - Simple and Affordable Automatic Watering Solution
DIY Garden Irrigation That Works!
How to Install a Drip Irrigation System for Raised Garden Beds | Step-by-Step DIY Guide
EASY DRIP IRRIGATION! How to build a garden watering system with multiple zones
Facts about water conservation and garden irrigation
💧 Drip irrigation can use up to 70% less water than traditional sprinklers because it applies water directly to plant roots.
🌱 Potted plants often dry out faster than garden soil, so they usually need smaller, more frequent waterings.
♻️ Reusing plastic bottles and tubing for irrigation keeps waste out of landfills and gives materials a second life.
🌍 Only about 2.5% of Earth's water is freshwater, and less than 1% is readily accessible for people and crops.
⏱️ Slow, steady drips encourage roots to grow deeper, which helps plants tolerate dry periods better.
How do I help my child build a simple drip irrigation system for potted plants?
What materials do I need to build a drip irrigation system from recycled bottles?
What ages is this drip irrigation activity suitable for?
What are the benefits of building a drip irrigation system with kids?
