Build an anemometer
Build a cup anemometer using paper cups, straws, a pin, and a pencil; test wind speed outdoors and record how fast the wind blows.


Step-by-step guide to build a cup anemometer
How to make an anemometer (wind speed meter)
Step 1
Gather all your materials on a clear table so you can build without losing anything.
Step 2
Cross the two straws in the middle to make a plus sign and tape them firmly where they meet.
Step 3
Use the marker and ruler to mark a small dot near the rim on the side of each cup where the straw will go.
Step 4
Carefully poke a small hole at each dot with the tip of the scissors or a pencil so the straw can fit through.
Step 5
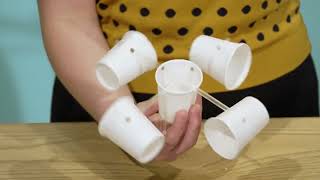
Push one end of each straw into a cup hole so there is one cup on each straw end and make sure all cup openings point the same way.
Step 6
Tape each cup to its straw if it feels loose so none fall off while spinning.
Step 7
Push the push pin straight through the very center of the crossed straws so the straws stay together and can still spin.
Step 8
Stick the sharp end of the push pin into the eraser of the pencil so the straw cross sits on the eraser and can turn freely.
Step 9
Take your anemometer outside and hold the pencil upright at arm’s length so the cups can spin in the wind.
Step 10
Use a timer or watch to count how many full spins the cups make in 10 seconds and write that number down.
Step 11
Multiply the 10-second count by 6 to get rotations per minute (RPM) and repeat the 10-second count two more times to make three readings.
Step 12
Average your three RPM numbers to get a final wind-speed reading and share a photo of your anemometer and your results on DIY.org.
Help!?
What can we use if we don't have plastic straws, paper cups, or a pencil with an eraser?
If you don't have straws use wooden skewers or straight sticks, replace paper cups with small yogurt pots or rolled cardstock cups for step 5, and use a cork or a bit of modeling clay instead of the pencil eraser to hold the pushpin in step 8.
Why won't the cups spin smoothly or they fall off when I take it outside?
If the cups wobble or fall, make sure the two straws are taped firmly at the center (step 2), each hole is only big enough for a snug fit (step 4), and tape each cup to its straw (step 6) so none come off while spinning.
How can I modify the project for a preschooler or a teenager?
For preschoolers have an adult pre-poke the holes and push the pushpin through the straws (steps 4 and 7) while the child assembles cups and counts spins, and for teens swap straws for skewers, add a small bead or washer as a bearing at the pushpin (steps 7–8), and record three RPM trials and calculate the average themselves (steps 11–13).
How can we improve accuracy or make the anemometer more fun to share on DIY.org?
Improve accuracy by ensuring all cup openings point the same way (step 5), add a tiny washer or bead around the pushpin on the eraser for smoother rotation (steps 7–8), decorate the cups, and take photos of your averaged RPM results to post on DIY.org (steps 12–13).
Watch videos on how to build a cup anemometer
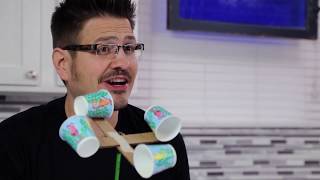
Wind Energy: How to Build an Anemometer | Bite-Size Science
4 Videos
Wind Energy: How to Build an Anemometer | Bite-Size Science
DIY Anemometer (measure wind speed) - 1 Minute Science
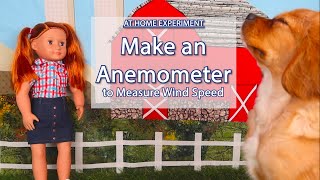
At Home Experiment: Make an Anemometer to Measure Wind Speed
Build an anemometer to measure wind speed
Facts about wind measurement and weather instruments
🌬️ A gentle breeze is about 5–20 km/h, while storm-force winds are usually over 90 km/h — great reasons to test your anemometer outside!
⚙️ The cup anemometer was invented in 1846 by John Thomas Romney Robinson and engineers still use the same basic idea today.
🕒 Scientists often count how many times the cups spin in a set time (like 10 seconds) and convert that to wind speed using a calibration.
🎡 Many cup anemometers use three or four cups; changing cup size or number affects how fast it spins and how you calibrate it.
📏 Professional anemometers can measure wind speed to within a few percent accuracy — they’re important tools for weather reports and pilots.
How do you build a cup anemometer and test wind speed outdoors?
What materials do I need to build a paper cup anemometer?
What ages is building a cup anemometer suitable for?
What are the benefits of making a paper cup anemometer?
