Build a Zipline That Plays Tones
Build a safe tabletop zipline with a glider that rings different bells or strikes tuned metal strips, exploring sound pitch and simple engineering.


Step-by-step guide to Build a Zipline That Plays Tones
Young Engineers: Zipline Racer - Fast and Fun DIY STEM Project for Kids and Students
Step 1
Gather all Materials Needed and bring them to the table so everything is ready to work with.
Step 2
Place the two chairs or stacks of books on opposite sides of a table about one meter apart to act as the zipline supports.
Step 3
Tie one end of the string securely to the top of one support at about table-height so it will be the higher end of the zipline.
Step 4
Thread the straw onto the string so the straw can slide along the line and become your glider sleeve.
Step 5
Tie the other end of the string to the second support making the line slant gently downward toward the lower support so the glider can roll downhill.
Step 6
Make a stopper at the lower end by tying a big knot or looping extra tape around the string so the straw cannot slide off the end.
Step 7
Tape the wooden craft stick to the straw so the stick points down below the straw and will act like a striker or arm.
Step 8
Use paper clips or safety pins to hang 3 different bells or metal objects along the zipline path where the stick will pass by each one.
Step 9
Measure and space the hanging bells with the ruler so each bell is a little farther along the line than the last one.
Step 10
Release the straw glider from the top and watch the stick hit the bells; observe which bells ring and how they sound.
Step 11
Move one bell slightly closer or farther from the path if the stick misses or just grazes it to make a clear tone.
Step 12
Try swapping a bell for a larger or smaller metal object to hear a higher or lower pitch and note which sounds higher and which sound lower.
Step 13
Share a photo or description of your finished zipline that plays tones on DIY.org so others can see and try your idea.
Help!?
What can I use instead of small bells if I can't find any?
If you can't find small bells for step 11, hang metal keys, bottle caps, spoons, or nuts-and-bolts with paper clips or safety pins so the wooden craft stick taped to the straw (step 8) can still strike them and make tones.
The straw glider keeps snagging or the stick misses the bells—how do I fix that?
If the straw glider snags or the stick misses the bells (steps 4, 8, 11), tighten and straighten the string or replace it with fishing line to remove sag, make a bigger stopper at the lower end with extra tape or a knot (step 6), and move each bell slightly with the ruler (step 10) until the taped craft stick reliably strikes them.
How can I adapt this zipline activity for younger kids or older kids?
For preschoolers, shorten the distance between supports and pre-thread the straw and attach a large, soft object instead of a craft stick (steps 2–4, 8) with adult supervision, while older kids can precisely measure spacing with the ruler (step 10), experiment with different metal sizes to study pitch (step 12), and document results.
What are easy ways to extend or personalize the tone-playing zipline?
To extend the project, add more hanging metal objects and use the ruler (step 10) to space them for rhythmic patterns, swap sizes to tune pitches (step 12), decorate the straw and craft stick (step 8), and post a photo or explanation of your design on DIY.org (step 13).
Watch videos on how to Build a Zipline That Plays Tones
7 Engineering Tips to Design a Fun Zip Line STEM Activity for Kids
4 Videos
7 Engineering Tips to Design a Fun Zip Line STEM Activity for Kids
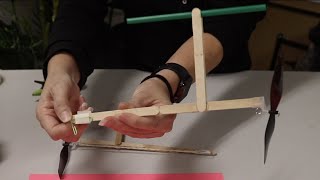
Zipline Racers
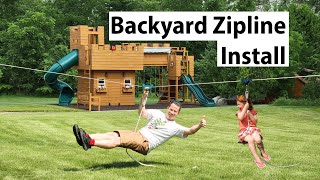
✅ Zipline Kit for Kids! Unboxing, Step by Step Install and Review

How to install a 100 ft. zip line kit for kids.
Facts about sound experiments and simple engineering for kids
🎢 Ziplines have been used for centuries in mountainous regions to move people and goods before becoming a popular adventure and recreation activity.
🎵 Metallophones are instruments made of tuned metal bars you strike to make clear musical pitches — like the tuned strips your glider can play.
🧩 Shorter or thinner metal bars vibrate faster and produce higher pitches; longer or thicker bars vibrate slower and produce lower pitches.
🛠️ Using a pulley or smooth guide on a zipline cuts friction so a glider runs more smoothly and can trigger bells more reliably.
🔔 When you strike a bell or metal strip it vibrates in patterns (standing waves) — those vibrations are what create the tones you hear.
How do you build a tabletop zipline that plays tones?
What materials do I need to build a tone-playing tabletop zipline?
What ages is this zipline activity suitable for?
What safety tips and variations should I know for the tone zipline?
