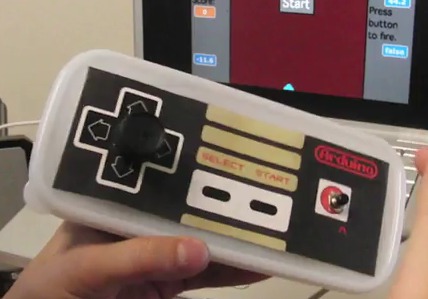
Build a video game controller
Build a simple video game controller from cardboard, buttons, conductive tape, and a kid-friendly microcontroller to learn about circuits and play games.


Step-by-step guide to build a video game controller
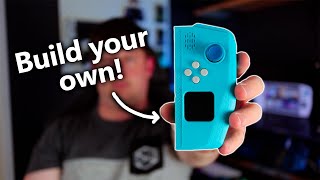
Making DIY game controller - Arduino gamepad TUTORIAL
Step 1
Draw a cool controller outline on the cardboard with your pencil and ruler.
Step 2
Cut out the controller shape from the cardboard using scissors or a craft knife with adult help.
Step 3
Mark small circles where you want each button to go and number them lightly with your pencil.
Step 4
Carefully cut or poke holes at the marked circles so the buttons will fit with an adult helping you.
Step 5
Push each button or snap into its hole and secure the underside with glue or tape.
Step 6
Stick a strip of conductive tape from the metal side of each button toward the area where the microcontroller will sit.
Step 7
Make one long conductive tape line that connects the other metal side of every button so they share a common ground.
Step 8
Tape the microcontroller onto the cardboard near the ends of the conductive tape traces.
Step 9
Use alligator clips or jumper wires to connect each button tape trace to a different input pin on the microcontroller.
Step 10
Connect the common ground tape to the microcontroller ground pad or pin.
Step 11
Open the microcontroller coding editor on a computer and start a new project.
Step 12
Write code that reads each input pin and maps each pin to a game control or keyboard command.
Step 13
Upload the program from the editor to your microcontroller so it runs your game controls.
Step 14
Press each button to test the controller and fix any loose tape or wire connections if a button does not work.
Step 15
Share your finished controller on DIY.org
Help!?
What can we use instead of conductive tape if a store nearby doesn't sell it?
If you can't find conductive tape, use flattened aluminum foil or copper tape pressed and glued from the metal side of each button toward the microcontroller so the foil serves as the conductive trace described in the 'Stick a strip of conductive tape' step.
A button doesn't register when I press it—what should I check first?
Check that the metal side of the button is making firm contact with the conductive tape, that the tape run to the microcontroller input and the long common ground line are unbroken, and reinforce any loose spots with extra tape or an alligator-clip test connection as suggested in the 'Press each button to test' step.
How can I adapt the project for younger kids or make it more challenging for older kids?
For younger children, have an adult pre-cut the cardboard, pre-poke the holes, and stick the buttons and tape so the child can decorate and press buttons, while older kids can cut the shape themselves, solder wires, write the microcontroller code to map inputs to keyboard commands, and debug uploads as in the 'Write code' and 'Upload the program' steps.
What are simple ways to enhance or personalize our finished controller?
Personalize it by painting the cardboard, labeling numbered buttons, adding LED indicators tied to input pins, incorporating a small vibration motor or analog joystick, or mounting the microcontroller in a decorated box before sharing the project on DIY.org.
Watch videos on how to build a video game controller
How To Draw A Game Controller For Kids
4 Videos
How To Draw A Game Controller For Kids
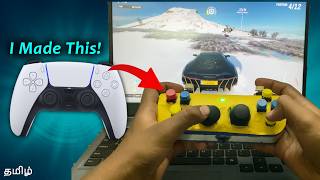
How to make Wireless Game controller joystick using ESP32 | Works on both Android and PC
How To Draw A PS5 Controller
Beginners guide to game controllers with Arduino
Facts about basic electronics and circuits
🎮 Modern game controllers can include 20+ inputs — buttons, triggers, sticks, and even motion sensors to give players lots of ways to control games.
🍌 Makey Makey lets you turn everyday objects like bananas, playdough, or foil into keyboard keys by completing simple circuits — no soldering required.
🧠 In 2016 the BBC distributed over a million micro:bit boards to UK schoolchildren to teach coding and basic electronics.
📦 Corrugated cardboard is lightweight but very strong — when reinforced or folded into arches it can support surprisingly heavy weights for building projects.
⚡ Conductive tape contains a metal layer (often copper or nickel) so you can create flexible circuit traces and switches without soldering.
How do I build a simple video game controller from cardboard?
What materials do I need to make a cardboard video game controller?
What ages is a cardboard controller project suitable for?
What are the benefits and safety tips for building a cardboard controller?
