Build a toy walker
Build a simple toy walker using cardboard, wooden dowels, straws, and bottle caps as wheels, then test movement and adjust balance.



Step-by-step guide to build a toy walker
How to Make a Traditional Push Wagon/Baby Activity Walker from PVC Pipe
Step 1
Gather all the materials on a clean table so everything is within reach.
Step 2
Use the ruler and marker to draw a rectangle about the size of a small book on the cardboard for the walker base.
Step 3
Cut out the cardboard rectangle with scissors to make the base.
Step 4
Mark two axle positions on the underside of the base about one finger’s width from each short end.
Step 5
Cut the two straws so each one spans the width of the base.
Step 6
Tape each straw firmly to the underside of the base aligned with the axle marks so the straw openings face outward.
Step 7
Push the wooden dowels through the taped straws so they stick out a little on both sides to make axles.
Step 8
Carefully make a small hole in the center of each bottle cap so they can fit onto the dowel ends (ask an adult to help with the hole).
Step 9
Push a bottle cap onto each exposed dowel end and secure each cap with a dab of glue or a wrap of tape so they stay on as wheels.
Step 10
Trim any extra dowel that sticks out past the bottle caps so the wheels can turn without hitting the cardboard.
Step 11
Tape a small scrap cardboard weight to the front or back of the base to start balancing the walker.
Step 12
Give the walker a gentle push on a flat floor to test how it rolls and move the weight or shift wheel positions to make it roll straighter.
Step 13
Share a photo or video of your finished walker and what you changed to balance it on DIY.org.
Help!?
What can I use instead of wooden dowels, plastic straws, or bottle caps if I can't find them?
Use pencils or bamboo skewers for dowels, short sections of rolled cardboard or empty pen casings in place of straws, and large plastic beads or stacked coins taped to the dowel ends instead of bottle caps for wheels.
My wheels won't turn or the axles are stuck — how do I fix that?
Check that each straw taped to the underside is open and aligned with the axle marks, trim any extra dowel past the bottle caps, slightly widen the holes in the caps, and re-tape the straws so the dowels can rotate freely.
How can I change the project to suit younger or older children?
For younger kids, have an adult pre-cut the cardboard and help make the cap holes while children tape straws and push dowels, and for older kids let them measure axle positions precisely, add adjustable scrap-cardboard weights, paint the base, or test different wheel sizes and axle materials.
How can we improve or personalize our walker after it rolls?
Decorate the cardboard base with the marker, add glued or taped extras like a small handle or removable roof, experiment with moving the taped weight or swapping wheel sizes to change rolling, and share your photos and changes on DIY.org.
Watch videos on how to build a toy walker
Building 5 Lego Walkers
4 Videos
Building 5 Lego Walkers
Handmade Baby Walker | DIY Woodworking Gift for My Granddaughter
Unboxing & Assembling a 6-in-1 Multifunctional Baby Walker | Step-by-Step Guide for Parents
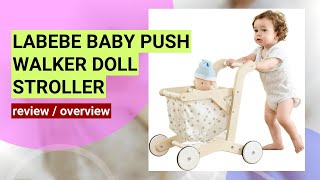
Review of the Labebe Baby Push Walker: A Perfect Learning Toy for Toddlers!
Facts about basic engineering and mechanics for kids
🛞 The wheel-and-axle is one of the six classical simple machines and made wheeled transport possible over 5,000 years ago.
📦 Corrugated cardboard is lightweight yet strong, which is why it's great for building small toy frames and prototypes.
🪵 Wooden dowels are straight round rods commonly used in woodworking and make sturdy axles for homemade wheels.
⚖️ Shifting a toy's center of mass forward or back changes whether it tips or rolls — that's how you adjust balance.
♻️ Reusing bottle caps, straws, and cardboard turns household tosses into fun, eco-friendly toy parts.
How do I build a simple toy walker that rolls and balances?
What materials and tools do I need to make a cardboard and dowel toy walker?
What ages is this cardboard toy walker activity suitable for, and how much supervision is needed?
What are the benefits of building a toy walker and what safety tips or variations should I know?
