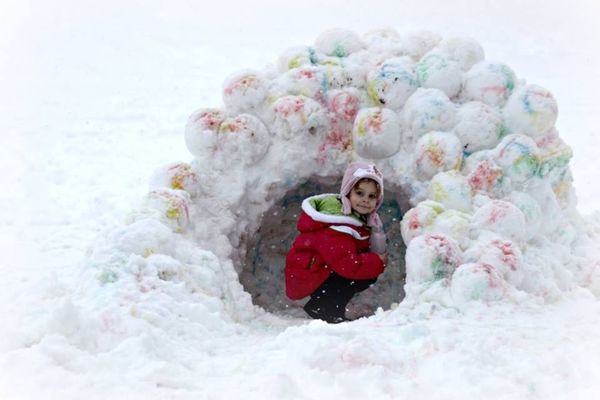
Build a snow shelter
Build a simple snow shelter by shaping packed snow blocks or digging a small trench, learn teamwork, insulation, and staying warm safely.


Step-by-step guide to build a snow shelter
How to Build a Snow Survival Shelter
Step 1
Put on your warm winter clothes and waterproof gloves so you stay cozy while building.
Step 2
With an adult, walk to a flat safe spot with at least one foot of packed snow and no hidden rocks or branches.
Step 3
Push the stick straight down into the snow to check that the snow is deep enough and feels firm.
Step 4
Decide whether you will build a packed-snow block shelter or dig a trench shelter.
Step 5
If you chose packed-snow blocks, scoop and pack snow into firm blocks about the size of a large book.
Step 6
If you chose packed-snow blocks, stack the blocks in a circle with a low entrance and tilt the blocks inward to form a dome shape.
Step 7
If you chose packed-snow blocks, press loose snow into the seams between blocks to seal gaps and make the wall tighter.
Step 8
If you chose a trench, use the shovel to dig a trench long enough to lie in and pile the dug snow to the sides.
Step 9
If you chose a trench, lay the tarp or blanket across the top of the trench to start a roof.
Step 10
If you chose a trench, throw the piled snow onto the tarp to cover the trench completely.
Step 11
If you chose a trench, lightly press the snow on top of the tarp to compact it into a light roof.
Step 12
Make a small ventilation hole in the roof about the size of your fist so fresh air can enter.
Step 13
Place the foam sleeping pad or extra blanket inside the shelter to insulate you from the cold ground.
Step 14
Sit inside briefly with the adult watching to check the shelter is stable and the roof is not sagging.
Step 15
Share a photo and a short description of your finished snow shelter on DIY.org.
Help!?
What can we use instead of a tarp, foam sleeping pad, or shovel if we don't have them?
If you don't have a tarp use a heavy-duty garbage bag or plastic sheet to cover the trench, replace the foam sleeping pad with extra blankets or bundled clothing for insulation, and substitute a shovel with a sturdy flat piece of wood or strong gloved hands to dig as directed.
The roof or blocks keep sagging or collapsing—what should we try to fix it?
If blocks collapse or the roof sags, stack additional packed-snow blocks, press loose snow into the seams to seal gaps, lightly compact the snow on top of the tarp if using a trench, and have an adult recheck stability before sitting inside.
How can we adapt this snow shelter activity for younger kids or older kids?
For younger kids let them pack snow into firm blocks about the size of a large book and help press seams while an adult digs or places the roof, and for older kids let them plan dome angles, build a thicker roof, and test stability by sitting inside with adult supervision.
What are some ways to personalize or improve our finished snow shelter?
Personalize the shelter by lining the floor with the foam sleeping pad or extra blanket, adding a small battery LED lantern while keeping the fist-sized ventilation hole clear, smoothing and sealing seams with packed snow, and then share a photo and short description on DIY.org.
Watch videos on how to build a snow shelter
I Build 4 Amazing Winter Shelters in the Forest | Start to Finish
4 Videos
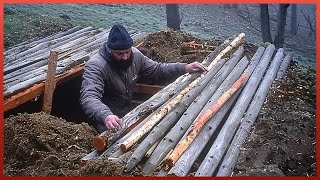
I Build 4 Amazing Winter Shelters in the Forest | Start to Finish
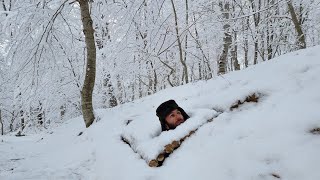
Winter Survival Shelter Built From SCRATCH in Freezing Forest!
How to Build a Winter Survival Shelter Fast for Freezing Nights

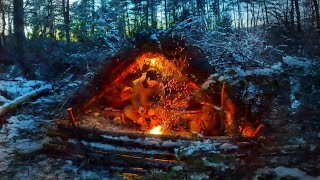
Winter Survival - How To Build a Lifesaving Survival Shelter!
Facts about winter survival skills
🧊 Igloos and packed-snow shelters work because snow traps air pockets that make excellent natural insulation.
🏕️ A well-built small snow shelter can be 10–20°C (18–36°F) warmer inside than the outside air, keeping you much comfier.
👥 Building a simple snow shelter is a great teamwork challenge—kids working together can often finish one in 30–60 minutes.
🔦 Always include a small ventilation hole and keep the entrance slightly lower than the sleeping area so the air stays fresh and warm.
⚠️ Safety first: never build under steep slopes, heavy cornices, or near tree wells—pick flat, stable ground away from avalanche-prone areas.
How do you build a simple snow shelter with kids?
What materials do I need to build a snow shelter?
What ages is building a snow shelter suitable for?
What safety tips should I follow when building a snow shelter?
