Build a planetarium dome and projector
Build a cardboard planetarium dome and star projector with adult help, using a flashlight and small holes, then explore constellations and night sky patterns.

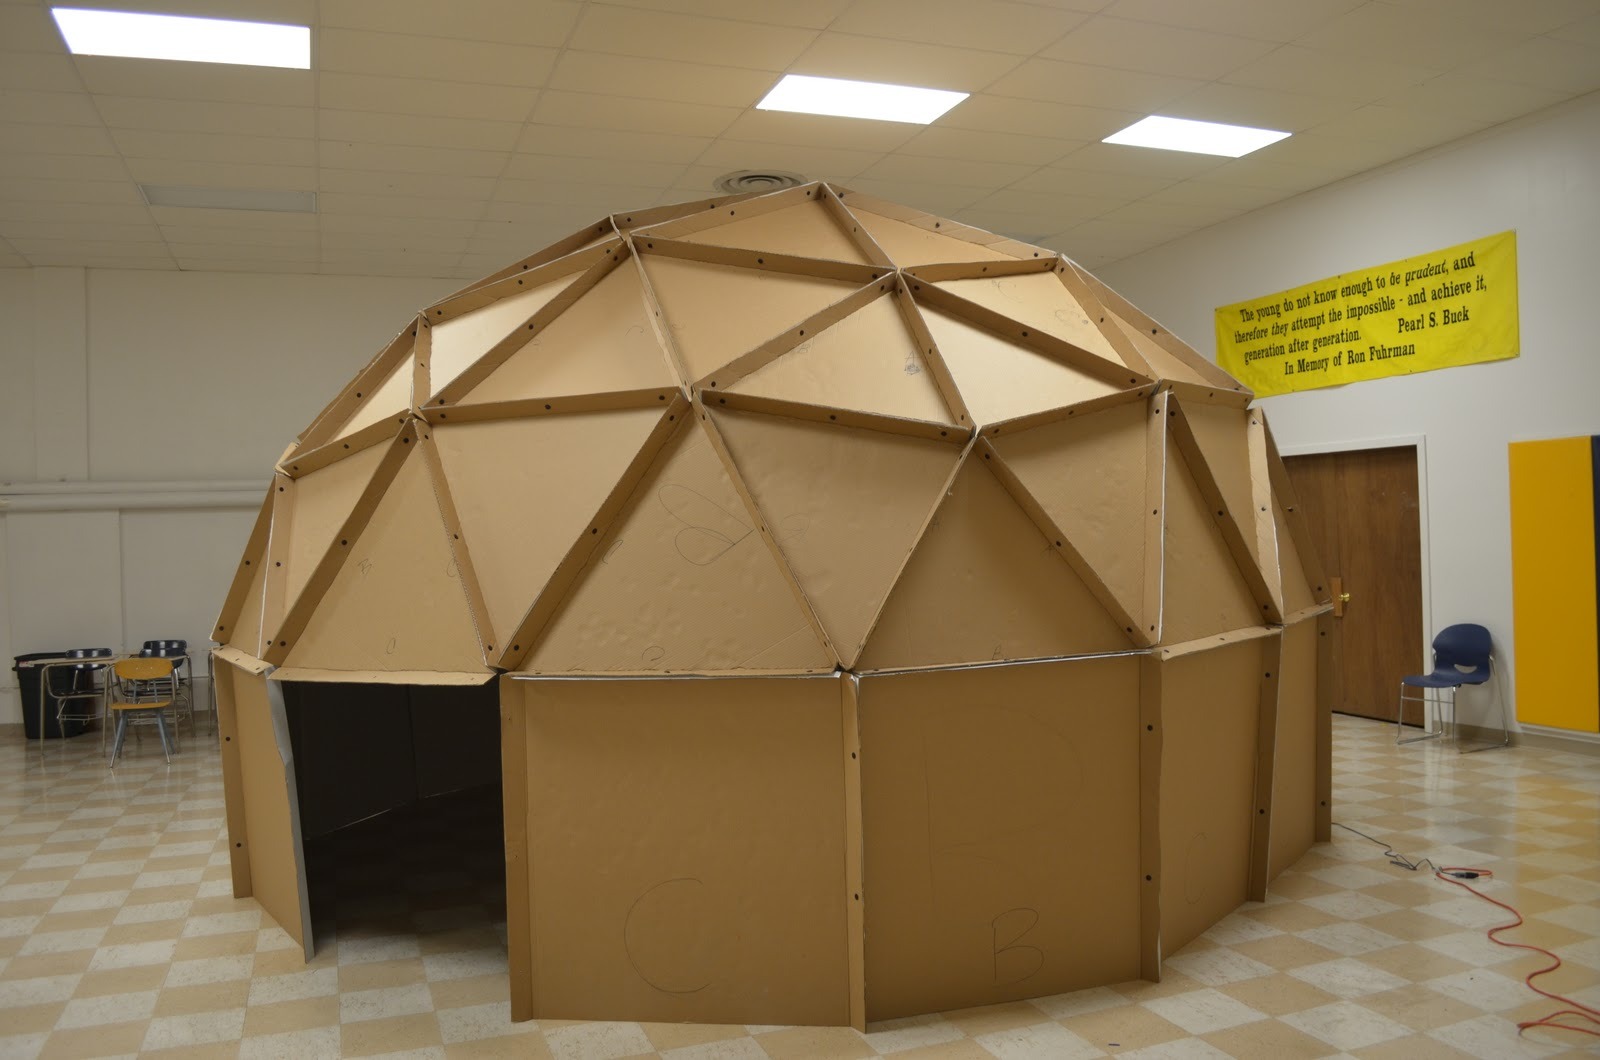

Step-by-step guide to build a cardboard planetarium dome and star projector
Make a DIY Star Projector or DIY Planetarium
Step 1
Gather all the materials and clear a floor space where you can set up your planetarium.
Step 2
Turn the cardboard box upside down so the closed top becomes the dome roof.
Step 3
Use the star map and black marker to draw the outlines or star points of the constellations you want on the dome top.
Step 4
Use the pushpin to poke a small hole through each star mark so light can shine through the dome.
Step 5
Ask an adult to carefully widen any holes that need to be a bit bigger using a needle or the tip of a tool.
Step 6
Ask an adult to cut a small access flap at the open base so you can place and reach the flashlight inside the dome.
Step 7
Place the dome on the floor beneath the area of ceiling where you want the stars to appear.
Step 8
Slide the flashlight into the dome through the access flap and point the beam up toward the dome top.
Step 9
Turn off the room lights and then turn on the flashlight so the stars project onto the ceiling.
Step 10
Move the dome closer or farther from the ceiling until the star points look clear and sharp.
Step 11
Use your star map to find and name at least three constellations you can see in the projection.
Step 12
Share a photo and a short description of your finished planetarium and star projector on DIY.org.
Help!?
What can we use instead of a cardboard box, pushpin, or flashlight if we don't have those materials?
If you don't have a cardboard box, use an overturned laundry basket or large mixing bowl as the dome, replace the pushpin with a sharpened pencil or paper clip to poke holes, and use a phone flashlight or a small LED torch in place of the flashlight.
Why are some projected stars blurry or missing and how do we fix that?
If stars are blurry or dim, follow the instruction to move the dome closer or farther from the ceiling until points look clear and sharp, widen any tiny holes carefully with a needle per the adult step, and steady the flashlight inside the dome with folded cardboard so the beam points straight.
How can we adapt the activity for younger children or for older kids who want more challenge?
For younger children, have an adult pre-poke larger holes and use glow-in-the-dark star stickers instead of a pushpin, while older kids can use the star map to draw more detailed constellations and make finer holes with a needle for sharper projections.
How can we enhance or personalize our planetarium before sharing the photo on DIY.org?
Paint the dome interior black to reduce stray light, tape colored cellophane over the flashlight to change star colors, and label three constellations on the ceiling with removable sticky notes before taking your photo and short description for DIY.org.
Watch videos on how to build a cardboard planetarium dome and star projector
DIY planetarium projector | homeschool | learn planets | kids fun craft | easy craft for kids
4 Videos
DIY planetarium projector | homeschool | learn planets | kids fun craft | easy craft for kids
Make Your Own Cardboard Planetarium and Projector
Make a Constellation Projector - No lens needed
How to Build a Planetarium Projector | KiwiCo
Facts about astronomy for kids
🪐 A simple pinhole projector inside a cardboard dome can recreate many bright constellations using just a flashlight!
🔦 Early mechanical planetarium projectors used lenses and gears to mimic the motion of the night sky—modern ones can project millions of stars.
✨ There are 88 officially recognized constellations that map the entire night sky from Earth.
📏 Tiny pinholes (around 1 mm) make sharper star points; larger holes create fuzzier, brighter dots.
♻️ Cardboard is lightweight, easy to cut, and recyclable—perfect for building a kid-friendly DIY planetarium dome.
How do I build a cardboard planetarium dome and star projector with my child?
What materials do I need to make a homemade planetarium dome and projector?
What ages is building a cardboard planetarium suitable for?
What are the benefits and safety tips for making a cardboard planetarium with kids?
