Build a passive air rocket
Build a safe passive air rocket using a plastic bottle, cardboard fins, and an air pump or stomp launcher to explore pressure and flight.


Step-by-step guide to build a passive air rocket
How to Make a Rocket at Home for Kids | Fun At-Home Science Activities
Step 1
Gather all materials in one spot.
Step 2
Ask an adult to choose a wide open outdoor space for launching.
Step 3
Empty the bottle and dry the inside and outside.
Step 4
Cut three identical fin shapes from the cardboard using the scissors.
Step 5
Mark three evenly spaced spots around the bottle base with the marker.
Step 6
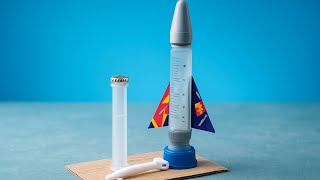
Tape the three fins to the bottle at the marked spots so they stand straight and stay secure.
Step 7
Roll the paper into a cone and tape it to the bottle top to make a nose cone.
Step 8
Press a small ball of playdough or clay into the nose cone tip for balance and seal it with tape if needed.
Step 9
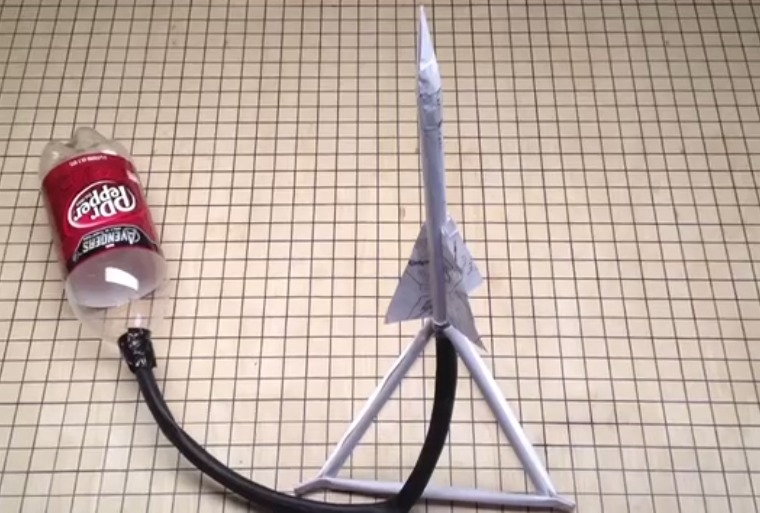
Decide which launcher you will use: the bicycle pump with needle adapter OR the stomp launcher made from a large 2 L bottle.
Step 10
If you chose the pump method ask an adult to make a snug stopper for the bottle mouth and fit the pump needle through it so air can be pumped safely into the bottle.
Step 11
If you chose the pump method ask the adult to pump air slowly until the rocket releases and flies.
Step 12
If you chose the stomp launcher ask an adult to cut the top off the large 2 L bottle to make a stable launcher base.
Step 13
If you chose the stomp launcher place your rocket on the launcher mouth and stomp once firmly on the base to launch while the adult watches.
Step 14
Share a photo and a short description of your finished air rocket on DIY.org
Help!?
If I don't have cardboard or scissors, what can I use to make the fins and cut them safely?
Use heavy construction paper, cereal-box cardboard, or clean thin plastic (like a milk jug) for the fins and have an adult help cut and tape them to the bottle as the instructions say.
My rocket wobbles or spins and won't fly straight—what should I check or fix?
Make sure the three fins are identical and taped straight at the marked spots, press the tape firmly, and reinforce each fin joint with an extra tape strip or add a little more playdough in the nose cone tip for balance.
How can I adapt the steps for younger kids or make it more challenging for older ones?
For younger kids, have an adult pre-cut and attach fins and handle the pump or stomp launcher, while older kids can measure fin angles, try different nose-cone shapes or water amounts, and record flight distances to compare designs.
What are simple ways to personalize or extend the air rocket activity after following the instructions?
Decorate and name the rocket before launch, experiment with different fin sizes or nose-cone weights using playdough to tune stability, and test variations in the same open spot while measuring flight distance to improve the design.
Watch videos on how to build a passive air rocket
Homemade Rocket Experiment | Simple Science Project for Students
4 Videos
Homemade Rocket Experiment | Simple Science Project for Students

How to Make a Rocket at Home 🚀 | Simple Science 🧪 Project #STEMProject #RocketScience #DIYProjects
How to make a Rocket at HOME ! Easy DIY science Project for school , step by step guide (Chandrayan)
Let's make a ROCKET! | Science experiment for kids | Jocelyn Presents
Facts about rocketry and air pressure experiments for kids
🚀 Newton's third law — every action has an equal and opposite reaction, and that's how rockets get their push.
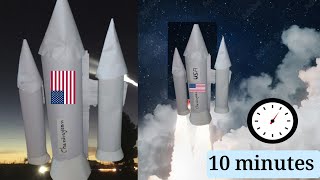
💨 Stomp- or air-only bottle rockets can often fly tens of meters high with just a few strong stomps or pumps.
🧭 Fins improve flight stability by shifting the center of pressure behind the center of mass so the rocket points forward.
🌬️ Air at sea level has a density of about 1.2 kg/m³, and that density is what creates drag and affects flight.
📐 Small changes to fin shape, fin angle, or adding nose weight can make a big difference in flight height and accuracy.
How do you build a safe passive air rocket using a plastic bottle, cardboard fins, and an air pump or stomp launcher?
What materials do I need to build a passive air rocket with a plastic bottle and stomp launcher?
What ages are suitable for making a passive air rocket, and how much supervision is needed?
What safety tips should I follow when launching a passive air rocket and what variations can we try?
