Build a magical home
Build a small magical miniature home using cardboard, craft sticks, paint, glue, and natural decorations; design rooms, add details, and display your creation.

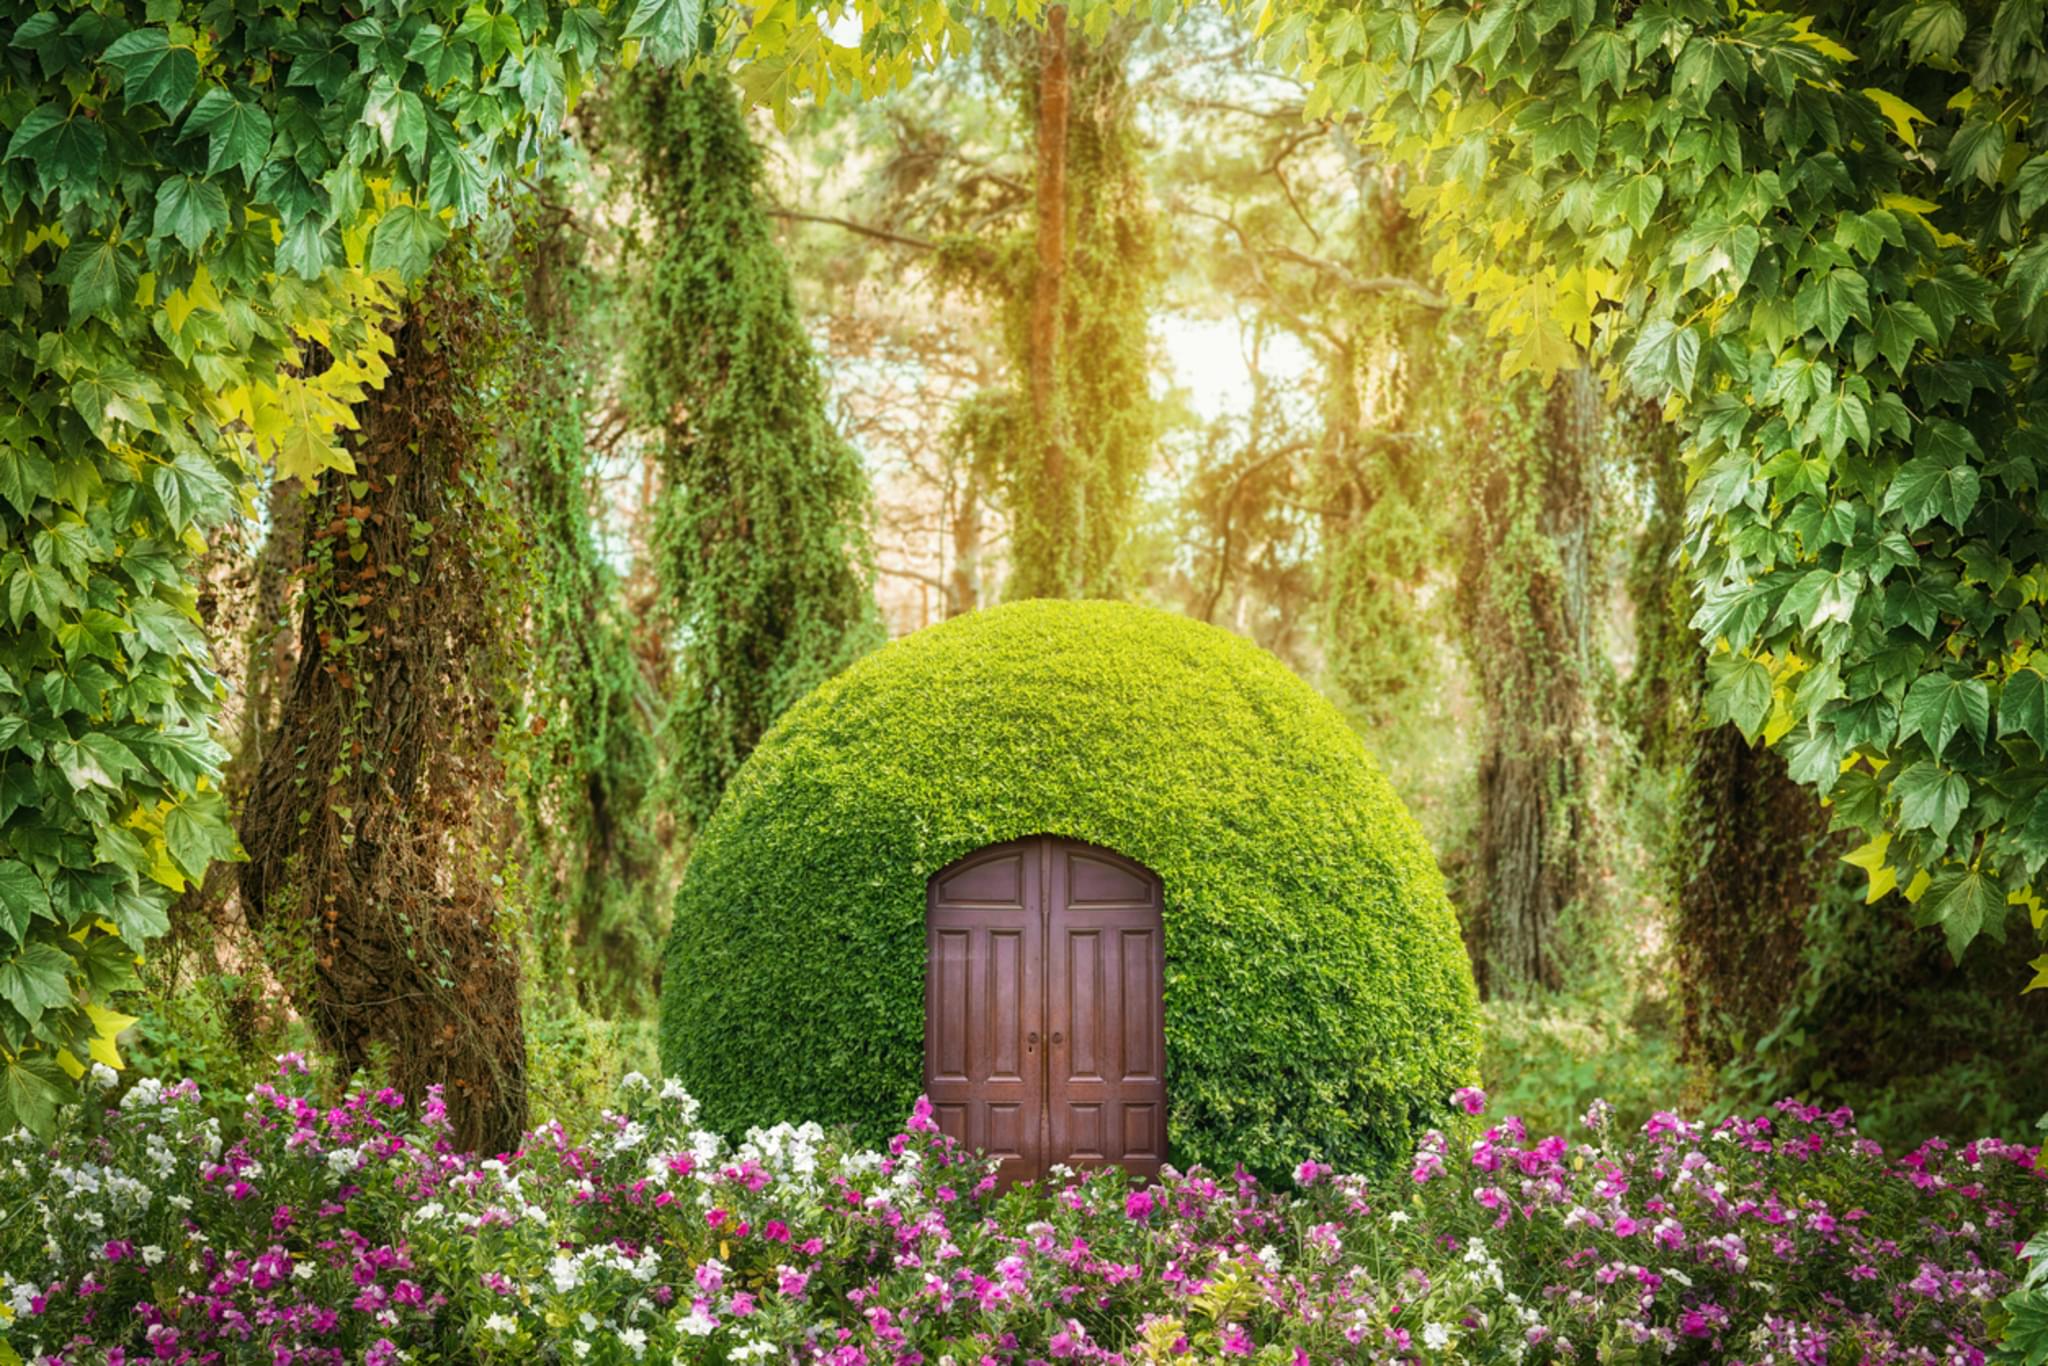

Step-by-step guide to build a magical miniature home
How To Create Magical Potions At Home: Fun & Easy Experiments For Kids! | Bella Rosa Kid Show
Step 1
Gather all your materials and clear a flat workspace so you have room to build.
Step 2
Decide how big your magical home will be and use a pencil and ruler to draw a floor plan and wall outlines on the cardboard.
Step 3
Cut out the cardboard base and the wall pieces along the lines you drew.
Step 4
Score fold lines on the wall pieces to make tabs that will help the walls stand up.
Step 5
Glue the wall tabs to the edges of the cardboard base to attach the walls.
Step 6
Hold each wall in place until the glue starts to set so the house stays steady.
Step 7
Cut roof pieces from cardboard to match the top of your house.
Step 8
Glue craft sticks across the roof pieces to create shingled texture.
Step 9
Attach the finished roof to the top of the walls using glue.
Step 10
Paint the exterior and roof with the colors you love to give your magical home personality.
Step 11
Let the paint dry completely before adding more details.
Step 12
Make windows doors and tiny furniture from craft sticks and small cardboard scraps.
Step 13
Glue the windows doors furniture and natural decorations like twigs leaves and stones onto your home and around its yard.
Step 14
Let all glued decorations dry fully so nothing falls off.
Step 15
Share your finished magical miniature home on DIY.org
Help!?
What can I use instead of corrugated cardboard, craft sticks, or acrylic paint if they’re hard to find?
Use cereal or shoe boxes cut for the base and walls instead of corrugated cardboard, wooden skewers or folded cardstock for roof “shingles” if you don’t have craft sticks, and markers, colored paper, or tempera paints in place of acrylic paint when decorating.
My walls keep collapsing while the glue dries—how can I stop that when I glue the wall tabs to the cardboard base?
Hold each wall and press tabs into place, then clamp with clothespins or binder clips and rest heavy books on the base or add temporary masking-tape braces until the glue sets.
How can I adapt the building steps for different age groups while still following the floor plan and cutting steps?
For preschoolers use a pre-cut shoebox and stickers to skip pencil, ruler, and scissors steps; for elementary kids let them draw the floor plan and score fold lines with supervision; and for teens add precise measurements, removable roof construction, and scaled furniture building.
What are some ways to extend or personalize the magical home after painting and adding windows and doors?
Make a removable roof with tape hinges, glue battery-powered LED fairy lights inside, create fabric curtains and tiny furniture from cardboard and twigs, and arrange moss, pebbles, and painted stones around the yard before sharing on DIY.org.
Watch videos on how to build a magical miniature home
DIY ORIGAMI MAGIC CUBE EASY FOLDING | MAGIC CUBE ORIGAMI TUTORIAL | UNFOLD THE MYSTERY PAPER CRAFT
4 Videos
DIY ORIGAMI MAGIC CUBE EASY FOLDING | MAGIC CUBE ORIGAMI TUTORIAL | UNFOLD THE MYSTERY PAPER CRAFT
Magical Homemade Harry Potter Crafts

Fun & Simple Magic Tricks Kids Can Try | Magic Made Easy

🌈 The CUTEST MINI HOUSE! 😍 CRAZY Colorful DIY Fun! 🤩 DIY Magic You'll LOVE! Imagine Playworld
Facts about miniature model making for kids
🏠 The earliest dollhouses appeared in 17th-century Europe as tiny, detailed display cabinets—perfect inspiration for mini magical homes!
🎨 Acrylic and tempera paints are kid-friendly choices for miniatures because they dry fast and wash up with water.
🌿 Tiny bits of real moss, twigs, leaves, and pebbles make miniature rooms feel magical—just collect them with permission from safe spots.
📏 Many miniature makers use 1:12 scale (1 inch = 1 foot) so a 6-foot person would be represented as a 6-inch figure.
♻️ Cardboard boxes and craft sticks are great upcycled materials—building with them helps reduce waste while sparking big creativity!
How do I build a magical miniature home with my child?
What materials do I need to build a magical miniature home?
What ages is this miniature home activity suitable for?
What safety tips and fun variations can I use for the miniature home?
