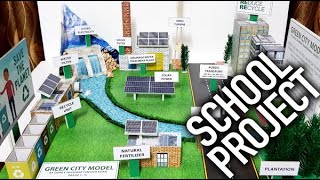
Build a City of the Future
Design and build a model City of the Future using recycled materials, craft supplies, and simple LED circuits to explore planning, sustainability, and teamwork.


Step-by-step guide to build a City of the Future
How to Make a Mini City Model | School Project
Step 1
Gather all materials from the list and bring them to a clear workspace.
Step 2
With your team draw a simple map of your city on paper showing zones for homes parks energy and transport.
Step 3
Choose at least three sustainable ideas to include such as solar panels green roofs a recycling center or bicycle lanes.
Step 4
Cut and tape cardboard pieces together to make a flat sturdy base for your city.
Step 5
Make at least five different buildings using recycled items like toilet rolls egg cartons bottles and small boxes.
Step 6
Attach each finished building onto the base with glue or tape where it belongs according to your map.
Step 7
Paint and decorate buildings parks roads and other features using paints brushes and coloring materials.
Step 8
Create parks roads and transport features from extra cardboard and glue them to the base.
Step 9
Mark the exact spots on the model where you want LEDs for features like streetlights solar panels or building lights.
Step 10
Make small holes or slots and push the LED leads through so the LED sits neatly on the surface.
Step 11
Stick two strips of copper tape from each LED back to a common battery area to form a positive and a negative track.
Step 12
Attach a 220 ohm resistor to the long (positive) leg of each LED by taping or twisting it securely to the lead.
Step 13
Secure each LED so the long leg with resistor touches the positive copper track and the short leg touches the negative track.
Step 14
Place a coin cell battery on the copper tape tracks with its flat printed side on the positive track to test the LED.
Step 15
Share your finished City of the Future on DIY.org
Help!?
What can I use if I can't find copper tape, LEDs, resistors, or coin cell batteries?
If copper tape is unavailable, use thin strips of aluminum foil taped down or insulated wire as positive/negative tracks, and substitute LEDs/resistors/coin cells with a small battery pack and low-voltage fairy lights as an alternative to the LED, 220 ohm resistor, and coin cell setup.
My LEDs won't light—what common mistakes should I check?
Check that each LED's long (positive) leg with the 220 ohm resistor is touching the positive copper track, the short leg touches the negative track, the coin cell is placed with its flat printed side on the positive track, and that copper tape connections are pressed down and free of paint or debris.
How can I adapt this project for different age groups?
For ages 4–6 have adults pre-cut the cardboard base and buildings and skip the LED/copper tape steps using stickers for lights, for ages 7–10 let kids follow the building, painting, and LED placement steps with supervision when making holes and attaching the 220 ohm resistors, and for 11+ add complexity like series/parallel circuits, switches, or a small solar panel to power the LEDs.
How can we extend or personalize the City of the Future after finishing the basic model?
Enhance the model by adding a small solar panel to feed the copper tracks instead of the coin cell, installing RGB LEDs or an Arduino controller to change building and streetlight colors at night, labeling zones on your map, and creating interactive features like movable vehicles on cardboard roads before sharing on DIY.org.
Watch videos on how to build a City of the Future
School Project - DIY - Green City Model - Sustainable City
4 Videos
School Project - DIY - Green City Model - Sustainable City
Future City Build the Model Video
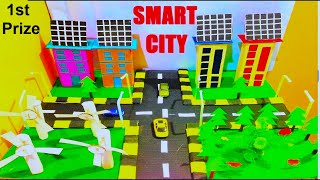
smart city model making using cardboard and waste materials | science project | howtofunda

Sustainable Cities and Communities 🏙️ SDG 11 🌿 Sustainable Development Goals for Kids
Facts about sustainable urban design and model building
🏙️ By 2050, about 68% of the world's population is expected to live in cities — so future city design really matters!
♻️ Recycling one ton of paper can save roughly 17 trees (and a lot of water and energy) — great reason to use recycled materials!
💡 LEDs use up to 90% less energy than incandescent bulbs and can last tens of thousands of hours — perfect for tiny city lights.
☀️ Small solar panels paired with batteries can power LED streetlights all night without using grid electricity.
👨🔬 The first visible-spectrum LED was invented in 1962 by Nick Holonyak Jr., opening the way for today’s tiny bright lights.
How do we design and build a model City of the Future using recycled materials and simple LEDs?
What materials do I need to build a recycled-material City of the Future with LED lights?
What ages is the City of the Future activity suitable for?
What are the benefits of building a City of the Future with recycled materials and LEDs?
