Beautify Bottles!
Decorate and repurpose empty plastic or glass bottles into colorful vases, planters, or lanterns using paint, stickers, yarn, and safe tools.

Step-by-step guide to Beautify Bottles!
Step 1
Spread the newspaper or table cover on your workspace so paint and glue stay clean.
Step 2
Peel off any labels and sticky residue from the bottle using your fingers or scissors.
Step 3
Wash the bottle inside and out with warm soapy water to remove dust and glue bits.
Step 4
Dry the bottle completely with a towel so paint will stick well.
Step 5
Choose whether you want a vase planter or lantern and pick your paint colors and decorations.
Step 6
Paint a smooth base coat over the bottle using a brush or foam brush.
Step 7
Let the base coat dry completely before touching it.
Step 8
Add a second coat or paint small designs and let those dry too.
Step 9
Wrap yarn or twine around the bottle neck or body and secure the ends with a dab of glue.
Step 10
Press stickers or adhesive gems onto the bottle to make it sparkly and fun.
Step 11
Ask an adult to cut the bottle if you want an open-top planter or a lantern opening.
Step 12
If you made a planter add potting soil and plant your small plant gently into the bottle.
Step 13
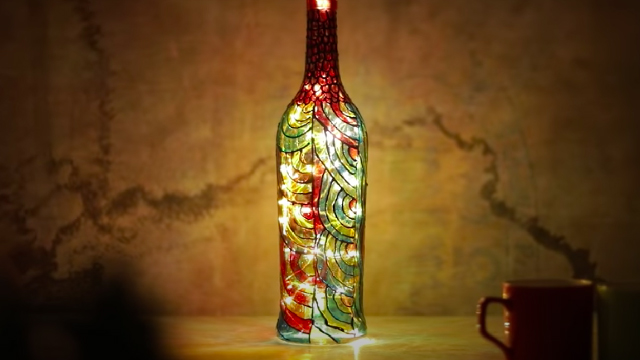
If you made a vase fill it with water and add fresh flowers or if you made a lantern place a battery-operated tea light inside.
Step 14
Let everything dry and set for a few hours so glue and paint are fully secure.
Step 15
Take a photo and share your finished beautified bottle on DIY.org so everyone can see your creation!
Final steps
You're almost there! Complete all the steps, bring your creation to life, post it, and conquer the challenge!

Help!?
What can I use if I can't find a foam brush, adhesive gems, or a battery-operated tea light?
Use a clean kitchen sponge or regular acrylic/house paint in place of a foam brush and craft paint, swap adhesive gems for sequins or magazine cutouts glued on with craft glue, and use a small LED string light or votive instead of a battery-operated tea light.
My paint is peeling or not sticking—what step did I miss and how can I fix it?
If paint peels, re-do the label-removal and wash steps to remove sticky residue, dry completely, lightly sand the bottle, then apply a second base coat or a primer and let each coat dry fully before touching.
How can I adapt this project for different ages—what should younger kids do versus older kids?
For preschoolers use washable paint, stickers, pre-cut bottles and have an adult handle any cutting or hot-glue work, while older kids can paint detailed designs, wrap twine themselves, cut the bottle with supervision, add potting soil and a plant, or make a lantern with a battery-operated tea light.
How can I make my beautified bottle last longer or look fancier?
After the second coat dries, add a clear sealant to protect the paint, decoupage tissue-paper designs before applying adhesive gems or yarn, or glue on a loop of wire to hang the lantern and then take a photo to share on DIY.org.
Watch videos on how to Beautify Bottles!
12 Brilliant DIY Wine Bottle Decor Ideas 🍷 | Don't Throw Away Empty Bottles!
4 Videos

12 Brilliant DIY Wine Bottle Decor Ideas 🍷 | Don't Throw Away Empty Bottles!
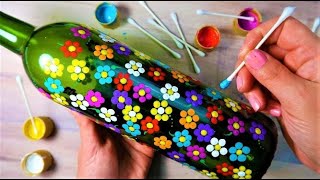
SUPER EASY Qtip Bottle Painting Rainbow Dot Flowers | How To with Lydia May
Learn how to create beautiful Bottle Art | Bottle Craft
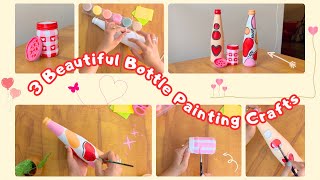
3 Beautiful Glass Bottle Painting | Bottle Art and Craft | How to make something from empty bottles
Facts about upcycling and recycled crafts
♻️ Around 1 million plastic bottles are bought worldwide every minute — perfect for upcycling projects!
🕯️ Bottle lanterns are easy and safe: pop in battery LED lights to make a glowing night-light or centerpiece.
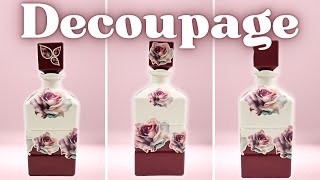
🎨 Decoupage (from French découper, “to cut out”) has been used to decorate furniture and objects since the 17th century.
🧴 Plastic bottles can take up to 450 years to break down in landfills, so reusing them helps the planet.
🌈 With paint, stickers, and yarn you can transform a bottle into a colorful vase or planter in under an hour!
How do you decorate and repurpose empty bottles into vases, planters, or lanterns?
What materials and tools do I need to beautify bottles?
What ages is bottle decorating suitable for?
What safety tips should I follow when decorating bottles?


One subscription, many ways to play and learn.
Only $6.99 after trial. No credit card required