Attempt 'Hockey Pockey'
Build a tabletop hockey game from cardboard, straws, and a bottle-cap puck, then play matches to practice aim, teamwork, and scoring.


Step-by-step guide to build a tabletop Hockey Pockey game
Step 1
Gather all the Materials Needed in one place so you can build without running around.
Step 2
Cut the cardboard into a rectangle about the size of your table space to make the hockey rink base.
Step 3
Use the marker and ruler to draw a center line and two goal areas on the short ends of the cardboard.
Step 4
Fold up the long edges of the cardboard about 1 to 2 cm to create side walls for the rink.
Step 5
Tape the folded edges along the underside to hold the walls upright so the puck will stay on the rink.
Step 6
Cut a small rectangular goal slot in the center of each short end where you drew the goal areas.
Step 7
Pinch and flatten the end of each drinking straw to make a simple paddle shape for your straws.
Step 8
Tape the flattened ends so they keep their paddle shape and are sturdy for play.
Step 9
Decorate the rink and paddles with your marker or colouring materials to make teams and cheer zone.
Step 10
Put the bottle cap in the center of the rink to act as your puck.
Step 11
Choose teams and agree on a target score or time limit for each match.
Step 12
Play matches taking turns using the straw paddles to move the bottle-cap puck toward the goals.
Step 13
Share a photo and a short description of your finished tabletop hockey game on DIY.org
Help!?
What can I use if I don't have a large piece of cardboard, a bottle cap, or drinking straws?
Use a flattened cereal box or shoebox lid for the rink, a plastic jar lid or large button as the puck, and wooden craft sticks or plastic spoon ends instead of drinking straws for paddles.
Why won't the side walls stay up or the puck slide smoothly, and how can I fix those problems?
Make a firmer 1–2 cm crease and tape the folded edges along the underside as the instructions say to keep walls upright, and smooth the playing surface with a sheet of paper or wax paper under the cardboard and slightly widen the goal slot if the bottle-cap puck keeps getting stuck.
How can I adapt Hockey Pockey for younger or older children?
For younger kids, pre-cut the cardboard and straws, enlarge the goal slots and use a ping-pong ball as the puck, while older kids can narrow goals, keep score or set time limits, and add detailed team decorations during the decorating step.
What are some ways to enhance or personalize our tabletop hockey game?
Clip a clothespin or small folded cardboard as a goalie at each goal, add angled cardboard ramps along the long edges for bank shots, and paint team zones or create a paper scoreboard as extensions of the decorate-and-play steps.
Watch videos on how to build a tabletop Hockey Pockey game
How to Lift the Puck in the Air: Beginner Adult Hockey Lessons
4 Videos

How to Lift the Puck in the Air: Beginner Adult Hockey Lessons
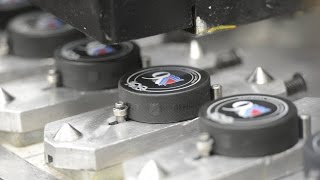
Canada 150: How hockey pucks are made
Learn the Basics of Hockey; Petey's Puck Talk Beginner's Edition

Mastering Hockey: Essential Rules Guide Explained
Facts about DIY tabletop games for kids
🏒 A regulation NHL puck weighs about 5.5–6 ounces (156–170 g), way heavier than a bottle-cap puck!
📦 Cardboard is recyclable and biodegradable, making it a kid-safe, craft-friendly building material.
🥤 The modern paper drinking straw was patented by Marvin Stone in 1888 to improve on natural rye grass straws.
🧩 Table hockey has a lively community with organized tournaments and fans around the world.
🤝 Playing tabletop games like homemade hockey helps kids build aim, fine motor skills, teamwork, and turn-taking.
How do you build and play 'Hockey Pockey' tabletop game?
What materials do I need for a tabletop 'Hockey Pockey' game?
What ages is the 'Hockey Pockey' tabletop game suitable for?
What are the benefits of playing 'Hockey Pockey' tabletop game?
