Assemble a tackle box
Assemble a personal tackle box by sorting and organizing fishing lures, hooks, sinkers, bobbers, and tools, labeling compartments to learn gear care and safety.


Step-by-step guide to assemble a personal tackle box
How to Set Up a Kids Fishing Tackle Box
Step 1
Gather all your materials and put them on a clear table or floor space so you can see everything.
Step 2
Wipe each lure hook sinker bobber and tool with the soft cloth to remove dirt and dry them.
Step 3
Look closely at each hook and lure and put any rusty bent or broken ones into a repair pile for an adult to handle.
Step 4
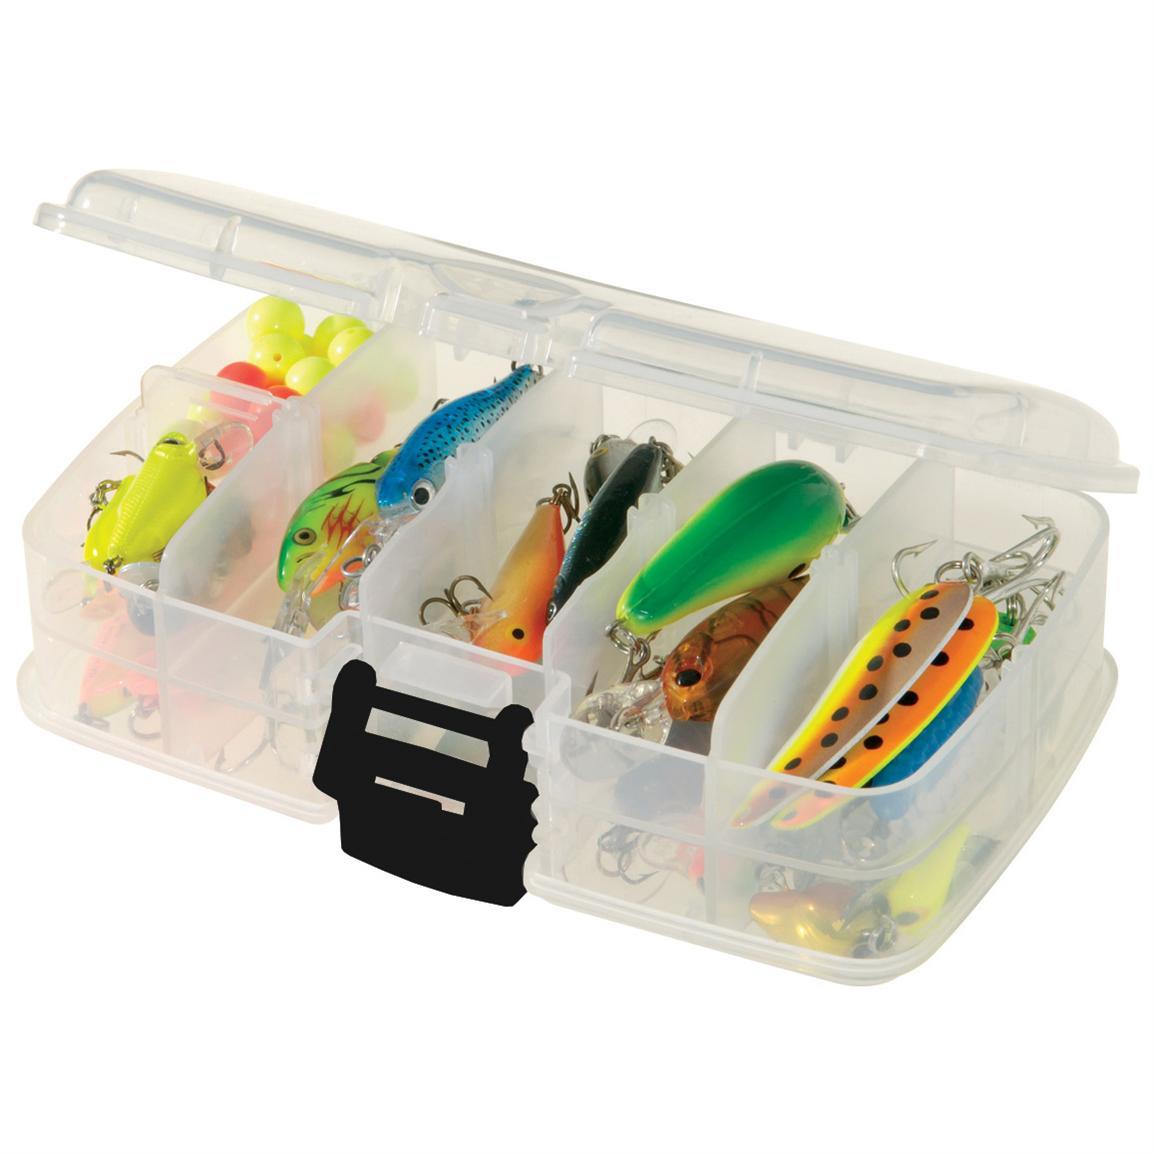
Sort your gear into five piles: lures; hooks; sinkers; bobbers; and tools.
Step 5
Put each hook into a small zip-top bag and seal it to keep the sharp points covered.
Step 6
Place the bagged hooks into one compartment of the tackle box.
Step 7
Put all sinkers into a deep compartment and all bobbers into a separate shallow compartment.
Step 8
Arrange lures by type and size into their own compartments so similar lures sit together.
Step 9
Place your pliers and other tools into the largest compartment so they are easy to reach.
Step 10
Cut small pieces of masking tape and write each compartment name with the permanent marker.
Step 11
Stick each label onto the matching compartment to mark where things belong.
Step 12
Write a short safety and care note on a piece of tape (for example: "Dry gear" and "Use pliers for hooks").
Step 13
Stick the safety and care note inside the lid of the tackle box and close the lid.
Step 14
Share a photo and description of your organized tackle box and what you learned on DIY.org
Help!?
I don't have small zip-top bags—what can I use to keep sharp hooks covered as instructed?
Use empty pill bottles or cleaned snack/condiment plastic containers, or wrap each hook in the soft cloth and secure it with masking tape so the sharp points stay covered before placing them in a compartment as the instructions say to do with zip-top bags.
When I wipe the lures and hooks they still look rusty or bent—what should I do during the 'repair pile' step?
Follow the instruction to 'put any rusty bent or broken ones into a repair pile for an adult to handle' and have an adult either replace rusty hooks, straighten minor bends with pliers, or safely dispose of items that can't be fixed rather than returning them to the tackle box.
How can I adapt this tackle box assembly for younger or older children?
For younger children, let an adult handle sharp steps like bagging hooks and sorting sinkers while the child wipes gear and sticks pre-written masking-tape labels, and for older children have them arrange lures by type/size, write the safety note, and take the photo and description to post on DIY.org.
How can we personalize or improve the tackle box beyond labeling and the safety note?
Color-code compartments with different masking-tape colors, add foam inserts or extra dividers to protect lures, create a written inventory to stick inside the lid next to the safety and care note, and decorate labels before closing the lid and sharing the photo on DIY.org.
Watch videos on how to assemble a personal tackle box
Building A Beginner Tackle Box Fishing Kit- All Species Of Fish!
4 Videos
Building A Beginner Tackle Box Fishing Kit- All Species Of Fish!

We Built the ULTIMATE $100 Walmart Tackle Box
How To Set Up A Trout Tacklebox For All Waters And Styles (EVERYTHING YOU NEED)
How To Build The Ultimate Beginner Tackle box (Best Lures For Beginner Fishing)
Facts about fishing gear care and safety
🧰 A tidy tackle box can cut fishing prep time by up to half — more time catching fish, less time searching!
🎣 Some classic lures like spoons and spinners have been used for over 100 years and still catch fish today.
🪝 Fish hooks use a quirky sizing system (including 1/0, 2/0 etc.) and are very sharp — always store them covered.
⚖️ Lead sinkers were common, but many regions now restrict lead because it can poison wildlife — try steel or tungsten instead.
🏷️ Labeling compartments with words or pictures helps kids find gear fast and keeps hooks and tools safely separated.
How do I assemble a personal tackle box with my child?
What materials do I need to assemble a child's tackle box?
What ages is assembling a tackle box suitable for?
What are the benefits and safety tips for kids assembling a tackle box?
