Animate A Pumpkin
Create a moving pumpkin puppet using a small foam or paper pumpkin, straws, elastic bands, and tape to animate mouth and arms for storytelling.


Step-by-step guide to animate a pumpkin
Turn Paper Into A Pumpkin In Minutes!
Step 1
Clear a small table or floor space and spread scrap paper or a towel to protect it.
Step 2
Put all your materials within arm’s reach so you can grab them easily.
Step 3
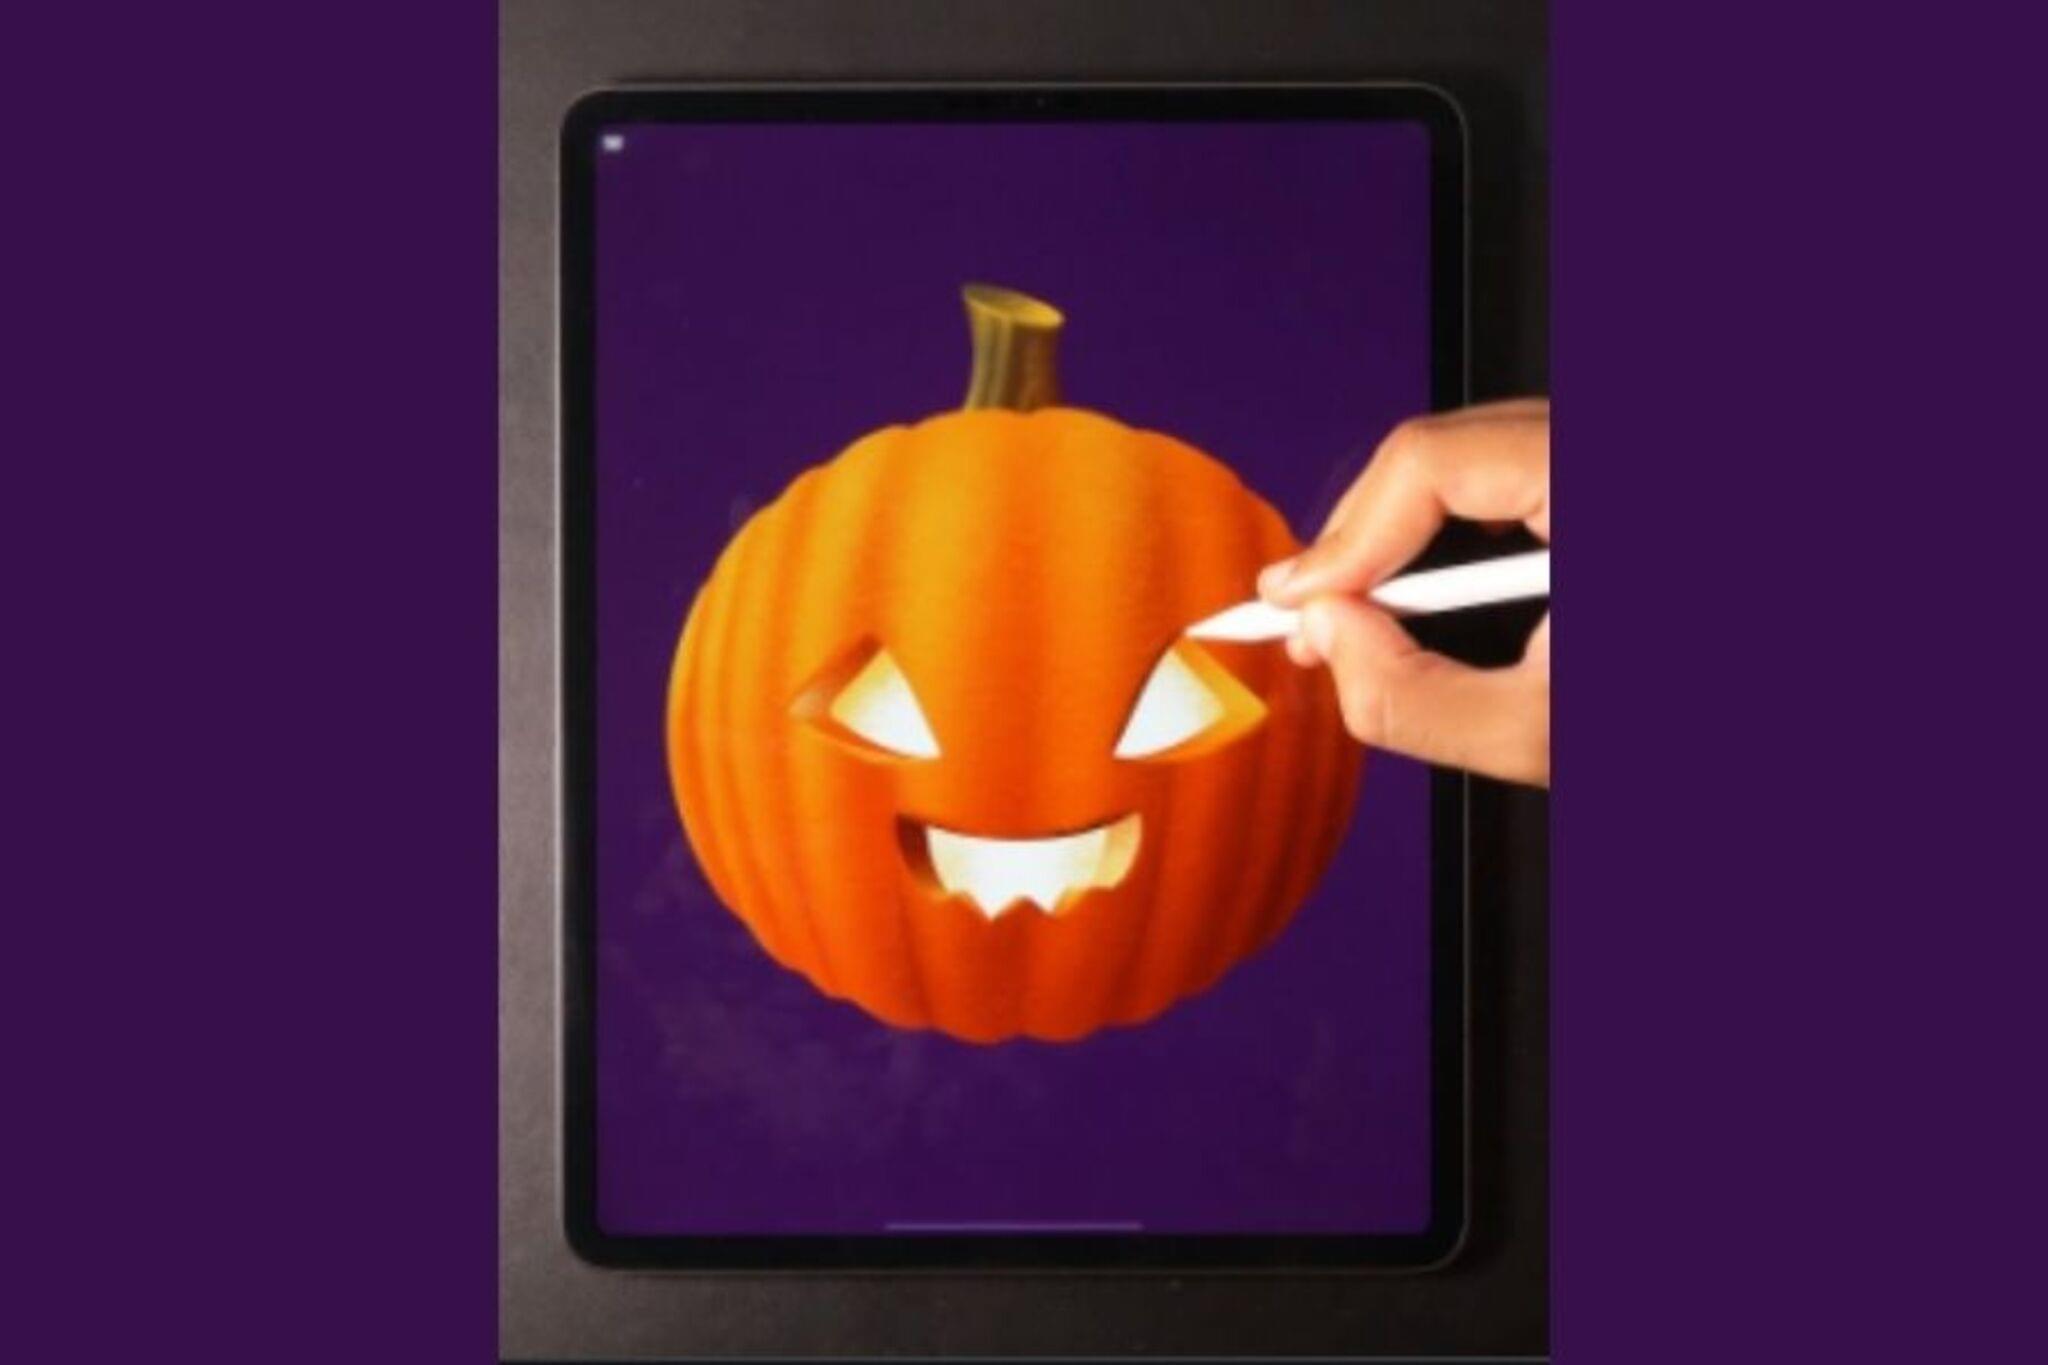
Use colouring materials to draw where the mouth and the two arms will go on the pumpkin.
Step 4
Carefully make a small horizontal slit at the marked mouth spot using scissors with adult help.
Step 5
Slide one straw under the mouth slit so it sits like a lever under the flap.
Step 6
Tape the straw to the underside of the mouth flap so the straw moves the flap when you push or pull it.
Step 7
Make two small holes at the marked arm spots on the left and right sides of the pumpkin using the tip of a straw or scissors with adult help.
Step 8
Push a straw into each hole so both straws stick out evenly to become the pumpkin’s arms.
Step 9
Loop an elastic band around each straw close to the pumpkin so the band helps the arm spring back after you move it.
Step 10
Tape a craft stick or a short straw piece to the back ends of the arm straws to make handles for moving the arms.
Step 11
Test the mouth lever and the arm handles by gently moving them to see how the puppet acts.
Step 12
Tighten or loosen tape and elastic bands as needed until the movements are smooth and playful.
Step 13
Share your moving pumpkin puppet and the story you made with it on DIY.org.
Help!?
What can we use instead of plastic straws or a real pumpkin if those are hard to find?
Use wooden skewers or rolled-up paper tubes in place of the straws for the mouth lever and arm rods and swap the real pumpkin for a foam craft pumpkin or a cardboard/paper bag pumpkin, but wrap any sharp skewer tips in tape and have an adult help with the mouth slit step.
The mouth lever or arms won't move smoothly—what should I check or fix?
If the mouth flap or arm straws stick or wobble when you test them, reinforce the underside of the mouth slit with tape and retape the straw lever, make arm holes slightly smaller or wrap the straw ends with tape for a snug fit, and tighten or adjust the elastic bands around each straw so the arms spring back properly.
How can I adapt the project for younger children or make it more challenging for older kids?
For younger children, have an adult pre-cut the small horizontal mouth slit and arm holes and use taped straws or stickers instead of scissors, while older kids can add brads for pivoting arms, a second straw hinge for a more complex mouth, or stronger elastic bands and craft-stick handles for finer control.
What are some easy ways to personalize or extend the moving pumpkin puppet activity?
Personalize the puppet after you use colouring materials to mark the mouth and arms by adding paint, googly eyes, paper eyelids taped to blink, a paper hat, and a small cardboard stage and props to act out and then share your moving pumpkin puppet and story on DIY.org.
Watch videos on how to animate a pumpkin
How to Make a 3D Pumpkin Craft
4 Videos

How to Make a 3D Pumpkin Craft
Quick & Simple 3D Pumpkin Craft - Made with circles cut out of paper!
How to Make Model Magic Pumkins EASY - Yayoi Kusama for kids #art #mrschuettesart
How To Make Easy Paper Halloween PUMPKIN For Kids / Nursery Craft Ideas / Paper Craft / KIDS crafts
Facts about puppet-making for kids
🎃 Pumpkins are actually a fruit (a type of squash) — and their seeds can be roasted for a crunchy snack.
🧵 Puppetry is one of the world’s oldest storytelling arts, with examples found in ancient cultures more than 3,000 years ago.
🪡 Marionettes are puppets controlled from above by strings, but simple materials like straws and elastics can make clever jointed puppets too.
🟠 Elastic bands store potential energy when stretched — perfect for making a puppet’s mouth or arms snap back into place.
🥤 Straws are a favorite craft hack: they make lightweight axles, joints, and levers for moving puppet parts.
How do I animate a pumpkin puppet for storytelling?
What materials do I need to make an animated pumpkin puppet?
What ages is animating a pumpkin puppet suitable for?
What fun variations can we try with an animated pumpkin puppet?
