Animate a head turn - Part 3!
Create a stop motion animation of a head turning using paper cutouts or clay, a camera, and frame-by-frame photos to explore motion.


Step-by-step guide to animate a head turn — Part 3
Step 1
Choose whether you will make the head from paper cutouts or from modeling clay.
Step 2
Tape the plain background paper or cardboard to a flat table so it will not move.
Step 3
Make a small neck stand from clay or a folded paper strip and tape it to the background so heads can sit on it.
Step 4
Create at least eight head positions that gradually turn from full front to profile using paper cutouts or by shaping the clay in small turns.
Step 5
Decorate each paper head or clay head with the same face features and colors so the movement looks smooth.
Step 6
Attach each paper head to the neck stand with tape or stick each clay head onto the neck with a toothpick so they stay steady.
Step 7
Place a lamp or steady light so the scene is evenly lit and does not change while you work.
Step 8
Set your camera or phone on a stable surface or tripod and frame the head so it stays in the same spot in every photo.
Step 9
Take the first photo of the front-facing head.
Step 10
Move the head to the next position and take another photo and repeat this action until you have photographed every head position.
Step 11
Look through your photos and delete any that are blurry or where the head moved too much.
Step 12
Import the photos into a stop-motion app or video editor and arrange them in order from front to profile.
Step 13
Set the playback speed to about 10 frames per second and export your animation as a video file.
Step 14
Share your finished head-turn animation on DIY.org.
Help!?
What can I use instead of modeling clay or toothpicks if those are hard to find?
Replace modeling clay with crumpled aluminum foil wrapped in masking tape or air-dry clay, and swap toothpicks for rolled paper pins or short wooden skewers to stick each clay head to the neck stand so they stay steady.
My heads keep wobbling or photos are blurry — what should I check?
Ensure the background paper/cardboard is taped to the table, firmly tape or push a longer toothpick/skewer through each head into the neck stand, use a tripod or stable surface for your camera, and test one shot with the lamp in place to confirm the image is sharp before continuing.
How can I adapt this head-turn activity for a 5-year-old versus a 12-year-old?
For a 5-year-old use paper cutouts, pre-cut head shapes, and only 4–6 positions with adult help taping and taking photos, while a 12-year-old can sculpt 8–12+ clay heads, control the tripod, set playback to ~10 fps, and import the photos into the stop-motion app independently.
How can we make the animation more interesting or personalize it after exporting the video?
Personalize the exported animation by adding different facial expressions or accessories to successive heads, changing or decorating the taped background, importing the video into the editor to add music or captions, or increasing the number of head positions for smoother movement.
Watch videos on how to animate a head turn — Part 3
[Live] Animating a head turn with eye blink
3 Videos
![[Live] Animating a head turn with eye blink](https://img.youtube.com/vi/_Ed6Xe6uAhw/mqdefault.jpg)
[Live] Animating a head turn with eye blink
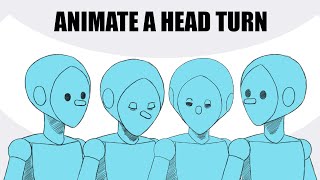
How to Animate a Head Turn - 2d Animation Tutorial
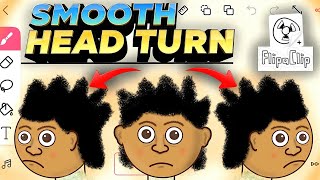
How to Animate a Smooth Head Turn in FlipaClip (EASY Step-by-Step)
Facts about stop-motion animation for kids
🎞️ Stop-motion animators move objects tiny amounts frame-by-frame—feature films like The Nightmare Before Christmas used thousands of individual frames.
🎨 Clay animation (claymation) reshapes plasticine models between photos—Aardman Animations famously used it for Wallace & Gromit.
✂️ Cutout animation goes back to the 1920s—filmmaker Lotte Reiniger made intricate silhouette films using paper cutouts.
👀 Movies use about 24 frames per second for very smooth motion, but 12–15 fps can already look like movement for short stop-motion clips.
📸 Plan ahead: a 2-second head turn at 12 fps needs 24 photos (at 24 fps it would need 48)—sketch key poses first to save time.
How do I animate a head turning in stop motion?
What materials do I need to create a stop-motion head turn?
What ages is a stop-motion head turn activity suitable for?
What are the benefits and safety tips for making stop-motion head turns?
