Your Obby Version!
Design and build your own mini obstacle course (obby) using cardboard, tape, cushions, and markers. Test, time yourself, and improve course design.

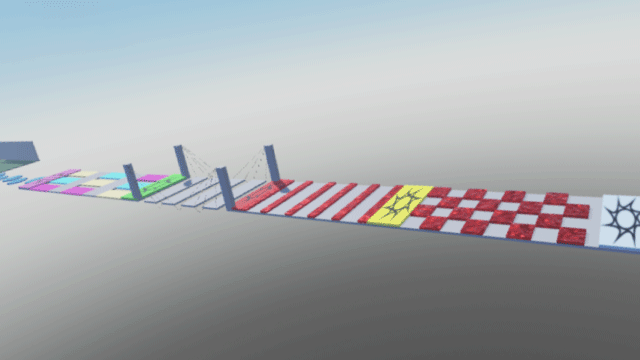

Step-by-step guide to design and build your own mini obstacle course (obby)
Step 1
Gather all the materials listed and bring them to the play area.
Step 2
Clear a safe open space on the floor so you have room to build and run the course.
Step 3
Use a marker to sketch a simple course layout on a flat piece of cardboard.
Step 4
Cut and fold cardboard to make one obstacle such as a ramp tunnel or bridge.
Step 5
Use tape to secure the cardboard pieces so the obstacle is sturdy.
Step 6
Place cushions to create a soft obstacle like stepping-stones or a soft wall.
Step 7
Decorate each obstacle with bright marker designs.
Step 8
Give each obstacle a silly name and write the name on it with a marker.
Step 9
Mark a clear start and finish on the floor using tape or a marker.
Step 10
Do a slow practice run through the course to learn the layout.
Step 11
Use a timer to do a fast timed trial and write down your time.
Step 12
Change one thing in the course to try to make your time faster.
Step 13
Run another timed trial and write down the new time.
Step 14
Compare your times and decide which change helped the most.
Step 15
Share a photo or video of your finished obby and your best time on DIY.org
Final steps
You're almost there! Complete all the steps, bring your creation to life, post it, and conquer the challenge!

Help!?
What can we use if we don't have large cardboard, a marker, or a timer?
Use flattened cereal boxes or folded poster board to cut and fold into a ramp or tunnel, a pencil or crayon instead of a marker, and your phone's built-in timer for the timed trials.
What should we do if an obstacle keeps collapsing or moving during the practice run?
If a cardboard obstacle wobbles or cushions slide, reinforce folds and seams with extra tape, add a folded cardboard brace or heavy book underneath the ramp, and put a non-slip mat or rug under cushions so the obstacle stays sturdy for the timed trial.
How can I adapt the obby for younger toddlers or older kids?
For toddlers, simplify by using only cushion stepping-stones and a low folded cardboard ramp with adult help for cutting and supervision, while older kids can add higher ramps, tighter time goals, and rules like 'no touching cushions' to increase difficulty.
What are fun ways to extend or personalize our obby after the first trials?
Add a theme and bright decorations to each obstacle, write silly names on cardboard signs, create small checkpoint tasks to earn points, attach LED string lights for flair, and keep a chart of best times and which single course change improved performance most to share on DIY.org.
Watch videos on how to design and build your own mini obstacle course (obby)
Blaze and the Monster Machines: 'Obstacle Course Challenge' Game Walkthrough | Nick Jr. Games (AD)
4 Videos
Blaze and the Monster Machines: 'Obstacle Course Challenge' Game Walkthrough | Nick Jr. Games (AD)
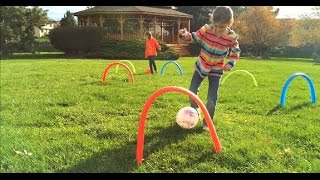
How to Make an Outdoor Obstacle Course

Math Games for Kids - Math Challenges for Kids

How to build an obstacle course in Minecraft | Minecraft tutorials for kids | #doitwithdiy
Facts about obstacle course design for kids
⏱️ Timing your runs and making small tweaks is real iterative design — tiny changes can shave seconds off your best time.
📦 Big cardboard boxes can become tunnels, ramps, and forts — and cardboard is recyclable when you're done!
🛋️ Cushions and pillows make great soft landing zones so your mini obby stays fun and safe.
🏁 Obstacle course racing (OCR) is a global sport with events like Spartan and Tough Mudder and world championships.
🏃♂️ Obstacle courses have been used for military and playground training for over 100 years.
How do I design and build a mini obstacle course (obby) at home?
What materials do I need to make a kids' obby (mini obstacle course)?
What ages is the DIY obby suitable for?
What are safety tips and fun variations for a homemade obby?


One subscription, many ways to play and learn.
Only $6.99 after trial. No credit card required