Arduino Projects | Build and Simulate with Vibe Coder
Use Vibe Coder to design, simulate, and build fun, kid-friendly Arduino projects. Safe, guided, and perfect for beginners and curious makers.
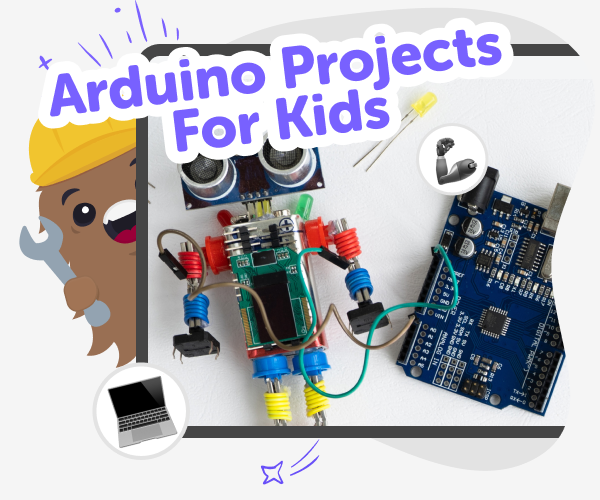
What are Arduino projects?
Arduino projects are small electronics builds that use a simple microcontroller to control lights, sensors, motors, and sounds. For kids, these projects turn ideas into physical things that respond to the world. Projects can be as tiny as a blinking LED or as big as a smart toy, and they teach basic electronics, logic, and design through hands-on making. Arduino projects exist so young makers can learn by doing. Instead of reading rules, kids experiment: change a value, run the circuit, and see what happens. That cycle of try, observe, and improve builds confidence and practical problem-solving skills.
Vibe Coder brings Arduino learning into a kid-friendly, conversational workspace called Ardu Coder. Kids choose from a range of examples or start with a blank canvas, and watch a live Preview show how the circuit and code behave. The Code view reveals the generated Arduino code and the Schematic view shows how the Arduino is wired up. Ask Anything offers safe, simple explanations so kids understand why things work. Using Vibe Coder, children can simulate projects first, test ideas without risking parts, iterate quickly, then export code and build with a guided parts list. Sharing is optional and moderated, keeping the experience safe and encouraging.
What are Arduino projects for kids?
Arduino projects for kids are hands-on activities that combine simple electronics and little programs to make interactive creations. They use a beginner-friendly microcontroller and easy components like LEDs, buttons, sensors, and buzzers. Projects are chosen to teach one idea at a time: reading a sensor, making something move, or controlling lights. On DIY.org, kids use Vibe Coder’s Ardu Coder to plan and test these projects in a guided way. That makes learning safer and more playful because kids experiment, ask questions, and see immediate feedback from the simulation before building with real parts.
Ten kid-friendly Arduino projects to try
1) Blinking LED - timing; parts: LED, resistor, board. 2) Button LED - inputs; parts: button, LED. 3) Fading LED - PWM; parts: LED, resistor. 4) Traffic light - sequences; parts: three LEDs. 5) Night light - light sensor; parts: LDR, LED. 6) Buzzer tune - sound output; parts: buzzer. 7) Temp alert - sensors and alerts; parts: temp sensor, LED. 8) Robot blink - motors and power; parts: motor. 9) Servo pointer - servos and position; parts: servo. 10) Simple alarm - conditions and feedback; parts: sensor, buzzer, LEDs.
Why simulate before building?
Simulating Arduino projects in Vibe Coder helps kids learn safely and save parts. A virtual Preview and schematic show how wiring and code interact so beginners can spot mistakes early. Simulation lets kids try many ideas quickly: change delays, swap sensors, or adjust thresholds and re-run without soldering or risking components. It also builds confidence — small wins in simulation make the jump to real hardware less scary. Teachers and parents appreciate that simulation reduces waste, prevents short circuits, and creates a clear learning path from idea to physical build.
Top troubleshooting tips for common Arduino errors
1) No power — check USB or battery connection. 2) LED not lighting — confirm resistor and LED orientation. 3) Button not detected — verify wiring to correct pins and pull-up/down setup. 4) Wrong readings — test sensor wiring and calibration values. 5) Code won’t upload — ensure board selected and correct port chosen. 6) Serial output missing — confirm baud rate matches in code and monitor. 7) Motor won’t run — check driver and external power supply. 8) Servo jitter — provide stable power and use proper ground. 9) Short circuit — inspect connections for crossed wires. 10) Unexpected behaviour — add Serial prints to debug logic.
Create and Simulate Arduino Projects with Vibe Coder
Open Ardu Coder in Vibe Coder
Choose Ardu Coder, pick an example project or start with a blank canvas, then type what you want in the left prompt window.
Simulate and Preview Your Circuit
Watch the Preview window show a live simulation and schematic; use controls to run, pause, and see how components behave.
View Code and Iterate
Toggle to the Code window to see generated Arduino code, edit or ask Vibe Coder to explain and adjust behaviours.
Make the most of Arduino projects
Try different sensors Swap LEDs for buttons, light sensors or buzzers in simulation to see how inputs change outputs and learn cause and effect. Iterate in simulation Fix code and wiring virtually before touching real components. Small, repeated tests teach debugging without wasting parts or time. Combine projects into showcases Link simple builds like a traffic light and pedestrian button to make bigger interactive systems and learn integration. Share and document safely Save projects, note parts and steps, and share through DIY.org’s moderated tools so friends can learn too.
Frequently asked questions
What age are these Arduino projects for?
They suit kids aged 7–15, with simpler projects for younger makers and more complex ones for older kids.
Do kids need to know how to code?
No. Vibe Coder generates code from prompts and explains steps so kids learn while making, without prior coding skills.
Can I try a project without parts?
Yes. Use Ardu Coder’s simulation Preview to test circuits and code before buying or assembling physical parts.
Are the projects safe for kids to build?
Yes. Projects use low-voltage components and Vibe Coder encourages safe practices; adult supervision is recommended for younger children.
How long do projects usually take?
Most beginner projects take 10–60 minutes. Intermediate builds can take longer depending on parts and complexity.
Do I need an account to save my projects?
Creating an account lets you save projects, export code, and share creations with friends safely on DIY.org.
What parts do I need for basic projects?
Common parts include an Arduino-compatible board, LEDs, resistors, buttons, a breadboard, wires, and simple sensors.
Can kids share their Arduino projects with others?
Yes. Sharing is optional and moderated so kids can showcase projects safely and see feedback from the DIY.org community.
More tools
Create Reading Games For 1st Grade
Create reading games for 1st grade with simple, playful ideas that help young readers practice sounds, sight words, and story thinking. Kids can explore reading skills by making games that feel fun, clear, and easy to try again.
Create Reading Games For 2nd Grade
Create reading games for 2nd grade with kid-friendly ideas that make reading practice playful, clear, and confidence-building. Explore simple game formats, then use Vibe Coding to turn a reading idea into an interactive project kids can build, test, and improve step by step.
Create Reading Games For 3rd Grade
Create reading games for 3rd grade with kid-friendly ideas that turn practice into play. Explore simple reading challenges, build confidence, and try a guided creative tool that helps kids make their own interactive learning games step by step.
Create Reading Games For 4th Grade
Create reading games for 4th grade with ideas that help kids practice words, stories, and comprehension in a fun, hands-on way. This page shows how reading games can build confidence, spark creativity, and make practice feel more like play.
Ready to start creating?
Join hundreds of thousands of kids already building cool stuff on DIY.ORG.
Your first game is on us.
Describe a game below - no sign-up needed to try.
Powered by AstroSafe
Make real games - not just chat