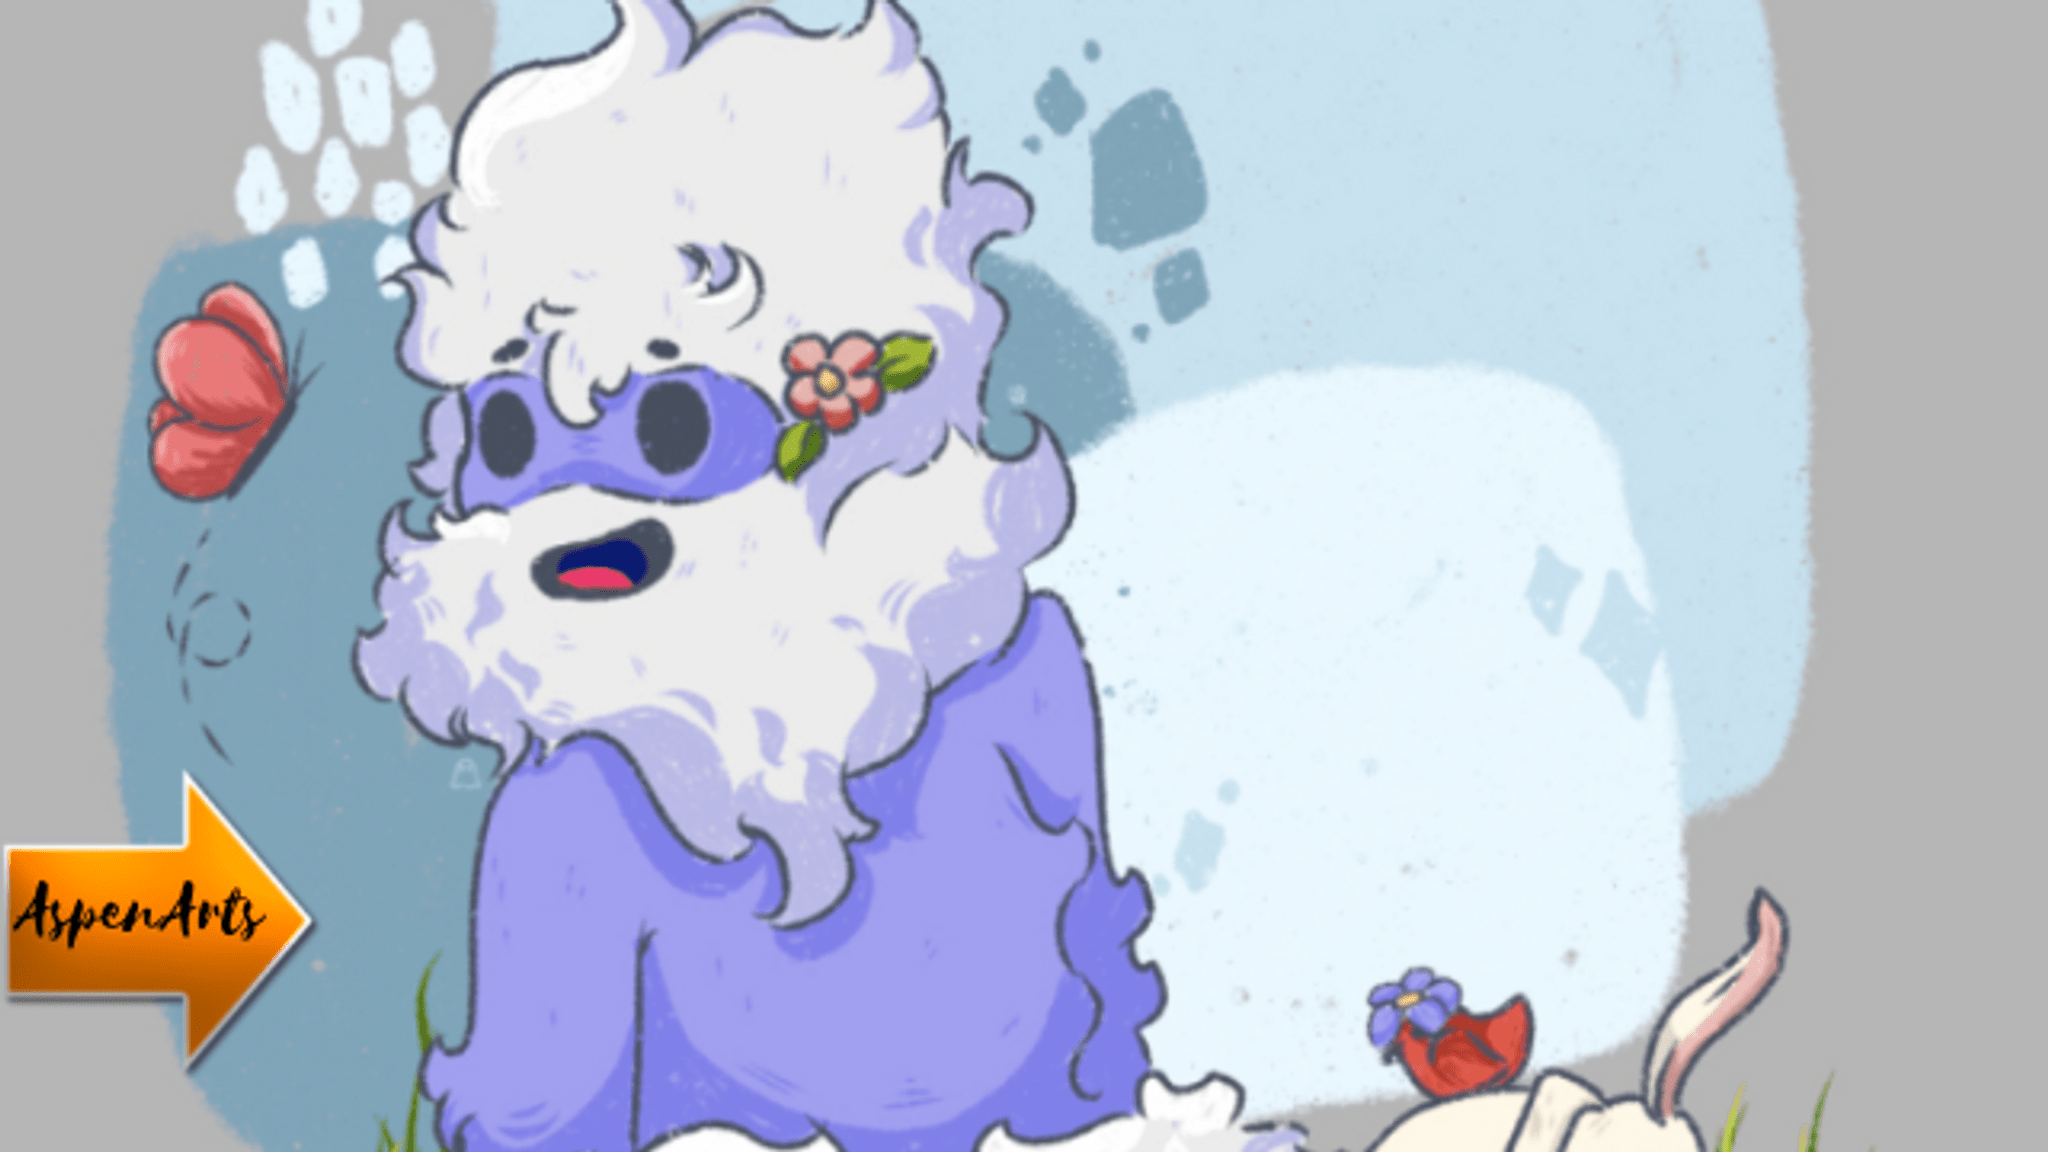
Yowie DTIYS
Draw your own Yowie character in your style: sketch shapes, add colors, and practice shading, proportions, and storytelling through a finished character artwork.

Drawing Apps
Step-by-step guide to draw your own Yowie character
Mind-Blowing DIY Crafts Your Kids Will Actually Love
Step 1
Gather all your materials and sit at a clean flat space where you can draw comfortably.
Step 2
Decide two words that describe your Yowie and pick the pose and spot on the paper where you will draw it.
Step 3
Lightly sketch basic shapes for the head body and limbs using circles ovals and rectangles to block out the form.
Step 4
Draw a centerline and eye line on the head to guide the face placement and expression.
Step 5
Connect the basic shapes with smooth lines to create a clearer outline of the Yowie’s body.
Step 6
Draw the facial features on the guidelines to give your Yowie a clear expression.
Step 7
Add hands feet and other body details like fur claws or toes to make your Yowie unique.
Step 8
Add one clothing item or prop that tells part of your Yowie’s story like a hat backpack or tool.
Step 9
Add one simple background element to show where your Yowie lives such as a cave tree or snowy hill.
Step 10
Check proportions and erase or redraw any parts that look too big or too small.
Step 11
Ink or darken your final outlines with the black pen or fineliner and allow the ink to dry.
Step 12
Gently erase the remaining pencil lines so only your clean inked drawing remains.
Step 13
Fill in flat base colors across your Yowie and its background using your coloring materials.
Step 14
Add shading and highlights to show volume and texture by darkening shadow areas and adding light spots.
Step 15
Share your finished Yowie artwork on DIY.org.
Help!?
What can I use if I don't have a black pen or fineliner for inking?
If you don't have a black pen or fineliner for step 11, substitute a fine-tip permanent marker or a dark mechanical pencil for the final outlines and then let the ink or marker dry before doing step 12 to erase pencil lines.
My Yowie's proportions look off or my ink smudged—how can I fix it?
Go back to the light basic shapes from step 3, adjust sizes and positions during the check in step 10, correct any shapes before you ink in step 11, and make sure the ink is fully dry before completing step 12 to avoid smudges.
How can I adapt this activity for different ages?
For younger kids use larger simple shapes in step 3, broad crayons for step 13, and one background element from step 9, while older kids can add detailed fur and claws in step 6 and layered shading/highlights in step 14.
How can we extend or personalize the finished Yowie drawing?
Personalize and extend the project by adding a textured clothing prop from step 7, creating a small diorama that matches the background in step 9, then photograph the result and share it on DIY.org as instructed in step 15.
Watch videos on how to draw your own Yowie character
CREATE Your Own Story Book For Kids Like A PRO With Canva And ChatGPT!
3 Videos

CREATE Your Own Story Book For Kids Like A PRO With Canva And ChatGPT!
How to Create Your Own Mosaic Art
Children's worksheets that you can make with Canva and ChatGPT | FULL TUTORIAL
Facts about drawing and character design for kids
🐾 The "yowie" is often called Australia's Bigfoot — stories about it appear in Aboriginal legends and settler reports.
🎨 Character designers usually start with simple shapes (circles, squares, triangles) to quickly build personality and correct proportions.
✏️ "Draw This In Your Style" (DTIYS) is a popular social media challenge that invites artists to redraw a character in their own artistic style.
🌈 Using a limited palette of 3–4 colors makes a character design more striking and easier for kids to pick and finish.
💡 Shading from one consistent light source (e.g., top-left) instantly adds depth—try three tones: light, mid, and dark.
How do I do the Yowie DTIYS activity?
What materials do I need for a Yowie DTIYS?
What ages is the Yowie DTIYS activity suitable for?
What are the benefits and safety tips for Yowie DTIYS?
