Write ANYTHING for DIY Times
Build a mini terrarium using a clear jar, soil, small plants, and decorations to learn about ecosystems, moisture cycles, and plant care.




Step-by-step guide to build a mini terrarium
10 Creative and Easy Kids Craft | Fun Crafts for Kids | Handmeyd Treasures
Step 1
Gather all Materials Needed and bring them to a clean workspace.
Step 2
Wash and dry the clear jar and lid so your terrarium starts clean.
Step 3
Pour small rocks or pebbles into the bottom of the jar to make a drainage layer about one quarter full.
Step 4
Spoon potting soil into the jar to make a planting bed that is about twice as deep as the pebble layer.
Step 5
Use a chopstick to make small planting holes in the soil where each plant will go.
Step 6
Gently remove one small plant from its pot by tipping the pot and easing the roots out.
Step 7
Loosen the plant’s roots gently with your fingers so they can spread in the soil.
Step 8
Place the plant into a hole and press soil around its roots to hold it upright.
Step 9
Add tiny decorations and more small stones on the soil surface to make your terrarium look fun.
Step 10
Lightly mist the soil and plants with the spray bottle until the soil is just slightly damp.
Step 11
Put the lid on the jar to create a little greenhouse and trap moisture inside.
Step 12
Set the terrarium in a spot with bright indirect light but not direct hot sun.
Step 13
Check your terrarium each day to look for condensation inside the jar.
Step 14
If you see lots of heavy condensation or water pooling, remove the lid for one hour to let excess moisture escape.
Step 15
Share your finished terrarium and what you learned about ecosystems and moisture cycles on DIY.org.
Help!?
What can we use if we don't have a clear jar or a spray bottle for the terrarium?
If you don't have a clear jar, use a clean clear plastic food container or a recycled clear plastic bottle with a secure lid, and if you lack a spray bottle, gently moisten the soil with a dampened paper towel or a small cup and dropper during the misting step.
What should we do if the plants look soggy or there's too much water inside the jar after sealing it?
Follow the instructions to remove the lid for one hour to let excess moisture escape, then lightly blot any pooled water with a paper towel and reduce future misting so the soil stays only slightly damp.
How can we change the activity for younger children or make it more challenging for older kids?
For younger kids, pre-measure the pebble and soil layers and let them place plants and decorations, while older kids can design layered drainage patterns, choose a variety of small plants, and record moisture and condensation changes daily.
What are simple ways to personalize or extend the terrarium project after it's finished?
Add tiny decorations and labeled plant markers on the soil surface, try themed scenes with small figurines, or track ecosystem changes and share photos and observations on DIY.org as the terrarium matures.
Watch videos on how to build a mini terrarium
10 Easy Shape Crafts for Kids | DIY Paper Toys
3 Videos

10 Easy Shape Crafts for Kids | DIY Paper Toys

Mind-Blowing DIY Crafts Your Kids Will Actually Love
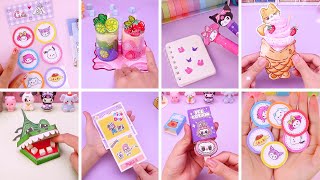
TOP 30+ DIY Creative Craft Ideas You can Make in 5 mins,DIY Sanrio Paper Blind Bag | Tiny DIY Craft
Facts about terrariums and plant care
🌱 Nathaniel Bagshaw Ward invented the Wardian case in the 1800s, an early terrarium that revolutionized plant transport.
💧 A sealed terrarium creates its own tiny water cycle: plants transpire, moisture condenses, and then waters the soil again.
🏺 Adding a thin layer of activated charcoal to a terrarium helps filter odors and keeps the mini-ecosystem fresh.
🌿 Moss is a terrarium superstar because it loves damp, low-light conditions and holds moisture well.
🕒 Properly sealed terrariums can go months or even years without extra watering if they're balanced and well-built.
How do I build a mini terrarium for kids?
What materials do I need to build a mini terrarium?
What ages is a mini terrarium activity suitable for?
What are the benefits and safety tips for making mini terrariums?
