Time For Some One Line Bookmarks!
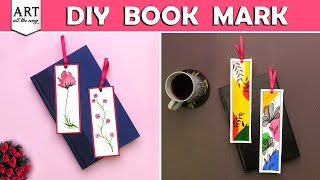
Make paper bookmarks decorated with continuous one-line drawings using pencil and marker, then cut, laminate, and add string to finish your unique designs.


Step-by-step guide to make paper bookmarks with one-line drawings
Step 1
Gather all the materials and set them on a flat work surface.
Step 2
Use the ruler to draw rectangles about 6 inches long and 2 inches wide on the cardstock for your bookmarks.
Step 3
Cut along the drawn lines to make bookmark strips.
Step 4
Make a small pencil dot near the top or center of each strip to mark your starting point.
Step 5
Practice drawing a continuous one-line doodle on a scrap piece of paper until you feel ready.
Step 6
Draw a continuous one-line design on a bookmark strip with your pencil without lifting the pencil.
Step 7
Trace over your pencil line with the black fine-tip marker.
Step 8
Erase any visible pencil marks so only the marker lines remain.
Step 9
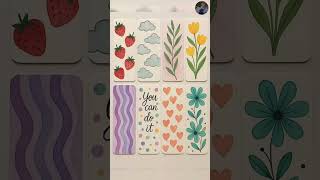
Add color or patterns inside or around your one-line drawing with your coloring materials.
Step 10
Laminate each bookmark using laminating sheets or clear adhesive film to protect the design.
Step 11
Trim any excess laminate leaving a small sealed margin around each bookmark.
Step 12
Punch a hole near the top center of each laminated bookmark.
Step 13
Thread a piece of string or ribbon through the hole and secure it with a knot.
Step 14
Take a photo of your finished bookmark and share your creation on DIY.org.
Help!?
What can we use if we don't have cardstock, laminating sheets, or a fine-tip marker?
If you don't have cardstock use a flattened cereal box or manila folder for Step 2, replace laminating sheets in Step 9 with clear contact paper or overlapping clear packing tape, and swap the black fine-tip marker in Step 7 for a black gel pen or Sharpie.
My one-line drawing keeps breaking or my laminate has bubbles — how do I fix those problems?
If your continuous one-line in Step 5 breaks, plan the path with light pencil marks on scrap paper and practice until smooth, and to avoid bubbles when laminating in Step 9 work on a flat surface and smooth the laminating sheet from the center outward with a credit card or ruler.
How can I adapt this bookmark activity for different ages?
For younger kids have an adult pre-cut the strips in Step 3 and let them use chunky markers and stickers in Step 8, while older kids can tackle more intricate one-line designs in Step 6, use fine liners in Step 7, and add beads to the ribbon in Step 12.
How can we extend or personalize the bookmarks beyond the basic steps?
Enhance your bookmarks by drawing on both sides before laminating in Step 9, adding watercolor or metallic accents in Step 8, reinforcing the hole with an eyelet in Step 11, and tying beads or a tassel onto the ribbon in Step 12 before photographing for DIY.org.
Watch videos on how to make paper bookmarks with one-line drawings
EASY BOOKMARK MAKING IDEAS | Cute bookmark ideas🐚🐻✨ | Simple Bookmark tutorial
4 Videos

EASY BOOKMARK MAKING IDEAS | Cute bookmark ideas🐚🐻✨ | Simple Bookmark tutorial
✨Easy DIY Bookmark Ideas | Creative & Simple Bookmarks Anyone Can Make

Easy Origami Bookmark Tutorial | How to Make Paper Bookmarks
Craft an Amazing DIY Bookmark | Easy Paper Art | Book Mark | How to Make a Bookmark @VENTUNOART
Facts about paper crafts for kids
✏️ Pablo Picasso often made single-line drawings that capture a face or animal with one elegant stroke.
🎨 Blind contour drawing is a practice where you draw while looking only at the subject — it boosts observation and produces fun one-line results.
🖊️ Line art shows how a single continuous line can suggest shape, motion, and personality without shading.
📄 You can cut up an A4 (or letter) sheet into about 2–4 bookmark strips, so one page makes several gifts!
🔒 Laminating your bookmark protects it from spills and wear, so your one-line masterpieces can last years.
How do you make one-line bookmarks?
What materials do I need for one-line bookmarks?
What ages are one-line bookmarks suitable for?
What are the benefits of making one-line bookmarks?


