Suggest a secondary action!
Create a simple paper windmill with paper, straw, and pencil axle; then measure rotation speed when you change wind strength and record observations.




Step-by-step guide to make a paper windmill and measure rotation speed
Step 1
Gather all materials on a clean table so everything is ready.
Step 2
Use the ruler to draw a 15 cm by 15 cm square on the paper.
Step 3
Cut out the 15 cm square with the scissors.
Step 4
Draw diagonal lines from each corner toward the center and mark a stop point 2 cm from the center on each line.
Step 5
Cut along the diagonal lines stopping at the 2 cm marks so the center stays uncut.
Step 6
Fold every other corner (four tips) into the center so the folded points meet and overlap.
Step 7
Cut a 2 cm long piece from the straw to make a small spacer.
Step 8
Push the pushpin through the 2 cm straw spacer so the straw sits on the pin shaft.
Step 9
Push the pin with straw spacer through the overlapped tips into the pencil eraser so the paper is free to spin around the spacer.
Step 10
Hold the pencil upright so the pinwheel can spin freely without touching anything.
Step 11
Set the timer for 10 seconds then blow gently at the pinwheel while counting rotations and write down the number for "light wind."
Step 12
Repeat the 10-second test with a medium-strength blow and write down the rotation count for "medium wind."
Step 13
Repeat the 10-second test with a strong blow or a low hairdryer setting and write down the rotation count for "strong wind."
Step 14
Compare the three rotation numbers and write one sentence describing how wind strength changed the spin speed.
Step 15
Take a photo or note about your pinwheel experiment and share your finished creation and observations on DIY.org.
Help!?
What can I use if I don't have a pushpin, straw, or pencil eraser?
If you don't have a pushpin, straw, or pencil eraser, substitute a straight sewing pin or small tack pushed through a short toothpick or bead as the spacer and press it into a cork or a roll of tape to recreate the step that secures the overlapped tips so the paper can spin.
My pinwheel won't spin — what should I check?
Check that you stopped cutting along the diagonal lines 2 cm from the center so the center stays uncut, confirm the straw spacer is on the pin shaft and not too tight, and if it's stuck gently widen the hole in the overlapped tips with the pushpin so the paper is free to spin around the spacer.
How can I adapt this activity for younger or older children?
For younger children, an adult can pre-draw and cut the 15 cm square and do the pushpin step so the child can fold corners and count rotations during the 10-second 'light/medium/strong' tests, while older kids can measure precisely with the ruler, vary spacer lengths, and use a low hairdryer for controlled trials.
How can we extend or personalize the pinwheel experiment?
Decorate the 15 cm square before cutting, experiment with different 2 cm straw spacer lengths and paper types, run extra 10-second trials at multiple hairdryer settings to compare rotation counts, graph your results, and share the photo and observations on DIY.org.
Watch videos on how to make a paper windmill and measure rotation speed
10 Easy Animal Drawings for Kids Vol. 1 | Step by Step Drawing Tutorials | How to Draw Cute Animals
4 Videos

10 Easy Animal Drawings for Kids Vol. 1 | Step by Step Drawing Tutorials | How to Draw Cute Animals

How To Draw A Funny Cartoon Pencil - Easy step-by-step art lesson for kids and adults!

Easy HOUSE Drawing for Kids! Step by Step Lessons
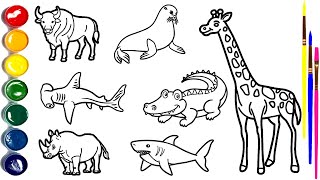
How to Draw Animals for Kids 🦏🦈🐊🦒 | Easy Step-by-Step Drawing Tutorial
Facts about wind energy and simple physics for kids
🌬️ Pinwheels (also called whirligigs) can start spinning in just a gentle breeze of a few kilometers per hour.
🌪️ The word 'anemometer' comes from the Greek 'anemos' meaning 'wind'—it's the tool meteorologists use to measure wind speed.
⚙️ Rotational speed is often measured in RPM (revolutions per minute); count spins for 10 seconds and multiply by 6 to estimate RPM.
🌱 Wind power grows with the cube of wind speed—if wind speed doubles, the available power increases about eight times!
✏️ A pencil through a straw makes a quick, low-friction axle—that's why it's a favorite trick for making smooth-spinning pinwheels.
How do I make a paper windmill and measure its rotation speed when changing wind strength?
What materials do I need to build a paper windmill with a straw and pencil axle?
What ages is the paper windmill and wind-strength experiment suitable for?
What are some benefits, safety tips, and variations for the paper windmill experiment?
