Stitch your favorite game character!
Sew a small felt plush of your favorite game character with a blunt plastic needle, simple stitches, stuffing, and basic embroidery details.
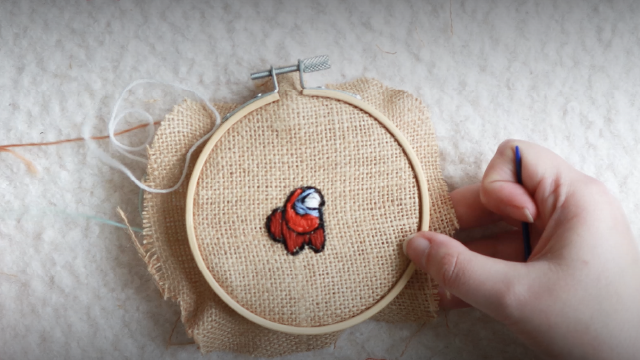
About this activity
Sew a small felt plush of your favorite game character with a blunt plastic needle, simple stitches, stuffing, and basic embroidery details.
What you need
Step by step
- 1
Step 1
Choose your favorite game character and draw a simple front facing outline on the paper.
- 2
Step 2
Cut out your paper outline to make a paper pattern.
- 3
Step 3
Lay the paper pattern on the felt and trace around it with the fabric marker or tailor's chalk.
- 4
Step 4
Cut two identical felt shapes from the traced outlines using child safe scissors.
- 5
Step 5
Thread the blunt plastic sewing needle with embroidery thread and tie a small knot at the end.
- 6
Step 6
Place the two felt shapes together with the right sides facing out and clip or hold the edges so they match.
- 7
Step 7
Sew around the edge with a running stitch leaving a small 2 cm gap for stuffing.
- 8
Step 8
Push small handfuls of stuffing polyfill into the gap until your plush is soft and plump.
- 9
Step 9
Continue the running stitch to close the gap and tie a secure knot to finish the seam.
- 10
Step 10
Use simple straight stitches or a backstitch to embroider eyes mouth and costume details on the plush.
- 11
Step 11
Trim any extra thread and tidy the edges so your plush looks neat.
- 12
Step 12
Take a photo and share your finished game character plush with a short description on DIY.org.
Fun facts
How do I stitch a small felt plush of my favorite game character?
Start by choosing a simple version of your favorite game character and draw a two-piece paper pattern (front and back). Pin the pattern to felt and cut both shapes. Thread a blunt plastic needle with embroidery floss and use running or blanket stitches to join edges, leaving a small gap. Stuff lightly with polyester fill, then finish stitching. Add embroidered facial or costume details before or after stuffing. Practice stitches on scrap felt first.
What materials do I need to sew a felt plush game character?
You'll need colored felt sheets, a blunt plastic (child-safe) sewing needle, embroidery floss or strong thread, polyester stuffing, a paper template, fabric marker or chalk, child-safe scissors, and clips or pins to hold layers. Optional: a needle threader, small buttons or felt for details, and fabric glue for tiny pieces. Choose washable, non-toxic materials and avoid tiny loose parts for young children.
What ages is sewing a felt plush suitable for?
This activity suits children roughly aged 5 and up. Ages 5–7 can use blunt needles and larger stitches with close adult supervision while handling scissors and stuffing. Ages 8–11 can sew more independently and add simple embroidery. Teens can tackle detailed shapes and fine embroidery. Adjust complexity—pattern size, stitch type, and small details—based on each child’s fine motor skill and patience.
What are the safety tips and benefits of stitching game character plushes with kids?
Benefits include improved fine motor skills, creativity, concentration, and a sense of accomplishment from making a character they love. Safety tips: always use a blunt plastic needle and child-safe scissors, supervise younger children, avoid tiny embellishments for under-fives, and securely knot seams to prevent stuffing escape. Keep work area well-lit and clean, and store needles and small items out of reach when not in use.
Watch & Learn
Need help?
What can I use if I don't have felt or a fabric marker?
Use scrap cotton, fleece, or an old t-shirt instead of felt and trace your paper pattern with a pencil or washable marker if you don't have a fabric marker or tailor's chalk.
My running stitches are uneven and the plush looks lumpy — what should I do?
Tie a small knot at the end of the embroidery thread, make evenly spaced running stitches around the edge, stuff small handfuls of polyfill through the 2 cm gap and push the filling into corners before finishing the seam.
How can I adapt this activity for different ages?
For preschoolers, have an adult cut the two felt shapes and thread the blunt plastic sewing needle, while older kids can draw more detailed paper patterns, practice backstitch for costume details, and sew and stuff the plush independently.
How can we personalize or enhance the finished game character plush?
Embroider unique facial expressions and costume details with backstitch, add small felt appliqués stitched onto the surface, trim extra thread neatly, and take a photo with a short description to share on DIY.org.