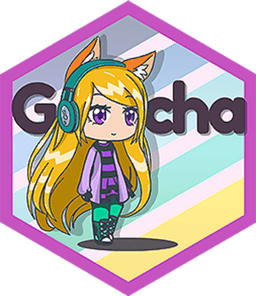
Share a Gacha Tip
Design a custom Gacha character on paper, practice a styling tip about colors and accessories, then share your design and advice with friends.

Step-by-step guide to Share a Gacha Tip
Math Games for Kids - Math Challenges for Kids
Step 1
Gather your materials and find a flat workspace to draw on.
Step 2
Think of a fun theme for your Gacha character like pop star wizard or animal and choose one idea.
Step 3
Pick two main colors and one accent color and decide on one accessory (hat glasses necklace) to highlight.
Step 4
Lightly draw the basic body shape and face of your character with your pencil.
Step 5
Draw the hairstyle and place the accessory where it will sit on the character.
Step 6
Sketch the clothing shapes and any simple patterns using the pencil.
Step 7
Use your chosen color scheme to color the main clothing areas with your coloring materials.
Step 8
Apply the accent color only to the accessory so it stands out from the rest.
Step 9
Add small details like shading highlights or patterns to make your character pop.
Step 10
Trace over the pencil lines with your black pen to finalize the drawing.
Step 11
Write a one-sentence styling tip next to your drawing that explains your color choice or how to wear the accessory.
Step 12
Share a clear photo of your finished page on DIY.org so friends can see your character and read your styling tip.
Help!?
I don't have a black pen or marker — what can I use to finish my drawing?
If you don't have a black pen, use a dark fine-tip marker, gel pen, or a sharpened black colored pencil to trace over your pencil lines in step 10 so the drawing still looks finished.
My colors smudge when I try to trace—how can I prevent that?
Let your coloring materials dry fully and gently erase stray pencil marks before tracing over the drawing with the black pen in step 10 to avoid smudges.
How can I change the activity for different ages?
Younger kids can use pre-drawn basic body shapes and fat markers to color main clothing areas (steps 4 and 7), while older kids can add detailed hairstyles, complex patterns, and extra shading in step 9 plus a thoughtful one-sentence styling tip in step 11.
How can we make the gacha character project more special or longer?
Extend the activity by making a trio of characters that each switch the two main colors and accessory, add backgrounds and extra patterns during step 9, and share all clear photos and matching styling tips on DIY.org as a mini-collection.
Watch videos on how to Share a Gacha Tip
Piano Games for Kids That Make Practice More Fun - Online & Printable Options
4 Videos

Piano Games for Kids That Make Practice More Fun - Online & Printable Options

Fun and Effective Games for ESL Teachers
Math Games for Kids - Mathematical Terminology for Kids

Addition and Subtraction Math Games for Kids | How to Solve Different Mathematical Problems
Facts about character design and styling for kids
🎰 The word “gacha” comes from Japanese capsule-toy machines called gashapon—players 'pull' for surprises just like a toy vending machine!
🎨 A simple color rule for characters: pick a main color, a secondary color, and one bright accent to make designs pop.
👛 Tiny accessories (badges, hairclips, belts) are powerful—adding one or two can change a character’s style instantly without redoing the outfit.
✏️ Quick notes and small pose sketches help you explain styling tips when you share your design with friends so they can copy or remix it.
🌟 Gacha Life (released in 2018) helped millions of kids create and share custom characters, inspiring big fan communities and storytelling.
How do I do the 'Share a Gacha Tip' activity where kids design a custom Gacha character and share styling tips?
What materials do I need for a paper Gacha character design activity?
What ages is the Gacha character design and sharing activity suitable for?
What are the benefits and safety tips for kids doing the 'Share a Gacha Tip' activity?
