Sew Strawberry Cow Plushie
Sew a soft strawberry shaped cow plushie using felt, stuffing, embroidery thread, and a simple pattern; practice basic sewing, cutting, and stuffing skills.
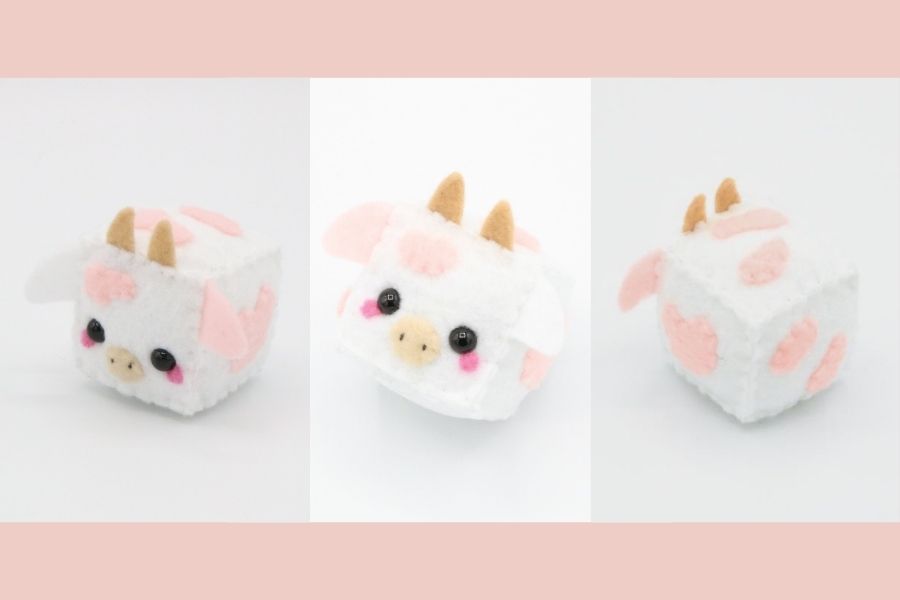
About this activity
Sew a soft strawberry shaped cow plushie using felt, stuffing, embroidery thread, and a simple pattern; practice basic sewing, cutting, and stuffing skills.
What you need
Step by step
- 1
Step 1
Gather all your materials and find a clean flat workspace to make your plushie.
- 2
Step 2
Draw a simple strawberry body shape on paper and also draw a leaf cap two small ears two tiny horns a few round spots and a short tail.
- 3
Step 3
Cut out each paper pattern piece carefully with scissors.
- 4
Step 4
Lay each paper pattern on the matching color of felt and trace around it with a fabric marker or pencil.
- 5
Step 5
Cut out all the felt shapes you traced.
- 6
Step 6
Sew the felt spots and the green leaf cap onto the front body piece with small even stitches.
- 7
Step 7
Embroider the mouth and nostrils on the front body piece using embroidery thread and small stitches.
- 8
Step 8
Attach the eyes by sewing on small safety eyes or by embroidering black eye shapes with thread.
- 9
Step 9
Place the front and back body felt pieces together and align their edges.
- 10
Step 10
Sew around the edge of the body with a running or whip stitch and leave a two-inch gap for stuffing.
- 11
Step 11
Stuff the plush gently through the gap with small amounts of polyester stuffing until it is plump and even.
- 12
Step 12
Sew the gap closed with neat stitches and tie off the thread securely.
- 13
Step 13
Sew the small felt tail to the bottom back of the plush with a few tight stitches.
- 14
Step 14
Share your finished strawberry cow plushie on DIY.org
Fun facts
How do I sew a strawberry cow plushie?
Print a simple strawberry cow pattern, then trace and cut felt pieces (front, back, leaves, face pieces). Embroider the eyes and spots on the front piece before sewing. Pin front and back together, sew around the edge with a running or backstitch leaving a small gap. Turn right-side out, stuff firmly with polyester filling, then ladder-stitch the gap closed. Add felt leaves and any sewn-on details to finish.
What materials do I need to make a strawberry cow plushie?
You’ll need felt in strawberry red, white/cream, green (for leaves), and accent colors; polyester stuffing; embroidery thread and a few matching sewing needles; a printed simple pattern; fabric-safe marker; child-safe scissors; straight pins or clips; and a tapestry or blunt needle for sewing closed. Optional items: small safety eyes (for older kids), ribbon, or fabric glue. Avoid tiny buttons for very young children.
What ages is sewing a strawberry cow plushie suitable for?
This project suits different ages: preschoolers (3–5) can help with sorting felt and stuffing with close adult help. Ages 6–9 can learn basic hand stitches and simple cutting with supervision. Ages 10+ can usually complete the whole plushie independently. Always supervise needle use and scissors; pre-cut pieces for younger children and avoid small parts for toddlers under three due to choking risk.
Is sewing a strawberry cow plushie safe for kids? What safety tips should I follow?
Supervise all needle and scissor use and choose child-safe blunt needles and safety scissors for beginners. Pre-cut pieces for very young children and skip buttons or small embellishments for kids under three. Keep a thimble or teach proper needle handling, store sharp tools out of reach, and check seams are secure to prevent stuffing leaks. Have a small first-aid kit nearby and work in a well-lit, tidy space.
Watch & Learn
Need help?
What can I use instead of felt, polyester stuffing, or safety eyes if I can't find them?
If you don't have felt use cotton fabric or fleece cut from an old T-shirt for Steps 3–5, substitute polyester stuffing with cotton batting or tightly rolled fabric scraps when stuffing in Step 11, and replace safety eyes in Step 7 with sewn-on buttons or embroidered black eye shapes.
My seams are puckering or my stuffing is lumpy—how can I fix that?
To avoid puckered seams while sewing the body in Step 9 use shorter, evenly spaced running or whip stitches and keep the pieces flat, and to prevent lumps add small amounts of stuffing through the two-inch gap in Step 11 and smooth the stuffing with your fingers as you go.
How can I adapt this activity for younger or older kids?
For younger children simplify Steps 3–9 by pre-cutting the paper patterns and felt pieces and using fabric glue and large safety eyes instead of hand-sewing and embroidery, while older kids can add detailed embroidery for the mouth/nostrils in Step 6, try invisible ladder stitches for Step 9, or modify the pattern shapes for more advanced sewing.
How can we personalize or extend the strawberry cow plushie?
Personalize the finished plushie from Step 12 by embroidering a name on the back, sewing a tiny felt bow or bell near the green leaf cap, using patterned fabric for the body and spots, or making matching mini plushies to share on DIY.org.