Sculpt with paper
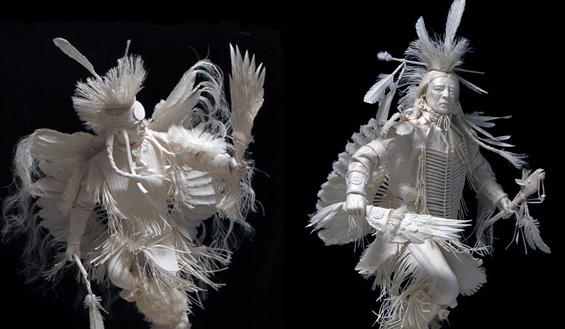
Create 3D paper sculptures by folding, cutting, curling, and gluing scrap paper to make animals, flowers, or abstract shapes while exploring texture and form.
About this activity
Create 3D paper sculptures by folding, cutting, curling, and gluing scrap paper to make animals, flowers, or abstract shapes while exploring texture and form.
What you need
Step by step
- 1
Step 1
Lay out all your materials on a clear table so you can reach everything easily.
- 2
Step 2
Decide whether you will make an animal a flower or an abstract shape and imagine its basic form.
- 3
Step 3
Cut a base shape from the cardboard or a thick scrap paper to hold your sculpture.
- 4
Step 4
Cut or tear scrap paper into a variety of pieces like strips squares and circles for different textures.
- 5
Step 5
Wrap paper strips around the pencil or dowel and slide them off to make curled pieces.
- 6
Step 6
Fold some paper pieces into fans pleats or cones to create volume and interesting shapes.
- 7
Step 7
Put glue on one large piece and stick it to the cardboard base to start the sculpture.
- 8
Step 8
Add more pieces by gluing them slightly overlapping to build height and texture one layer at a time.
- 9
Step 9
Cut tiny paper details like eyes petals or spots and glue them onto your sculpture for character.
- 10
Step 10
Let your sculpture dry completely so the pieces stay in place before you move it.
- 11
Step 11
Take a photo and share your finished paper sculpture on DIY.org
Fun facts
How do I sculpt with scrap paper to make 3D animals, flowers, or abstract shapes?
To sculpt with scrap paper, start by gathering different paper types and a stable work base. Sketch a simple shape, then build an armature from rolled paper or cardboard. Use folding, curling, cutting, and crumpling to form parts; attach layers with white glue or glue sticks and reinforce with tape where needed. Add texture with scrunched paper, fringe cuts, or glued paper strips. Let glue dry between steps and finish with paint or marker details.
What materials do I need to sculpt with paper at home?
You'll need a variety of scrap paper (newspaper, magazine pages, construction paper), scissors, white glue and a glue stick, masking or clear tape, and a sturdy base like cardboard. Add pencils, a ruler, paper clips, a hole punch, and a bone folder or butter knife for creasing. Optional: paint, markers, brushes, glitter, and sealant. For safety, include child-safe scissors and a protective mat to keep surfaces clean.
What ages is paper sculpting suitable for and what supervision is needed?
Paper sculpting suits different ages with the right projects and supervision. Toddlers (2–4) enjoy scrunching and gluing large pieces with heavy glue or glue sticks, always supervised. Ages 5–8 can cut simple shapes, fold, and assemble with supervision using child-safe scissors. Ages 9+ can tackle detailed cuts, armatures, and mixed media; older kids may use craft knives with adult help. Adjust complexity to skill level and motor control.
What are the benefits of making 3D paper sculptures with my child?
Paper sculpting builds fine motor skills, spatial reasoning, and creativity as kids translate 2D materials into 3D forms. It teaches problem-solving, patience, and planning while encouraging sensory exploration through different textures. Using scrap paper promotes recycling and cost‑effective art, and collaborative projects boost communication and confidence. Regular practice supports concentration and early STEAM skills like engineering concepts and structural thinking.
Watch & Learn
Need help?
What can we use if we don’t have cardboard or thick scrap paper for the base?
Use a flattened cereal box panel, a thin piece of wood, or stack and glue several sheets of scrap paper together to make a sturdy cardboard base.
My sculpture keeps flopping over or layers slide—how do I make it hold its shape?
Press each glued piece firmly onto the cardboard base, add extra glue under overlapping layers, and insert small folded tabs or a taped dowel for extra support while the sculpture dries.
How can I change this activity for different ages?
For ages 2–4, pre-cut large shapes and let them glue or tear pieces onto the base; ages 5–8 can cut strips and wrap them around a pencil, and ages 9+ can add tiny details like eyes or pleats and build taller layered textures as described.
How can we make the sculpture last longer or look fancier before sharing it on DIY.org?
Paint or varnish the dry paper sculpture, reinforce tall parts with a thin wire or glued dowel inside the layers, and add tiny cut details like petals or spots before photographing.