Ready with your calligraphy materials?
Practice basic calligraphy strokes and create a decorated name card using brush pens, ink, and guide sheets while learning letter shapes and spacing.


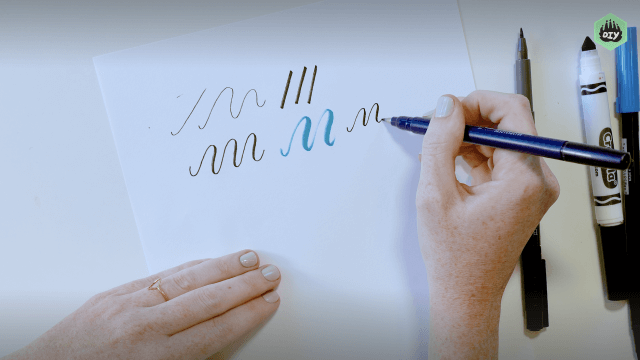

Step-by-step guide to practicing calligraphy strokes and making a decorated name card
Step 1
Lay out your materials on a clean flat table so everything is easy to reach.
Step 2
Place a scrap paper under your name card to protect the table from ink.
Step 3
Slide a guide sheet under the name card so the guide lines show through the paper.
Step 4
Hold your brush pen at about a 45-degree angle.
Step 5
On scrap paper practice five light upstrokes and five heavier downstrokes using the same angle.
Step 6
On the guide sheet practice three ovals and three compound curves to learn letter shapes.
Step 7
Lightly draw pencil guidelines on your name card with the ruler to mark the baseline and x-height.
Step 8
Lightly sketch your name in pencil on the card following the guidelines and even spacing.
Step 9
Trace over each pencil letter with your brush pen using light pressure on upstrokes and heavier pressure on downstrokes.
Step 10
Wait until the ink is completely dry before touching the card.
Step 11
Gently erase the pencil lines from the card.
Step 12
Add small decorations or a border with colouring materials or a fine brush for dots and accents.
Step 13
Share your finished name card on DIY.org
Help!?
What can we use if we don't have a brush pen or a guide sheet?
If you don't have a brush pen, use a soft-tipped marker or a small round watercolor brush with diluted ink, and if you lack a guide sheet, draw or print guideline lines on regular paper and slide that under the name card as instructed.
My strokes look uneven or my letters aren't consistent—how can I fix that?
Practice more of the light upstrokes and heavier downstrokes on scrap paper (step 5) keeping the pen at a 45-degree angle, and repeat the ovals and compound curves on the guide sheet (step 6) before sketching on the name card to build consistent pressure and shapes.
How can I adapt this activity for younger children or older kids?
For younger kids simplify by using larger name cards, thick markers, and pre-drawn letters to trace, while older kids can add strict pencil guidelines with the ruler, increase guide-sheet drills from step 6, and practice more refined brush pressure control before inking.
What are some ways to personalize or enhance the finished name card?
After erasing pencil lines (step 10), personalize the card by adding a light watercolor wash before inking, using metallic pens or a fine brush for dots and accents in step 11, or embossing the dried ink for texture before sharing on DIY.org.
Watch videos on how to practice basic calligraphy strokes and create a decorated name card
Learn Calligraphy: A Step-by-Step Calligraphy Tutorial for Beginners
4 Videos
Learn Calligraphy: A Step-by-Step Calligraphy Tutorial for Beginners
The Easiest Kind of Calligraphy (In 3 Minutes!)
The FIRST 3 Things You Need to Know to Learn Calligraphy
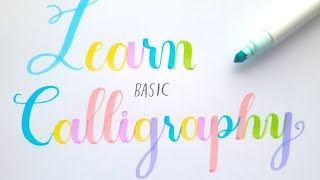
The Ultimate Guide to Calligraphy for Beginners | Basics of Learning Calligraphy #calligraphy
Facts about calligraphy for kids
🖋️ The word "calligraphy" comes from Greek kallos (beauty) + graphe (writing) — it literally means "beautiful writing".
✍️ Brush pens let you change line thickness just by pressure: light for thin upstrokes, heavier for thick downstrokes.
📏 Guide sheets use baselines and x-heights so letters stay the same size — pros use them to keep writing consistent.
🎨 Western calligraphy includes styles like Italic and Copperplate, while Chinese and Arabic calligraphy use different tools and rules.
⏱️ Practicing 10–15 minutes a day builds muscle memory quickly, helping strokes become steadier and letter shapes more consistent.
How do I teach my child basic calligraphy strokes and make a decorated name card?
What materials do I need for a child-friendly calligraphy name-card project?
What ages is practicing basic calligraphy with brush pens suitable for?
What are the benefits and safety tips for kids doing calligraphy, plus fun variations?
