Make Shaker Cards
Make colorful shaker cards using cardstock, clear window film, foam tape, and sequins; cut, assemble, and shake to explore creativity and fine motor skills.
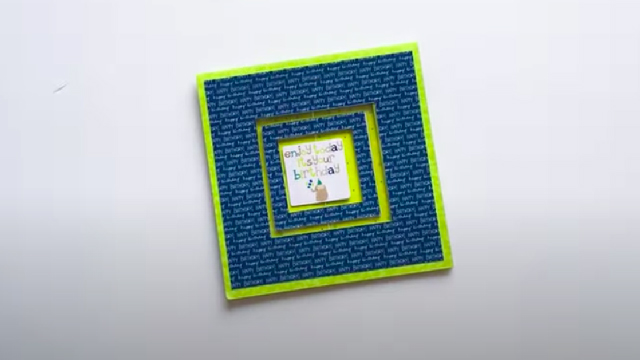
About this activity
Make colorful shaker cards using cardstock, clear window film, foam tape, and sequins; cut, assemble, and shake to explore creativity and fine motor skills.
What you need
Step by step
- 1
Step 1
Pick a piece of cardstock and fold it in half to make your card base.
- 2
Step 2
Use your pencil and ruler to draw a rectangle or circle on the front where you want the shaker window.
- 3
Step 3
Cut out the window shape with scissors to make the opening.
- 4
Step 4
Cut a piece of clear window film slightly larger than the window opening.
- 5
Step 5
Stick the clear film over the opening from the inside using glue or double-sided tape so it covers the hole.
- 6
Step 6
Cut thin strips of foam tape to go all around the inside edge of the window.
- 7
Step 7
Press the foam tape strips onto the inside front of the card around the window to form a raised border.
- 8
Step 8
Sprinkle a small pile of sequins into the center area inside the foam tape border.
- 9
Step 9
Peel the backing off the foam tape to expose the sticky surface.
- 10
Step 10
Press a second piece of cardstock or the card back onto the foam tape to seal the sequins inside the pocket.
- 11
Step 11
Trim any extra clear film or foam that sticks out from the edges with scissors.
- 12
Step 12
Decorate the card front and write a message using your coloring materials.
- 13
Step 13
Shake the card gently to watch the sequins dance inside the window.
- 14
Step 14
Share your finished shaker card on DIY.org
Fun facts
How do you make shaker cards?
To make a shaker card, fold a cardstock base, cut a window in the front panel, and adhere clear window film over the opening from the inside. Stick foam tape around the window edges to create a sealed pocket, pour in sequins or small confetti, then press a top panel or second piece of cardstock over the foam to close the pocket. Decorate the outside with markers, stickers, or stamps, then shake to watch the pieces move.
What materials do I need for shaker cards?
You'll need sturdy cardstock for the card base, clear window film or transparent plastic (like acetate), foam tape or adhesive foam strips to create the shaker cavity, sequins, beads, or small confetti for the filling, and scissors or a craft knife. Also have a ruler, pencil, double-sided tape or glue, and optional decorations like markers, stickers, ribbon, or stamps. For safety, choose large sequins for young kids and use child-safe scissors.
What ages is this activity suitable for?
This activity suits children roughly ages 4 and up. Preschoolers (4–6) can help choose colors, pour sequins, and decorate with supervision; fine motor skills develop as they stick foam and align panels. Ages 7–10 can cut windows, assemble independently, and design more detailed cards. Younger children need close supervision for small pieces and sharp tools. Adjust complexity—simpler pre-cut kits for toddlers or more intricate layers and embellishments for older kids.
What are the benefits and safety tips for shaker cards?
Shaker cards boost creativity, fine motor skills, hand-eye coordination, and sensory exploration as children manipulate sequins and assemble layers. They also teach planning, measuring, and patience. For safety, use age-appropriate fillings (larger sequins for young kids), supervise cutting with craft knives, and seal edges well to prevent spills. Variations include using themed confetti, glitter glue sealed between layers, or making mini magnets by attaching a magnetic strip for holiday or clas
Watch & Learn
Need help?
What can we use if we don't have clear window film or foam tape?
Cut a piece of clear plastic from a report cover, food packaging, or a produce bag and 'stick the clear film over the opening' with double-sided tape or glue, and replace the thin foam tape in step 6 with doubled-up craft foam strips or folded masking tape for the raised border.
My sequins keep escaping or the window leaks — how do I fix that?
Ensure the foam tape strips in step 6 form an unbroken seal with no gaps, press the second piece of cardstock firmly in step 10 to fully adhere to the exposed sticky edge, and trim any overhanging clear film or foam in step 11 so the edges lie flat.
How can I adapt this activity for younger or older kids?
For younger children have an adult pre-cut the window (step 3), pre-attach the clear film (step 5), and use large chunky sequins in step 8, while older kids can freehand detailed shapes in step 2, use precision scissors or a craft knife for step 3, and add layered embellishments in step 12.
How can we make the shaker card more special or interactive?
Before sealing in step 10 add tiny paper cutouts or themed confetti, create multiple windows by repeating steps 2–11, or glue a small clear sleeve inside to swap different filler mixes so shaking the card (step 13) changes the look.