Make pom-poms
Make colorful yarn pom poms using cardboard or a fork, learn wrapping, tying, and trimming techniques, and decorate crafts or gifts safely.
About this activity
Make colorful yarn pom poms using cardboard or a fork, learn wrapping, tying, and trimming techniques, and decorate crafts or gifts safely.
What you need
Step by step
- 1
Step 1
Gather your materials and pick whether you will make pom-poms with a cardboard ring or with a fork.
- 2
Step 2
Prepare your tool by cutting two cardboard rings about 2 inches wide with a hole in the middle if you chose cardboard or by checking the fork is clean and steady if you chose a fork.
- 3
Step 3
Hold the end of the yarn against your tool and begin wrapping the yarn around the cardboard rings or around the middle of the fork.
- 4
Step 4
Continue wrapping the yarn evenly and tightly until the bundle looks thick and full.
- 5
Step 5
Cut a 6 inch piece of yarn and slide it between the two cardboard rings or under the wrapped yarn on the fork and tie it tightly around the middle with a double knot.
- 6
Step 6
Carefully remove the wrapped yarn from the fork or separate the two cardboard rings so the wrapped bundle comes free.
- 7
Step 7
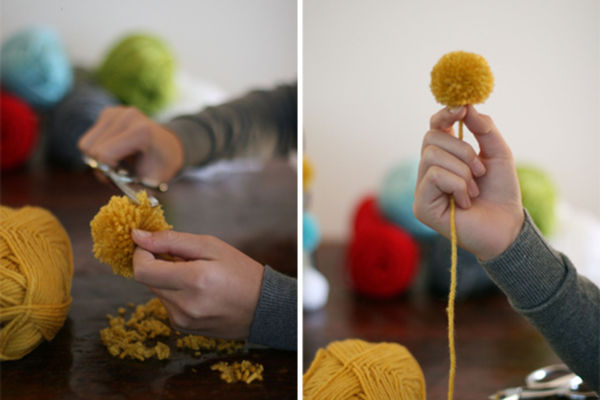
Use scissors to cut all the loops around the edge of the bundle so the pom-pom strands are loose.
- 8
Step 8
Fluff the strands with your fingers and trim any long or uneven pieces to make a nice round pom-pom.
- 9
Step 9
Tie a ribbon or string around the center knot to make a hanging loop or to attach it to a gift.
- 10
Step 10
Decorate your pom-pom by gluing or taping it onto a card or gift or by adding small glued decorations to the pom-pom.
- 11
Step 11
Put away leftover yarn and scissors and tidy your workspace.
- 12
Step 12
Share a photo of your finished pom-pom creation on DIY.org.
Fun facts
How do you make yarn pom-poms with cardboard or a fork?
To make pom-poms, choose a method: cardboard ring or fork. Wrap yarn evenly 50–150 times around the ring or the fork’s tines. Slip a separate length of yarn under the wrapped bundle and tie tightly in the middle with a secure knot. For cardboard, cut the outer loop and remove the rings; for a fork, cut loops across the top. Trim into a round shape and fluff. Supervise children when using scissors and needles.
What materials do I need to make colorful yarn pom-poms?
Gather soft yarn in assorted colors, scissors, a fork or cardboard (cut into two rings), and a short length of strong yarn for tying. Optional items: a pom-pom maker, tape or pencil to hold cardboard, a blunt yarn needle or safety pin for threading, ribbons to attach pom-poms, and non-toxic glue for decorating. Keep small embellishments out of reach of young children.
What ages is this pom-pom activity suitable for?
Pom-pom making suits many ages: toddlers (2–4) can play with pre-made pom-poms; with close adult help they can try wrapping. Ages 4–7 can use a fork or cardboard with supervision for tying and cutting. Ages 8+ can work independently and try fine trimming or adding beads. Always supervise scissors and small parts to prevent choking and ensure safe use of needles or glue.
What are safe decorating ideas and fun variations for yarn pom-poms?
Use pom-poms to decorate gift wrap, make garlands, keychains, or glue them onto cards and hair clips. For safety, secure attachments with strong knots or non-toxic glue, avoid tiny beads for children under 3, and supervise trimming. Variations include two-color wraps, oversized pom-poms with large cardboard, mini pom-poms on a fork, mixing fiber textures, or adding bells and ribbon for older kids.
Watch & Learn
Need help?
What can we use instead of cardboard rings or a fork if we can't find them?
If you don't have a fork or thick cardboard for step 2, cut two rings from a toilet-paper roll or use a paper plate with the center hole cut out to wrap the yarn around.
Why does my pom-pom fall apart when I cut the loops, and how can I fix it?
If the yarn slips or your pom-pom falls apart when you cut the loops, make sure to hold the yarn tail against your tool (step 3), wrap tightly and evenly until the bundle is thick (step 4), and tie the 6-inch center piece with a secure double knot (step 5) before cutting loops (step 7).
How can I adapt this pom-pom activity for different age groups?
For preschoolers, have an adult pre-cut the cardboard rings and let them wrap chunky yarn around a fork (steps 2–4) while older kids can create multi-colored layered pom-poms, trim them into precise rounds (steps 7–8), and add glued decorations (step 10).
How can we make our pom-poms more special or use them in other projects?
To personalize and extend the activity, tie several finished pom-poms onto a ribbon to make a garland (step 9), glue sequins or felt shapes onto them (step 10), or photograph and share your creations on DIY.org (step 12).