Make Lemon Bars with DIY Star IAmExercivic
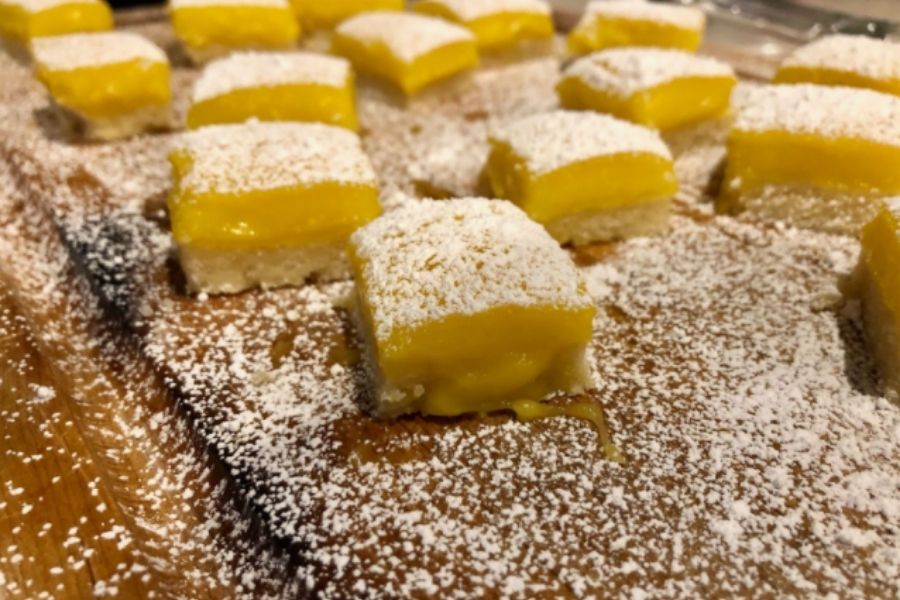
Make lemon bars from simple ingredients with adult supervision, and create a DIY star-shaped powdered sugar stencil to decorate them.
About this activity
Make lemon bars from simple ingredients with adult supervision, and create a DIY star-shaped powdered sugar stencil to decorate them.
What you need
Step by step
- 1
Step 1
Preheat the oven to 350°F (175°C).
- 2
Step 2
Line the 8x8 inch baking pan with parchment paper leaving some overhang for easy lifting.
- 3
Step 3
Put 1 cup all-purpose flour and 1/4 cup granulated sugar and a pinch of salt into a mixing bowl together with the cold butter cubes.
- 4
Step 4
Mash the butter into the dry mixture with a fork or your fingers until it looks like coarse crumbs.
- 5
Step 5
Press the crumb mixture firmly into the bottom of the prepared pan to form the crust.
- 6
Step 6
Bake the crust in the oven for 15 to 18 minutes until it is lightly golden.
- 7
Step 7
In a separate bowl whisk 2 large eggs and 1 cup granulated sugar until smooth.
- 8
Step 8
Add 2 tablespoons flour and the zest of one lemon and 1/3 cup fresh lemon juice to the eggs and whisk until combined.
- 9
Step 9
Pour the lemon filling over the hot crust and spread it evenly with a spatula.
- 10
Step 10
Bake the pan for 20 to 25 minutes until the filling is set and only slightly jiggly in the center.
- 11
Step 11
Let the lemon bars cool completely in the pan on a cooling rack for at least one hour.
- 12
Step 12
Draw a star shape on the stiff paper or cardstock with a pencil.
- 13
Step 13
Cut out the star carefully with scissors to make your star-shaped stencil.
- 14
Step 14
Place the star stencil gently on the cooled lemon bars and dust powdered sugar through the stencil to decorate, then lift the stencil straight up to reveal the star.
- 15
Step 15
Slice the lemon bars into squares and share your finished creation on DIY.org.
Fun facts
How do you make lemon bars with a DIY star powdered sugar stencil?
To make lemon bars with a homemade star powdered-sugar stencil, prepare a shortbread crust (mix flour, sugar, and softened butter), press into an 8x8 pan, and bake until light golden. Whisk eggs, sugar, lemon juice, zest, and a bit of flour for the filling; pour over warm crust and bake again until set. Cool completely, lift bars using parchment, slice, then place a DIY star stencil over each bar and dust with powdered sugar. Always use adult supervision for hot ovens and knives.
What materials do I need to make lemon bars and a DIY star powdered sugar stencil?
You’ll need basic baking ingredients: all-purpose flour, granulated sugar, powdered sugar for dusting, unsalted butter, eggs, fresh lemons (juice and zest), and a small amount of flour for the filling. Tools: 8x8 baking pan, parchment paper, mixing bowls, whisk, measuring cups/spoons, spatula, knife and cutting board, oven mitts, cooling rack, and a small sieve for dusting. For the DIY star stencil, use stiff paper or cardstock and a craft knife or scissors (adult should cut the stencil).
What ages is the lemon bar and DIY star stencil activity suitable for?
Suitable ages vary by task: preschoolers (3–5) can help rinse lemons, hold zest, and sprinkle powdered sugar with supervision; children 6–9 can measure, whisk, press crust, and position pre-cut stencils with adult help; ages 10+ can follow recipe steps more independently but still need an adult to handle the oven and sharp knives. Always assign oven, hot-pan, and cutting tasks to an adult and adapt jobs to each child’s skill level.
What safety tips and variations should we know for lemon bars with a star stencil?
Safety: supervise oven, hot pans, and knives; don’t taste raw filling that contains uncooked eggs—use pasteurized eggs if worried; let bars cool fully before slicing or decorating. Variations: make a gluten-free crust, use coconut oil instead of butter, fold fresh raspberries into the filling, or try lemon-lime zest. For younger kids, pre-cut stencils and let them place and dust the sugar while an adult handles cutting and baking.
Watch & Learn
Need help?
What can I substitute if I don't have parchment paper, an 8x8 inch pan, or fresh lemons?
Use a similarly sized 9x9 or 7x11 pan lined with lightly greased aluminum foil (leave overhang like parchment), substitute 1/3 cup bottled lemon juice for the fresh lemon juice, and keep the butter very cold by using refrigerated sticks cut into cubes so the crust still mashes into coarse crumbs.
My crust is falling apart or the filling is too runny — what should I check and fix?
Ensure the butter is very cold and you press the crumb mixture firmly into the pan before baking to avoid a crumbly crust, and bake the lemon filling the full 20–25 minutes until only slightly jiggly and then cool completely for at least one hour so the filling sets.
How can I adapt this lemon bar activity for younger kids, older kids, or teens?
For younger kids have an adult handle oven steps while kids mash butter into crumbs, press the crust, and dust powdered sugar through the star stencil; elementary kids can help whisk eggs, zest the lemon, and spread the filling with supervision; and teens can measure, bake, design intricate cardstock stencils, and upload their photos to DIY.org.
How can we personalize or extend the recipe and stencil decoration to make the project more interesting?
Stir 1–2 teaspoons extra lemon zest or a tablespoon of poppy seeds into the filling, press fresh raspberries into the hot filling before baking for a fruity twist, cut different stencil shapes from stiff paper or cardstock, or dust cocoa powder or colored sanding sugar through the stencil instead of powdered sugar before slicing and sharing on DIY.org.