Make fashion with LEGO®
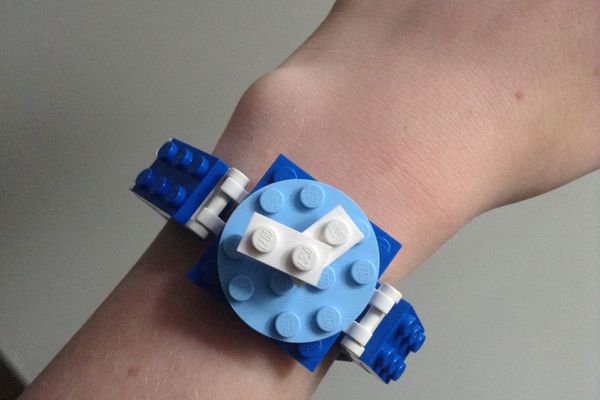
Design and build wearable LEGO® accessories like bracelets, belts, and mini brooches using bricks, creativity, and safe attachment methods to personalize outfits.


Step-by-step guide to make wearable LEGO® accessories
How To: Build a Jewelry Box from LEGO bricks
Step 1
Gather all your materials and choose whether you will make a bracelet belt or mini brooch.
Step 2
Use a strip of ribbon or fabric to measure the wrist or waist area and mark the length with a small knot.
Step 3
Sort and pick LEGO colors and shapes you want to use for your design.
Step 4
Build a sturdy flat LEGO base the same length or size you measured using plates and tiles.
Step 5
Add LEGO Technic pieces or bricks with holes at the points where you will attach ribbon or elastic.
Step 6
Thread elastic cord or ribbon through the holes and tie a secure knot to create the wearable loop.
Step 7
Trim any extra elastic or ribbon close to the knot with scissors for a neat finish.
Step 8
Cut a piece of felt slightly smaller than your LEGO base to make a soft backing.
Step 9
Stick an adhesive-backed Velcro strip to the felt backing so one Velcro side is firmly attached to the felt.
Step 10
Press the felt backing onto the back of your LEGO base so the Velcro holds the felt in place for comfort.
Step 11
Decorate the front with extra tiles studs or small LEGO decorations to personalize your accessory.
Step 12
Try on your accessory and make small adjustments to fit and comfort.
Step 13
Share a photo of your finished wearable LEGO creation on DIY.org
Help!?
What can I use instead of adhesive-backed Velcro or LEGO Technic pieces if they're hard to find?
If adhesive-backed Velcro is unavailable, sew or glue regular Velcro to the felt backing from step 9, and if you don't have Technic pieces for step 6 use bricks with side clips, bars, or even a sturdy cardboard base built like the LEGO base in step 4 with punched holes to thread ribbon or elastic through.
My LEGO base keeps coming apart when I attach the ribbon—how do I fix that?
If the flat LEGO base from step 4 is unstable when you thread ribbon or elastic in step 6, reinforce it by overlapping extra plates and tiles, secure the knot from step 6 with a small dab of fabric or craft glue, and press the adhesive Velcro firmly in step 8 or glue the felt in step 10 for added support.
How can I adapt this activity for different ages?
For younger kids use larger Duplo plates, pre-measure ribbon and pre-cut felt and have an adult do the knot-tying in step 6, for elementary kids let them sort colors and build the base in step 4 with supervision, and for teens challenge them to add Technic connectors or sew the felt backing in step 10 for a more finished accessory.
How can we enhance or personalize the wearable LEGO creation beyond the basics?
Personalize and extend the project by creating interchangeable tile panels that snap onto the base built in step 4, adding name studs or extra decorations in step 11, swapping the Velcro in step 8 for snap buttons or a buckle for a neater closure, or embedding a tiny LED under tiles for a light-up effect before step 11.
Watch videos on how to make wearable LEGO® accessories
How to Make LEGO Jewelry | Sophie's World
4 Videos
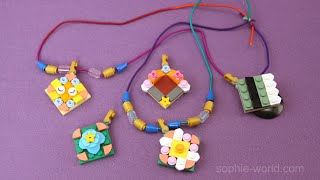
How to Make LEGO Jewelry | Sophie's World

LEGO Creativity at Home Workshop with Nadine Coyle
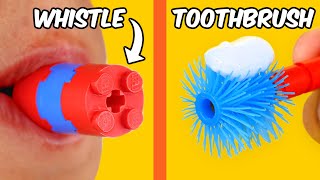
LEGO BUILDS you can use in REAL LIFE...

Making Rumi's Golden outfit in LEGO 🌟 doll repaint DIY craft
Facts about wearable LEGO® crafts
🧱 LEGO bricks made since 1958 still connect with modern bricks — compatibility across decades!
👑 Bracelets are one of the oldest types of jewelry, with examples dating back thousands of years (as early as 7000 BCE).
💡 LEGO began as a wooden toy company in 1932 before inventing the plastic bricks that became iconic.
🎨 Fashion designers often use unexpected materials—like recycled plastics or playful items—to create wearable art.
🔒 For wearable LEGO accessories, soft backings (felt, fabric) and elastic or sew-on snaps are safer than exposed glue or sharp pins.
How do I make wearable LEGO® accessories like bracelets and brooches?
What materials and tools do I need to make LEGO® fashion accessories?
What ages are LEGO® wearable accessories suitable for?
What safety tips should I follow when making LEGO® wearables?


