Make environment textures
Make environment textures using crayons, paint, sponges, and found materials to create repeating patterns and surface details for dioramas or game backgrounds.
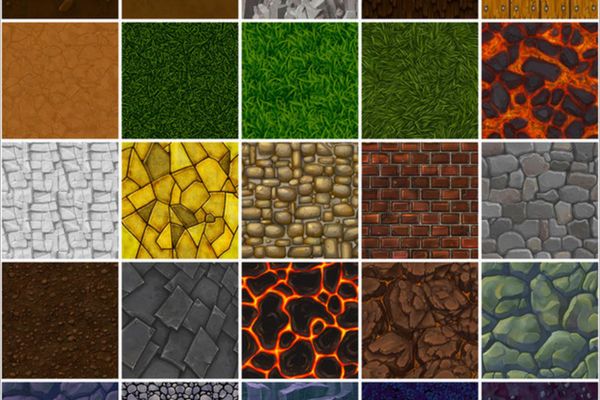
About this activity
Make environment textures using crayons, paint, sponges, and found materials to create repeating patterns and surface details for dioramas or game backgrounds.
What you need
Step by step
- 1
Step 1
Gather all your materials and put them on a clear table space so everything is easy to reach.
- 2
Step 2
Choose the cardboard or sturdy paper base that will become your diorama or background surface.
- 3
Step 3
Pick six different found materials to make texture stamps like a leaf bubble wrap a fabric scrap a twig a sponge piece and a cardboard edge.
- 4
Step 4
Squeeze small amounts of each paint color onto separate sections of a paper plate to make your paint palettes.
- 5
Step 5
Test each found material by pressing it into paint and stamping on scrap paper to see the mark it makes.
- 6
Step 6
Choose which textures will represent parts of your scene for example bumpy for rocks leafy for bushes and dotted for sand.
- 7
Step 7
Colour large areas of your base with crayons to make a bright base layer for your textures.
- 8
Step 8
Dip a clean sponge in a light wash of paint and dab it across an area to create a soft background wash.
- 9
Step 9
Dip one found material lightly into paint so it is covered but not dripping.
- 10
Step 10
Press that found material onto your base repeatedly to make a neat repeating pattern in the area you chose.
- 11
Step 11
Repeat steps 9 and 10 with your other found materials to add different repeating patterns across the scene.
- 12
Step 12
Use crayons to draw small surface details like grass blades veins or tiny stones over the painted textures.
- 13
Step 13
Let your artwork dry completely on a flat surface so the paint and crayons stay in place.
- 14
Step 14
Share a photo of your finished texture scene on DIY.org so other kids can see your cool patterns.
Fun facts
How do you make environment textures for dioramas and game backgrounds?
Start by planning the environment (rocky, grassy, sandy). Lay paper or craft board over textured found materials like leaves, corrugated cardboard, or fabric. Use crayons for rubbings, sponge and brush with paint for mottled color, and stamp repeating shapes for pattern. Layer dry textures and painted details, let each layer dry, then trim and glue into a diorama or scan/photograph at high resolution for game backgrounds. Test repeating seams if making tiles.
What materials do I need to create environment textures?
Gather crayons (varied hardness), tempera or acrylic paints, sponges, foam stamps, brushes, and palette. Collect found textures: leaves, sandpaper, bubble wrap, corrugated cardboard, fabric, twigs, and pebbles. You’ll also want heavyweight paper or craft board, scissors, glue, masking tape, a scrap tray, sealant spray (optional), and a smock. A camera or phone is useful for digitizing textures for game use.
What ages is this texture-making activity suitable for?
This activity suits a wide range: preschoolers (3–5) can explore crayon rubbings and sponge dabbing with close supervision. Elementary children (6–9) can create deliberate patterns and layer textures. Tweens and teens (10+) can refine repeating tiles, experiment with color theory, and digitize textures for games. Adjust tools and supervision for scissors, paints, and small found objects according to the child’s skill level.
What are some variations and creative ideas for environment textures?
Try themed variations: beach (sand, salt paint), forest (leaf rubbings, bark stamps), urban (cardboard, metal grates), and alien worlds (foil, textured foam). Make repeating tiles by matching edges while painting to create seamless backgrounds. Experiment with scale—micro-details for close-ups, broad washes for distant backgrounds. Digitize and edit textures for color swaps or layer blending modes in simple image apps for game-ready assets.
Watch & Learn
Need help?
What can we use instead of hard-to-find items like bubble wrap, twigs, or sponges listed in step 3?
If you can't find the bubble wrap, twig, or sponge from step 3, substitute crumpled aluminum foil for bubble wrap, a rolled strip of corrugated cardboard for a twig edge, and a kitchen scrub pad or folded paper towel for a sponge piece.
My stamps are smudging or leaving faint marks—how can I fix this during steps 5 and 9–11?
If stamps smudge or are faint when following steps 5 and 9–11, blot excess paint on scrap paper from the test in step 5, press evenly and firmly when stamping, and adjust paint thickness so it's covered but not dripping as instructed in step 9.
How can I adapt the activity for different ages while following steps 3–11?
For younger kids, simplify steps 3–11 by using three large textures, bigger stamps, and washable paints, while older kids can layer multiple repeating patterns and add fine crayon details from step 11 for more complex scenes.
How can we extend or personalize the texture scene before sharing it on DIY.org as in step 13?
To extend and personalize the project, glue small real natural items or fabric scraps onto your diorama base, add a short written caption or mini story about the scene, or fold the cardboard into a 3D diorama before photographing for step 13.