Make Clouds with Cushions
Build fluffy indoor 'clouds' using cushions, cotton stuffing, and fabric; arrange, balance, and decorate them while exploring shapes, textures, and simple engineering.
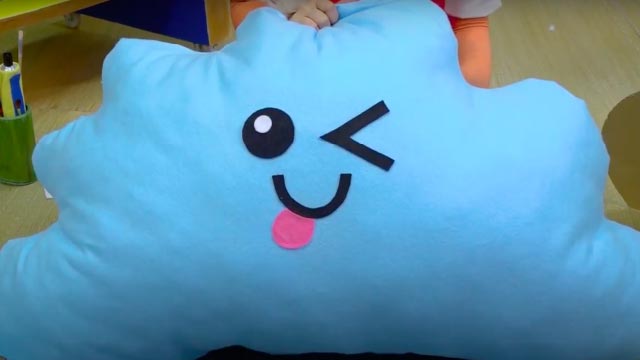
About this activity
Build fluffy indoor 'clouds' using cushions, cotton stuffing, and fabric; arrange, balance, and decorate them while exploring shapes, textures, and simple engineering.
What you need
Step by step
- 1
Step 1
Gather all your materials and bring them to a clear floor space.
- 2
Step 2
Lay the light fabric or sheet flat on the floor to make a clean work surface.
- 3
Step 3
Put one cushion in the middle of the fabric.
- 4
Step 4
Pull the fabric up and around the cushion to make a soft rounded cover.
- 5
Step 5
Fasten the fabric under the cushion with safety pins or clear tape to hold it in place.
- 6
Step 6
Take a small handful of cotton stuffing.
- 7
Step 7
Place the cotton on top and around the cushion to create fluffy cloud bumps.
- 8
Step 8
Secure the cotton in place with more safety pins or small dabs of fabric glue.
- 9
Step 9
Add ribbons or colour your cloud with fabric markers or paint to make it extra fun.
- 10
Step 10
Tie a string or ribbon to your cloud if you want it to hang.
- 11
Step 11
Put your cloud where you want it to live like on a chair a shelf or hanging from the ceiling.
- 12
Step 12
Gently adjust the cotton stuffing and pins until the cloud balances and looks as fluffy as you want.
- 13
Step 13
Share your finished cloud creation on DIY.org
Fun facts
How do I make fluffy indoor 'clouds' with cushions and stuffing?
To make fluffy indoor 'clouds' with cushions and stuffing, choose soft cushions and lightweight fabric or pillowcases. Stuff small fabric pouches or cushion covers with polyester fiberfill, tuck and secure openings with Velcro, safety pins, or simple stitches. Arrange cushions on the floor or sofa, stacking and balancing layers to form cloud shapes. Let children experiment with shape and stability, add lightweight decorations, and always supervise to check stacks are stable before sitting or cli
What materials do I need to build cushion clouds at home?
You'll need a collection of soft cushions or throw pillows, polyester fiberfill or cotton stuffing, lightweight fabric or old pillowcases, and Velcro strips or safety pins. Add a non-slip rug or underlay to prevent sliding. Optional supplies: felt, fabric glue, ribbons, battery-powered LED fairy lights, and child-safe sewing needles and thread. Avoid hot glue and small loose items for toddlers, and choose washable materials for easy cleanup.
What ages is the Make Clouds with Cushions activity suitable for?
This activity fits roughly ages 3-10 with adult supervision and tweaks. Toddlers (3-4) enjoy sensory play with pre-made soft clouds; preschoolers (4-6) can help stuff pouches and arrange shapes; school-age kids (7-10) can design balanced structures and sew simple covers. Young children need help with pins, needles, and lights. Adjust complexity, materials, and supervision based on each child's motor skills and attention span.
What are the benefits, safety tips, and fun variations for cushion cloud play?
Building cushion clouds boosts creativity, spatial reasoning, fine motor skills, and cooperative play while introducing basic engineering and sensory exploration. For safety, avoid plastic bags, secure any lights, keep stacks low to prevent falls, and supervise use of pins or needles. Try variations like themed clouds (stormy or rainbow), a cloud obstacle course, a quiet 'reading cloud' nook with soft lighting, or timed building challenges for older kids.
Watch & Learn
Need help?
What can we use if we don’t have safety pins, cotton stuffing, or a light fabric?
If you don’t have safety pins, cotton stuffing, or a light fabric, fasten the fabric under the cushion with small binder clips or Velcro strips instead of safety pins, use polyester pillow filler or torn-up old pillows for the cotton stuffing, and substitute an old pillowcase or T-shirt for the light sheet in step 2.
My fabric slips and the cotton keeps falling off — how can I fix it?
Make sure to pull the fabric tightly around the cushion in step 3 and secure it under the cushion with extra safety pins or clear tape and add a few small dabs of fabric glue where the cotton meets the fabric to hold the stuffing in place.
How can I adapt this activity for a 3-year-old versus a 10-year-old?
For a 3-year-old, have an adult do the pinning and gluing while the child places cotton bumps and ribbons using a pillowcase instead of safety pins, whereas a 10-year-old can pull the fabric tight, fasten with safety pins, colour with fabric markers or paint in step 8, and tie the hanging string themselves in step 9.
How can we make the cloud more special or longer-lasting?
To make it extra special and durable, sew or hot-glue the fabric closed instead of using safety pins, tuck a battery-operated LED fairy-light strand under the cotton before securing it (steps 6–9), and personalize with fabric markers and ribbons from step 8 to hang and share on DIY.org.