Make Clay Miniatures with DIY Jr Mod @DaphneDuck
Follow DIY Jr Mod @DaphneDuck to sculpt small clay miniatures, learning shaping, detailing, and safe painting using child friendly modeling materials and tools.

Step-by-step guide to make clay miniatures with DIY Jr Mod @DaphneDuck
Step 1
Clear a small table and cover it with wax paper or a silicone mat to protect the surface.
Step 2
Put on an old shirt or apron to keep your clothes clean.
Step 3
Find and follow DIY Jr Mod @DaphneDuck so you can watch their sculpting tips and ideas.
Step 4
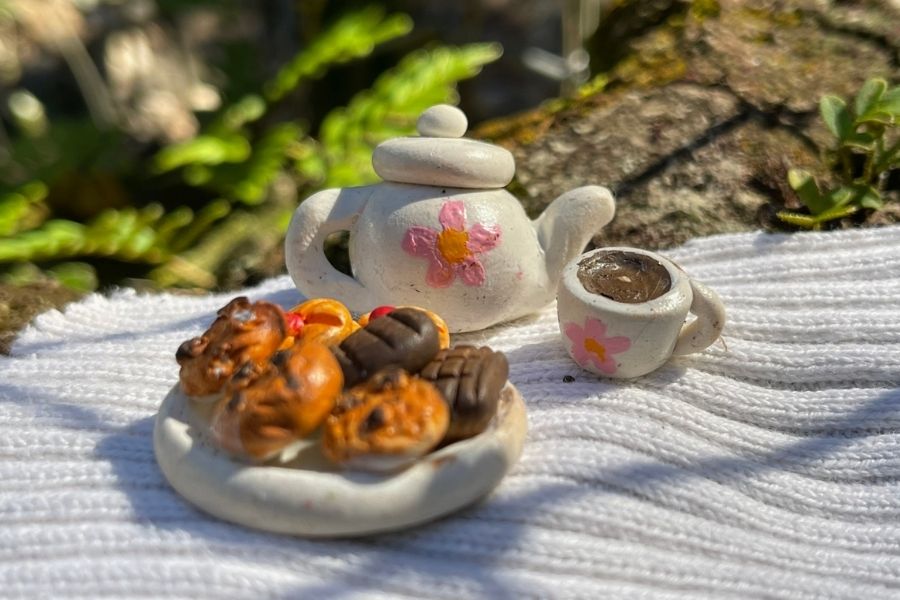
Decide what tiny miniature you want to make like a tiny animal a little food item or a mini character.
Step 5
Tear off a small piece of clay about the size of a large marble.
Step 6
Knead the clay in your hands until it is soft and easy to shape.
Step 7
Roll the clay with the rolling pin or bottle to make a smooth base shape for your miniature.
Step 8
Use the plastic sculpting tool or blunt butter knife to shape the main features of your miniature.
Step 9
Add small details like eyes or texture using toothpicks one tiny mark at a time.
Step 10
Smooth any rough edges by dipping your finger in a little water and gently rubbing the clay.
Step 11
Let your miniature air-dry on the wax paper until it is completely hard following the clay package instructions.
Step 12
Paint your dry miniature with child-safe acrylic paints and let the paint dry on the paper plate or palette.
Step 13
Take a photo of your finished miniature and share your creation on DIY.org
Help!?
What can I use if I don't have air-dry clay, a rolling pin, or child-safe acrylic paints?
Substitute air-dry clay with homemade salt-dough, use a clean bottle or marker as a rolling pin, and paint finished miniatures with washable tempera instead of child-safe acrylics.
What if my miniature cracks while air-drying or small details fall off?
Press cracks closed and smooth with a water-dampened finger as in the 'smooth any rough edges' step, reattach small parts by scoring with the plastic sculpting tool or toothpick and blending with a little water before following the clay package drying instructions.
How can I change the activity for younger or older kids?
For younger kids simplify by using larger clay pieces and blunt tools like a butter knife and helping with kneading and rolling, while older kids can add fine toothpick details, more complex characters, and use a palette to mix acrylics as in the painting step.
How can we personalize or extend the finished miniatures beyond just painting?
After the paint dries on the paper plate, seal miniatures with a clear craft varnish, glue on tiny magnets or pin backs, create a painted clay base, and then take a photo to share on DIY.org as the final step.
Watch videos on how to make clay miniatures with DIY Jr Mod @DaphneDuck
5 Easy Polymer Clay Miniature DIYs | Tutorial Compilation
4 Videos
5 Easy Polymer Clay Miniature DIYs | Tutorial Compilation
How to Make Modelling Clay at Home for Kids | Homemade Modelling Clay
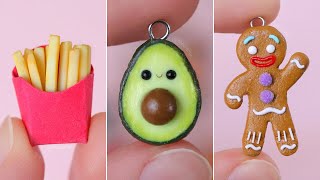
8 Polymer Clay Miniature DIY Crafts | Tutorial Compilation
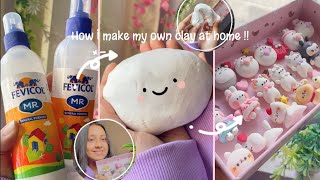
✨How I make my own diy AIR DRY CLAY at home ^-^(Basic tutorial + small tips) aka cold porcelain clay
Facts about clay modeling for kids
🍪 Polymer clay hardens in a regular home oven (usually around 265–275°F / 130–135°C) — no kiln needed!
☁️ Air-dry clay dries and hardens naturally overnight, making it great for kid-friendly projects without baking.
🎨 Most cured clays accept child-safe acrylic paints, so miniatures can be bright and washable once sealed.
🔎 Miniature artists commonly use scales like 1:12 (one inch = one foot) to make tiny, detailed scenes.
🧼 Keeping hands and tools clean with warm soapy water helps clay details stay crisp and prevents color transfer.
How do you make clay miniatures with DIY Jr Mod @DaphneDuck?
What materials do I need for Make Clay Miniatures with DIY Jr Mod @DaphneDuck?
What ages is this Make Clay Miniatures activity suitable for?
Is making clay miniatures safe for kids, and what safety tips should I follow?
