Make ASL Flash Cards
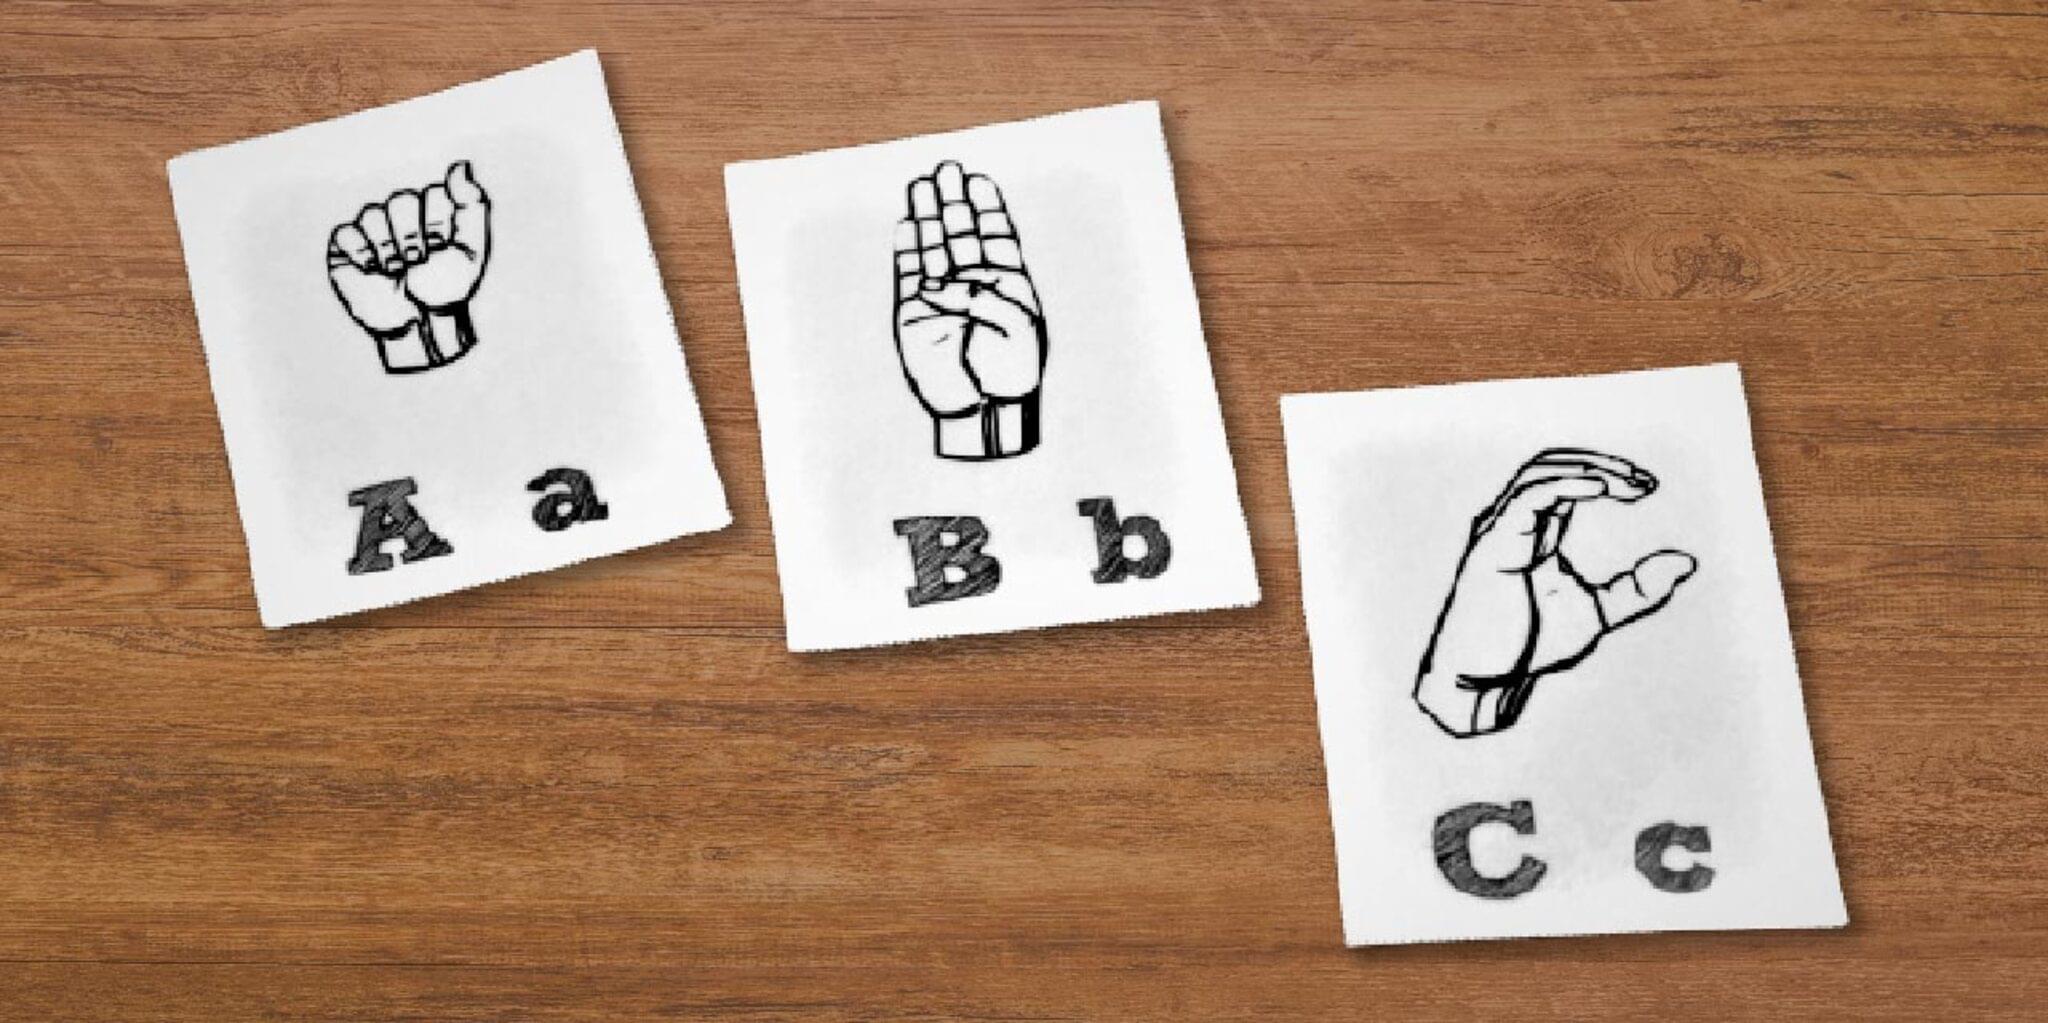
Make ASL flash cards showing letters and simple words using drawings and photos; practice finger spelling and matching games to learn American Sign Language.
About this activity
Make ASL flash cards showing letters and simple words using drawings and photos; practice finger spelling and matching games to learn American Sign Language.
What you need
Step by step
- 1
Step 1
Gather all the materials and set them on a flat table where you can work.
- 2
Step 2
Pick 10 letters and 10 simple words you want to learn for your first set.
- 3
Step 3
Cut the paper or index cards into card sizes using the scissors.
- 4
Step 4
On the front of each card write one large letter with a marker.
- 5
Step 5
Add a picture to the front of the matching card by drawing it or gluing a photo from a magazine.
- 6
Step 6
Write the printed word under the picture on the front of the card.
- 7
Step 7
Flip each card and draw the ASL handshape for that letter on the back using your pencil first and then outline with marker.
- 8
Step 8
Make extra cards that show only the picture or only the ASL handshape to use for games.
- 9
Step 9
Shuffle the cards and lay them face down on the table.
- 10
Step 10
Play a matching game with a friend or family member to match letters to handshapes or pictures to handshapes.
- 11
Step 11
Practice finger spelling each letter in front of a mirror or with your partner using the cards as prompts.
- 12
Step 12
Keep your finished flash cards together in a box or rubber band so they stay neat.
- 13
Step 13
Share a photo or description of your finished ASL flash cards on DIY.org.
Fun facts
How do I make ASL flash cards and practice finger‑spelling with my child?
Start by picking a set of letters or simple words to teach. On index cards or cardstock, draw or print a photo showing the sign, and write the letter or word underneath. Model each sign slowly, then have your child copy the finger‑spelling. Turn it into games: matching cards to pictures, timed flash rounds, or “find the letter” scavenger hunts. Practice in short, frequent sessions (5–10 minutes) and celebrate progress to keep motivation high.
What materials do I need to make ASL flash cards?
You’ll need sturdy index cards or cardstock, markers or pens for drawing, and reference images or a trustworthy ASL chart (online or book) for accuracy. A camera or printed photos helps show real hand shapes. Optional: laminator or clear sleeves for durability, a hole punch and ring to fan cards, and stickers for rewards. Digital options include printable templates or flashcard apps if you prefer screen‑based practice.
What ages is making ASL flash cards suitable for?
This activity works well for preschoolers through elementary kids. Ages 3–5 benefit from simple picture‑paired letters and adult guidance for hands‑on finger practice. Ages 6–10 can copy signs, practice independent finger‑spelling, and play matching or memory games. Adapt difficulty by using single letters for younger children and simple words or short phrases for older kids. Always supervise practice to ensure correct hand shapes and encourage repetition.
What are the benefits of making ASL flash cards with my child?
Creating ASL flash cards boosts visual language skills, fine motor control, and memory through repeated finger‑spelling practice. It encourages inclusive communication, increases vocabulary recognition, and builds confidence in expressing ideas without speech. Working together on cards also strengthens parent‑child bonding and patience. Regular practice supports early literacy and can help children who are visual learners or have diverse communication needs gain a useful, lifelong skill.
Watch & Learn
Need help?
What can I use instead of index cards or magazine photos if I don't have them?
If you don't have index cards, cut sturdy paper or thin cereal-box cardboard into card sizes with scissors as in the 'Cut the paper or index cards into card sizes' step, and use phone-printed photos or hand-drawn pictures instead of gluing magazine photos when you 'Add a picture to the front of the matching card'.
My ASL drawings look wrong — how can I make accurate handshapes?
Follow the instruction to 'draw the ASL handshape for that letter on the back using your pencil first' by tracing an ASL diagram from a book or screen under tracing paper, practicing the finger positions in a mirror, then outlining with marker to get the correct handshape.
How can I change this activity for younger or older kids?
For younger children, simplify the 'Pick 10 letters and 10 simple words' step to 3–5 letters, use pre-cut cards and stickers for pictures, and for older kids expand to more letters/words, add sentences under the picture, and time finger-spelling practice with the cards as prompts.
How can we make the flash cards last longer or play more games?
To extend and personalize the project, laminate each finished flash card or cover them with clear tape to keep them neat in a box or rubber band, color-code cards by vowels/consonants, make the extra 'only picture' or 'only handshape' cards suggested for games, and share a photo on DIY.org as the instructions recommend.