Make an Origami Rabbit!
Fold paper to make an origami rabbit, learning precise creases, step by step instructions, and simple tricks to shape ears and body.
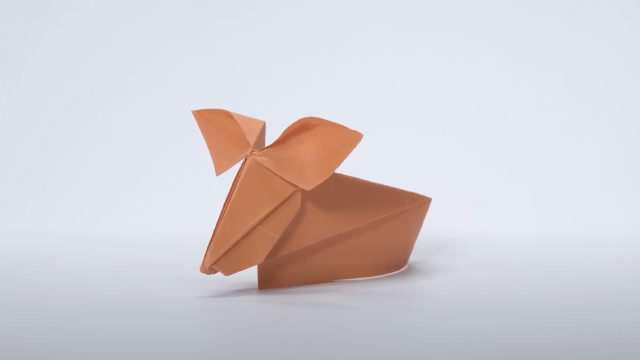
About this activity
Fold paper to make an origami rabbit, learning precise creases, step by step instructions, and simple tricks to shape ears and body.
What you need
Step by step
- 1
Step 1
Place your square paper color side down on a flat surface.
- 2
Step 2
Fold the paper in half diagonally by bringing one corner to the opposite corner to make a triangle and crease firmly.
- 3
Step 3
Rotate the triangle so the long side is at the bottom and the point is facing up.
- 4
Step 4
Fold the bottom-left corner up to meet the top point and crease the fold.
- 5
Step 5
Fold the bottom-right corner up to meet the top point and crease the fold.
- 6
Step 6
Turn the paper over so the folded flaps are facing down.
- 7
Step 7
Fold the small top triangle point down about one-third of the way toward the center and crease to make the rabbit’s nose.
- 8
Step 8
Flip the model back over so the front faces you.
- 9
Step 9
Gently open and fold the left thin flap upward and outward to form the left ear and crease along the fold.
- 10
Step 10
Gently open and fold the right thin flap upward and outward to form the right ear and crease along the fold.
- 11
Step 11
Fold the bottom point up behind the body about halfway to create the rabbit’s body and help it sit, then crease firmly.
- 12
Step 12
Share your finished origami rabbit on DIY.org.
Fun facts
How do you make an origami rabbit step by step?
Start with a square sheet. Fold it diagonally both ways and open to make crease lines. Fold two opposite corners into the center to form a kite shape. Fold the top down, then use small inside or outside reverse folds to create the rabbit’s head and long ears. Fold the lower section to form the body and tuck or crease the base so it sits upright. Adjust ear angles and add drawn eyes to finish.
What materials do I need to make an origami rabbit?
You'll need square origami paper (about 6–8 inches), or cut a square from regular paper. Use a flat, clean table and good lighting. Optional tools: a bone folder or ruler to make sharp creases, a pencil or fine marker for eyes, and a tray to keep small pieces. No glue or scissors are required for traditional folding, but scissors can be useful if you need to trim a square.
What ages is this origami rabbit activity suitable for?
This origami rabbit suits ages differently: preschoolers (3–5) benefit from supervised participation—folding simple creases and decorating. Ages 5–7 can complete the basic shape with adult help for reverse folds. Ages 8+ often manage the full step-by-step independently, practicing precision. Adapt pace and complexity: simplify steps for younger children and add shaping or multiple rabbits for older kids. Always provide supervision when scissors or small accessories are used.
What are the benefits of making an origami rabbit with my child?
Folding an origami rabbit builds fine motor skills, hand-eye coordination, and patience. Following step-by-step instructions strengthens sequencing and spatial reasoning—useful for early math. It encourages creativity when kids decorate or invent variations, and it’s a calm, screen-free activity that improves focus. Group folding supports social skills like taking turns and explaining steps. These benefits make origami both educational and relaxing for children and parents to enjoy together.
Watch & Learn
Need help?
I don't have square origami paper—what can I use instead?
Use any paper (printer paper, wrapping paper, magazine pages, or a large sticky note) cut into a square and place the color side down before folding the diagonal triangle.
My rabbit's ears won't stay folded — how can I fix them?
When you 'gently open and fold the left/right thin flap upward and outward' press a firm crease along the ear fold and, if needed, add a tiny dab of glue or tuck a small paper tab inside the ear to hold its shape.
How can I adapt this activity for younger or older kids?
For younger children use a larger pre-cut square and pre-crease the diagonal triangle (step 2) to simplify folds, while older kids can try making smaller rabbits from trimmed squares or adding intricate patterns after folding the nose and ears.
Any ideas to personalize or extend the finished origami rabbit?
After you fold the bottom point up behind the body about halfway, glue a cotton ball or pom-pom as a tail, draw eyes and whiskers on the nose triangle, and make a whole family of rabbits in different colors to share on DIY.org.