Make an Origami Pig!
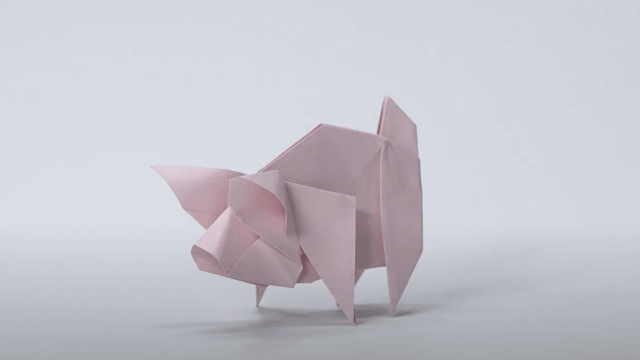
Fold paper to make a simple origami pig, learning precise folds, symmetry, and patience while decorating it with markers or stickers.
About this activity
Fold paper to make a simple origami pig, learning precise folds, symmetry, and patience while decorating it with markers or stickers.
What you need
Step by step
- 1
Step 1
Place one square paper on the table with the coloured side facing down.
- 2
Step 2
Fold the paper diagonally from one corner to the opposite corner to make a triangle and press the fold firmly.
- 3
Step 3
Turn the triangle so the long side is along the bottom and the point faces up.
- 4
Step 4
Fold the top point down toward the bottom about one-third of the triangle’s height to make the pig’s snout and crease well.
- 5
Step 5
Flip the paper over so the snout fold is now on the back.
- 6
Step 6
Fold the left corner up toward the top point to make one ear and press the crease flat.
- 7
Step 7
Fold the right corner up toward the top point to make the other ear and press the crease flat.
- 8
Step 8
Flip the paper back to the front so you can see the snout and ears.
- 9
Step 9
Fold a small tip of the snout upward to make the pig’s nose ridge and flatten the fold.
- 10
Step 10
Use your colouring materials to draw two eyes above the snout and two nostrils on the snout.
- 11
Step 11
Add stickers or other decorations to personalize your pig.
- 12
Step 12
Share your finished origami pig on DIY.org.
Fun facts
How do you fold a simple origami pig step by step?
Start with a square piece of paper and work on a flat surface. Fold the paper diagonally both ways to find the center, then fold edges to make a square base. Create the pig’s snout by folding a small corner forward, make ears by folding two top corners back, and form legs by folding small tabs at the bottom. Keep folds crisp, work symmetrically, then decorate with markers or stickers.
What materials do I need to make an origami pig?
You need a square sheet of origami paper or any square paper (6–8 inch works well), a flat surface, and patience. Optional supplies: child-safe scissors for simple modifications, glue for securing tabs, colored markers, crayons, or stickers for decorating. If you don’t have square paper, trim a rectangular sheet into a square — an adult should help younger kids. No special tools required, so it’s an inexpensive, portable activity.
What ages is making an origami pig suitable for?
This origami pig is suitable for ages about 5 and up with adult guidance. Preschoolers (ages 3–5) can try simple folding with hands-on help; school-age children (6–10) will follow step-by-step instructions independently and build fine motor skills. Older kids and teens can make tighter, neater folds and try variations. Supervise young children when using scissors or glue, and allow extra time to practice patience and symmetry.
What are the benefits of making an origami pig?
Making an origami pig helps develop fine motor skills, hand-eye coordination, and spatial reasoning as children learn to fold precisely and maintain symmetry. It also boosts concentration, patience, and following sequential instructions. Decorating adds creative expression and decision-making. This quiet, low-cost activity supports emotional regulation and confidence when a child completes a model. You can extend learning by counting folds, comparing sizes, or telling a story about the pig.
Watch & Learn
Need help?
What can I use if I don't have square coloured paper for step 1?
Cut a regular sheet of printer paper into a square by folding one corner to the opposite edge and trimming the excess, then place the coloured or patterned side facing down as instructed in step 1.
My pig's ears look uneven after steps 5–6—how can I fix them?
Unfold the ear folds, make sure the triangle's long side is along the bottom (step 3), then fold each corner up so its tip meets the top point before pressing the creases flat.
How can I adapt this origami pig activity for different ages?
For preschoolers, prefold the diagonal triangle and snout (steps 2 and 4) so they can fold the ears and decorate, while older kids can try smaller squares or more precise snout and ear folds for detailed pigs.
How can we enhance or personalize the origami pig after decorating in step 10?
After drawing eyes and nostrils in step 10, glue on googly eyes, add a tiny rolled-paper tail to the back near the snout fold, or make a whole pig family with different-sized coloured squares to share on DIY.org.