Make an Origami Godzilla!
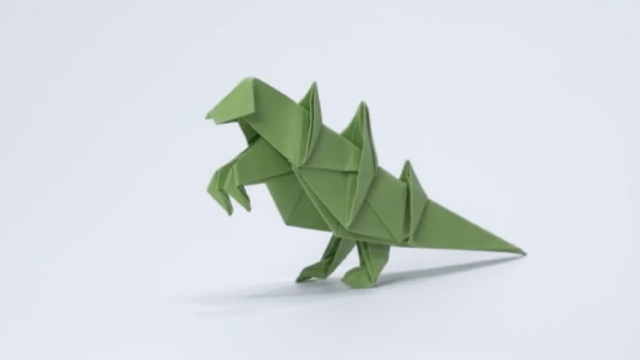
Fold and decorate an origami Godzilla model from square paper, following step-by-step folds to learn symmetry, patience, and simple paper sculpting skills.
About this activity
Fold and decorate an origami Godzilla model from square paper, following step-by-step folds to learn symmetry, patience, and simple paper sculpting skills.
What you need
Step by step
- 1
Step 1
Place your square paper colored side down on the table so the plain side is facing up.
- 2
Step 2
Fold the paper diagonally corner to corner then open it to make a crease from one corner to the opposite corner.
- 3
Step 3
Fold the other two corners together diagonally then open it so you have an X crease across the paper.
- 4
Step 4
Fold the top edge down to meet the bottom edge then open to make a horizontal crease.
- 5
Step 5
Fold the left edge over to meet the right edge then open to make a vertical crease.
- 6
Step 6
Collapse the paper into a square base by bringing the four corners together and flattening the model into a smaller square.
- 7
Step 7
Fold the right top flap’s outer edge into the center line and crease well.
- 8
Step 8
Fold the left top flap’s outer edge into the center line and crease well.
- 9
Step 9
Fold the bottom point of the kite shape upward about two thirds of the way to form Godzilla’s tail.
- 10
Step 10
Fold the very tip of the upper point back down a little to form Godzilla’s head angle.
- 11
Step 11
Fold the left bottom corner outward a little to make Godzilla’s left leg and crease it.
- 12
Step 12
Fold the right bottom corner outward a little to make Godzilla’s right leg and crease it.
- 13
Step 13
Make small zigzag pleats along the top back from the head to the tail to form spines and press each crease flat.
- 14
Step 14
Decorate your Godzilla by drawing eyes teeth and scales and color the spines and body however you like.
- 15
Step 15
Take a photo of your finished Origami Godzilla and share your creation on DIY.org
Fun facts
How do you fold and decorate an origami Godzilla?
Start with a square sheet. Fold basic creases (diagonals and midlines), then form a bird/base-like foundation with kite and squash folds. Shape the head with small reverse folds, narrow one end into a tail, and make small accordion or mountain folds for dorsal plates. Refine legs/arms by folding and tucking paper. Finish by drawing eyes, scales, and teeth with markers or add glued paper spikes for a 3D look. Go slow and crease sharply.
What materials do I need to make an origami Godzilla?
You need square origami paper (6–8 in is easy for kids), a flat workspace, and a bone folder or fingernail to make crisp creases. For decorating, have markers, colored pencils, or stickers, plus glue for optional spikes. Scissors are optional if you want to trim or add glued pieces. Keep a scrap paper and wet wipes nearby for little hands.
What ages is folding an origami Godzilla suitable for?
This activity suits children about 6 and up. Ages 6–8 will enjoy it with adult help for precise folds; ages 9–12 can likely follow step-by-step instructions independently. Younger kids (4–5) can join by decorating pre-folded bases or making simplified versions. Adjust difficulty by choosing larger paper, simplifying steps, or offering hands-on assistance.
What are the benefits of making an origami Godzilla?
Folding an origami Godzilla boosts fine motor skills, patience, and sequential thinking as children follow steps. It teaches symmetry, spatial reasoning, and early geometry concepts while encouraging creativity through decorating. The activity also builds concentration and pride in a finished model, and can be a calm screen-free pastime that promotes parent-child bonding when done together.
Watch & Learn
Need help?
What can we use instead of the square colored paper if we don't have origami paper?
Cut a sheet of printer paper, wrapping paper, or a magazine page into a square and place it colored side down as the instructions require.
I'm stuck collapsing the paper into a square base—any tips to make that step work?
If the square base won't form, reopen to the X and center creases, push the diagonal creases inward, bring the four corners together and flatten the model into the smaller square while pressing each crease flat.
How can we adapt this activity for younger children or make it more challenging for older kids?
For younger kids use a larger pre-cut square and pre-crease the diagonal and center folds, and for older kids add more precise zigzag pleats for detailed spines and smaller, sharper folds for the head and legs.
What are some creative ways to personalize or enhance our finished Origami Godzilla beyond coloring?
After drawing eyes and scales, glue on googly eyes or tiny tissue-paper scales along the zigzag back pleats, mount Godzilla on a painted cardboard 'city' for a diorama, and then take a photo to share on DIY.org.