Make an Origami Fish!
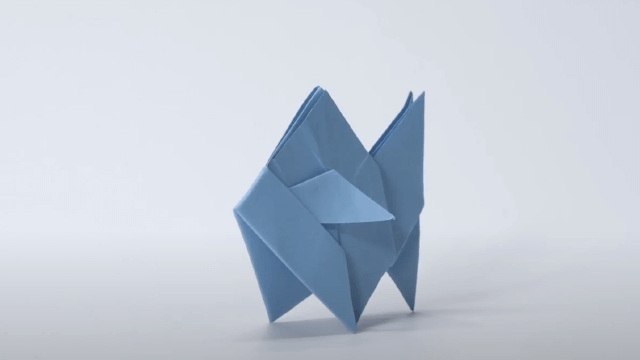
Fold a square paper step-by-step to make a colorful origami fish, then decorate fins and eyes while learning neat folding techniques.
About this activity
Fold a square paper step-by-step to make a colorful origami fish, then decorate fins and eyes while learning neat folding techniques.
What you need
Step by step
- 1
Step 1
Place one square sheet of paper color side down on a flat surface.
- 2
Step 2
Fold the paper diagonally from one corner to the opposite corner to make a triangle.
- 3
Step 3
Fold the triangle in half by bringing the left point to meet the right point to make a smaller triangle.
- 4
Step 4
Unfold the last fold so you have the larger triangle again with a center crease.
- 5
Step 5
Lift only the top layer's right corner and fold it across toward the left to form a triangular tail.
- 6
Step 6
Flip the paper over so the tail is on the other side.
- 7
Step 7
Fold the left corner back about one-third of the way toward the center to make the fish head.
- 8
Step 8
Tuck the small head flap into the pocket under the layers to lock the head in place.
- 9
Step 9
Smooth the main creases with your finger to make the fish hold its shape.
- 10
Step 10
Gently pull the tail edges outward to shape the fins so they look lively.
- 11
Step 11
Decorate the fish by drawing scales and eyes or by sticking on stickers or googly eyes and glueing scrap-paper fins if you like.
- 12
Step 12
Share your finished origami fish on DIY.org.
Fun facts
How do I fold a square paper step-by-step to make an origami fish?
Start with a square paper, color side down. Fold diagonally to make a triangle and crease well. Fold the two bottom corners up toward the top point to form a diamond or basic fish body. Fold a small triangle at one end back to make the mouth. Shape the tail by folding the opposite end inward or splitting it into two flaps. Reverse-fold small edges outward for fins, crease firmly, then decorate eyes and patterns.
What materials do I need to make an origami fish?
You need square paper (origami paper about 15x15 cm works great) or cut regular paper into a square. Have markers, crayons, or colored pencils for decorating, plus glue or tape for attaching googly eyes or glitter if desired. Optional: safety scissors (for cutting squares), stickers, and a bone folder or ruler to make crisp creases. Lay down newspaper or a placemat to protect surfaces.
What ages is making an origami fish suitable for?
Origami fish works for ages 4 and up with adult help. Ages 4–6 benefit from guided, simple folds and step-by-step demonstration; they’ll need supervision for any cutting or glue. Ages 7–9 can follow instructions more independently and experiment with tail or fin shapes. Children 10+ usually fold and decorate on their own. Adjust complexity and supervision to skill level and attention span.
What are the benefits of making an origami fish with my child?
Origami fish develops fine motor skills, hand-eye coordination, patience and following sequential steps. It supports spatial reasoning, symmetry understanding, and creativity through decorating. Crafts like this boost concentration and confidence when a child completes a tidy model. Safety note: avoid small adornments for children under three. Try variations—patterned paper, accordion tails, or magnet-backed fish—to extend learning and play.
Watch & Learn
Need help?
What can I use if I don't have square origami paper or googly eyes for decorating?
Use any paper cut into a square (printer paper or recycled paper) for step 1 and replace googly eyes in step 11 with drawn eyes or sticker circles cut from colored paper.
My head flap won't tuck into the pocket in step 7—what should I do?
If the head flap won't tuck in during step 7, re-sharpen the creases from steps 2–4, gently open the pocket with your finger, and then slide the flap in so it locks more easily.
How can I adapt this origami fish for younger children or make it more challenging for older kids?
For younger children, pre-fold the square and skip tucking in step 7 by gluing the head flap for stability, while older kids can use thinner origami paper and add extra tail or fin folds before step 9 for more detail.
What are some creative ways to extend or personalize the finished fish after step 11?
Personalize and extend the project by gluing scrap-paper fins and googly eyes from step 11, painting scales on the body, or stringing several finished fish together to make a mobile to share on DIY.org.