Make an Obstacle Course
Design and build a backyard obstacle course using cones, ropes, pillows, and chairs; time runs, adjust challenges, and practice agility and problem-solving.



Step-by-step guide to make a backyard obstacle course
Step 1
Choose a flat backyard area and pick a spot to build your course.
Step 2
Mark a clear Start line and Finish line with chalk or masking tape.
Step 3
Arrange cones in a zigzag so you can weave through them.
Step 4
Tie the rope between two chairs about 10 cm off the ground to make a low balance line.
Step 5
Scatter pillows in a line to act as stepping stones.
Step 6
Drape a blanket over two chairs to create a low tunnel to crawl through.
Step 7
Place a beanbag or small ball and a target circle to make a toss challenge.
Step 8
Walk slowly through the whole course to check that each obstacle is safe and reachable.
Step 9
Move any cones chairs pillows or rope to fix spacing or safety problems you find.
Step 10
Use a stopwatch or timer to run the course and record your first time.
Step 11
Change one obstacle to make the course easier or harder (for example move cones closer or raise the balance rope a little).
Step 12
Run the course three times trying to beat your best time and practice new skills.
Step 13
Share a photo or video of your finished obstacle course and your best time on DIY.org
Help!?
What can I use instead of cones, rope, or chalk if I don't have them?
Use plastic cups or empty water bottles for the zigzag cones, a jump rope or sturdy belt tied between two boxes or stools for the low balance line, and string, sticks, or a row of small toys instead of chalk or masking tape to mark Start and Finish.
What should I do if an obstacle feels unsafe or falls down during setup?
When you 'Walk slowly through the whole course to check that each obstacle is safe,' stabilize wobbly chairs with books, tuck and clip the blanket under the chairs for the tunnel, retie or lower the rope, and spread or tape down pillows as the 'Move any cones chairs pillows or rope' step recommends.
How can I change the course for different ages or abilities?
Following 'Change one obstacle to make the course easier or harder,' make it easier for little kids by lowering the rope to the ground or removing the balance line and bringing cones closer together, and make it harder for older kids by raising the rope slightly, spacing cones farther apart, or shrinking the toss target before you 'Run the course three times.'
How can we make the obstacle course more fun or challenging after the first run?
Add a scoring rule for the toss challenge, create a themed course (pirate or jungle), turn it into a relay with friends using the stopwatch to compare times, and then 'Share a photo or video of your finished obstacle course and your best time on DIY.org' to personalize it.
Watch videos on how to make a backyard obstacle course
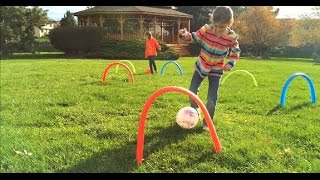
How to Make an Outdoor Obstacle Course
4 Videos
How to Make an Outdoor Obstacle Course
Cool Math Lessons for Kids
Math Games for Kids - Math Challenges for Kids

2nd Grade Kids Learning Videos Compilation
Facts about outdoor play and physical activity for kids
🏁 Obstacle courses are used in military training, school PE classes, and backyard games—people of all ages enjoy them.
🧗 Parkour and freerunning popularized creative ways to move over obstacles using balance, vaults, and rolls.
⏱️ Timing each run helps kids set goals and see improvement in speed, strategy, and confidence.
🪑 You can build a safe, fun course from everyday items like cones, chairs, ropes, and pillows—no special gear needed.
🌟 Obstacle courses train both physical skills (balance, agility) and brain skills (planning, problem-solving, teamwork).
How do you set up a backyard obstacle course for kids?
What materials do I need to build a backyard obstacle course?
What ages is a DIY backyard obstacle course suitable for?
What are the benefits and safety tips for a backyard obstacle course?
