Make an Edible Snowman
Build an edible snowman using marshmallows, pretzels, candies, and frosting; assemble decorations, practice fine motor skills, and learn simple kitchen safety.
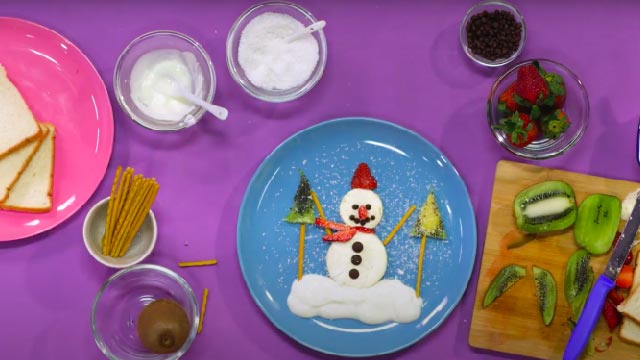
About this activity
Build an edible snowman using marshmallows, pretzels, candies, and frosting; assemble decorations, practice fine motor skills, and learn simple kitchen safety.
What you need
Step by step
- 1
Step 1
Wash your hands with soap and water and dry them so everything stays clean.
- 2
Step 2
Place your plate on the table and put all your materials on the plate within reach.
- 3
Step 3
Squeeze a small dot of frosting onto the plate to use as edible glue.
- 4
Step 4
Put one marshmallow in the center of the plate to be the snowman’s base.
- 5
Step 5
Push a toothpick halfway into the top of the base marshmallow with an adult nearby.
- 6
Step 6
Press a second marshmallow onto the exposed toothpick so it sits on top of the base.
- 7
Step 7
Put a small dab of frosting on top of the middle marshmallow to help the head stick.
- 8
Step 8
Press a third marshmallow onto the dab of frosting to make the snowman’s head.
- 9
Step 9
Gently push one pretzel stick into each side of the middle marshmallow to make the arms.
- 10
Step 10
Press two small round candies onto the head with tiny bits of frosting to make the eyes.
- 11
Step 11
Press one small orange candy into the center of the face with frosting to make a carrot nose.
- 12
Step 12
Press three small round candies down the front of the middle marshmallow with frosting to make buttons.
- 13
Step 13
Wrap a small strip of fruit roll up or licorice around the neck to make a scarf.
- 14
Step 14
Take a photo and share your finished edible snowman on DIY.org
Fun facts
How do you make an edible snowman?
To build an edible snowman, first lay out marshmallows (large for the base, medium and small for body and head). Pipe a bit of frosting between each marshmallow to "glue" them together; use a toothpick only with adult help. Press pretzel sticks into the middle section for arms and candies for eyes, nose, and buttons. Let children decorate freely, then enjoy on a plate. Supervise the whole time and demonstrate safe use of any sharp tools.
What materials do I need for an edible snowman?
You'll need large, medium, and mini marshmallows; ready-made frosting or thick icing; pretzel sticks or twists for arms; small candies (chocolate chips, M&M's, mini candies) for eyes and buttons; an orange candy or candy corn for a carrot nose; toothpicks or wooden skewers for older kids (optional); a small plate, napkins, and a spoon or piping bag for frosting. Optional: sprinkles, edible glitter, and a damp cloth for quick clean-up.
What ages is this activity suitable for?
This activity suits preschool to elementary children, roughly ages 3–10. Toddlers (around 3–4) enjoy sticking candies and frosting with close adult supervision because small pieces are choking hazards. Ages 5–7 can practice fine motor control and simple assembly, while 8–10-year-olds can design more detailed snowmen and safely use small tools like toothpicks with guidance. Adjust tasks to each child's skill level and always supervise around small foods and sharp items.
What are the benefits of making edible snowmen?
Making edible snowmen develops fine motor skills, hand-eye coordination, and early planning as children select and attach tiny decorations. It encourages creativity, language as kids describe their designs, and basic kitchen confidence like spreading frosting and cleaning up. The shared activity supports social skills if done with siblings or friends. Always reinforce safety: supervise chewing of small candies and limit sharp tools so the activity remains fun and risk-aware.
Watch & Learn
Need help?
What can we use if we don't have toothpicks, pretzel sticks, or fruit roll-ups?
If you don't have toothpicks for stacking (the step where you push a toothpick into the base), use a short piece of uncooked spaghetti with adult supervision, swap pretzel stick arms for small breadsticks or thin licorice, and replace the fruit roll-up scarf with a strip of soft cookie or fruit leather.
Why does my snowman keep falling apart, and how can I fix it?
If the marshmallows slide or the head keeps falling (during the toothpick and frosting steps), put a larger dot of frosting as edible glue, press the toothpick more firmly into the base with an adult nearby, or add a tiny candy shim between layers for extra grip.
How can I adapt this activity for different ages?
For toddlers skip the sharp-toothpick step and stack marshmallows using only the frosting glue with close adult help, for school-age kids allow supervised toothpick insertion and more detailed candy placement, and for older kids challenge them to design multiple snowmen or complex faces before photographing for DIY.org.
How can we make the edible snowman more creative or special?
Personalize and extend the project by adding a candy hat, using sprinkles or crushed cookies as a snowy plate base, creating a mini snowman family with varied button patterns, or arranging a winter scene to photograph and share on DIY.org.