Make a zoning map of your neighborhood
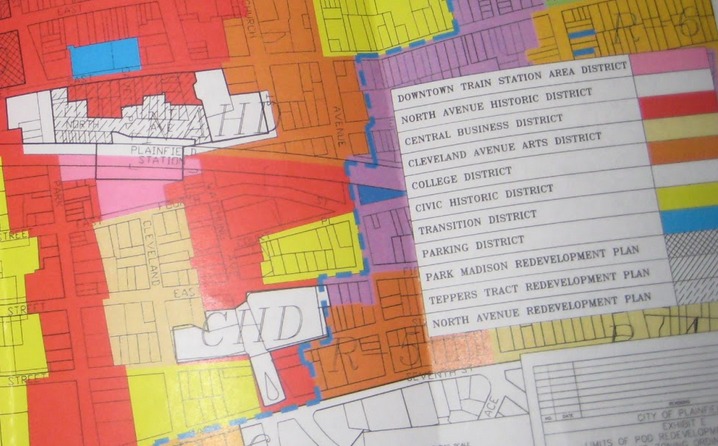
Make a zoning map of your neighborhood by walking with an adult, observing building uses, color-coding zones, drawing a legend, and labeling streets and landmarks.
About this activity
Make a zoning map of your neighborhood by walking with an adult, observing building uses, color-coding zones, drawing a legend, and labeling streets and landmarks.
What you need
Step by step
- 1
Step 1
Gather your materials and put them in a backpack so everything is easy to carry.
- 2
Step 2
Ask an adult to choose a safe short walking route around your neighborhood to study.
- 3
Step 3
Walk the route with the adult and stop at each building to write one short word for its use in your notebook.
- 4
Step 4
At every corner or intersection write the street name in your notebook so you can find them on your map later.
- 5
Step 5
When you see a park school store or other landmark draw a tiny sketch symbol next to its note.
- 6
Step 6
Sit down in a quiet spot with your paper and notebook ready after the walk.
- 7
Step 7
Draw a simple outline of the streets you walked to make the base map on your paper.
- 8
Step 8
Draw a small shape for each building in the correct spot on your map and write its one-word use beside it.
- 9
Step 9
Add the landmark symbols from your notes onto the map where they belong.
- 10
Step 10
Decide which color will stand for each zone type like residential commercial public and industrial and draw a small colored square legend on your map.
- 11
Step 11
Color each building or area on your map using the colors you chose.
- 12
Step 12
Use your ruler to draw clear zone boundaries and make the street lines neat.
- 13
Step 13
Write street names and label parks schools and stores clearly on the map.
- 14
Step 14
Add a title date and your name so people know when you made the zoning map and who made it.
- 15
Step 15
Share your finished zoning map on DIY.org.
Fun facts
How do I make a zoning map of my neighborhood with my child?
Take a supervised neighborhood walk with a notebook or printed blank map, pencil, and camera. Walk block by block, observing building uses (homes, shops, schools, parks), sketching block outlines and noting street names and landmarks. Back home, use colored pencils or markers to color-code zones (residential, commercial, recreational), add a legend that explains colors and symbols, and label streets and key places. Talk about what you noticed and why areas look different.
What materials do I need to make a neighborhood zoning map?
Gather a blank map or plain paper, clipboard, pencils, eraser, ruler, and colored pencils or markers for color-coding. Bring a smartphone or camera to photograph buildings and landmarks, plus sticky notes for temporary labels. Optional extras: printable map templates, stickers for younger kids, tape measure or step counter for rough distances, and a waterproof bag. Don’t forget water, snacks, and adult supervision while walking.
What ages is making a neighborhood zoning map suitable for?
This activity fits many ages: preschoolers (4–6) can spot landmarks and place stickers with help; early elementary (6–9) can label streets, color simple zones, and help sketch blocks; older kids (9–14) can create scale sketches, categorize land uses, and discuss planning ideas. Always adapt walk length and complexity to the child’s attention span and mobility, and ensure an adult accompanies younger children.
What safety tips and fun variations can improve a neighborhood zoning map activity?
Safety first: walk with an adult, use sidewalks, cross at corners, carry ID and a charged phone, and set a clear route and time limit. Benefits include improved observation, map skills, vocabulary, and civic awareness. Variations: make a bike or public-transit map, create a digital map with photos, compare maps from different seasons, or redesign zoning to add parks or community gardens. Discuss why zoning affects daily life.
Watch & Learn
Need help?
What can I use instead of a backpack, ruler, or colored pencils if I don't have them?
You can use a tote bag or fanny pack instead of a backpack, a stiff folder or clipboard as a paper support, the straight edge of a book or a piece of cardboard as a ruler to 'draw clear zone boundaries', and crayons, markers, or colored pens to 'color each building or area on your map.'
What should I do if I forget to write a building's use or miss a street name during the walk?
If you miss writing a one-word use or a street name while you 'stop at each building' or 'At every corner or intersection write the street name', quickly take a photo of the building or street sign or record a short voice memo so you can add accurate notes later when you 'sit down in a quiet spot with your paper and notebook.'
How can I change the activity for younger kids or make it more challenging for older kids?
For ages 4–6 focus only on spotting and sketching big landmarks like 'parks, schools, stores' and coloring large zones, for ages 7–9 keep the one-word building uses and simple shapes, and for ages 10–13 add measured steps, a simple scale, precise zone boundaries with your ruler, and a detailed legend before you 'Share your finished zoning map on DIY.org.'
What are simple ways to improve or personalize the zoning map after it's finished?
To enhance your map, create custom symbols for landmarks, add patterned stickers or a scale bar when you 'Draw a simple outline of the streets', write notes about traffic or walking routes, add a clear title, date and your name, and attach photos before you 'Share your finished zoning map on DIY.org.'