Make a telescope
Build a simple telescope from cardboard tubes and lenses, then observe the Moon and nearby objects to explore magnification and basic optics.
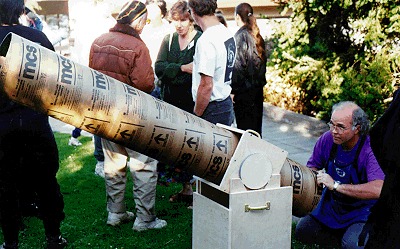
About this activity
Build a simple telescope from cardboard tubes and lenses, then observe the Moon and nearby objects to explore magnification and basic optics.
What you need
Step by step
- 1
Step 1
Gather all the materials on a clear table with an adult nearby
- 2
Step 2
Measure the large tube to about 30 centimeters and cut it with scissors using adult help
- 3
Step 3
Measure the small tube to about 25 centimeters and cut it so it can slide inside the large tube
- 4
Step 4
Line the inside of both tubes with black construction paper and glue it in place
- 5
Step 5
Center and tape the larger focal length lens to one end of the large tube using masking tape
- 6
Step 6
Center and tape the shorter focal length lens to one end of the small tube using masking tape
- 7
Step 7
Insert the small tube into the large tube until there is about a two centimeter overlap
- 8
Step 8
Hold the eyepiece end to your eye and look at a distant object during the day
- 9
Step 9
Slowly slide the small tube in and out until the distant object appears clear
- 10
Step 10
Mark the tube position where the image is sharp with your marker
- 11
Step 11
Place a small strip of masking tape at the mark to hold the focus position
- 12
Step 12
Go outside at night when the Moon is visible
- 13
Step 13
Point the objective end of the telescope at the Moon
- 14
Step 14
Look through the eyepiece and fine tune the focus by sliding the tubes until the Moon looks sharp
- 15
Step 15
Share a photo or a description of your finished telescope and what you saw on DIY.org
Fun facts
How do I build a simple cardboard tube telescope and observe the Moon?
To build a simple telescope, slide a smaller cardboard tube into a larger one to act as the body. Mount a convex lens (a magnifying-glass lens) at the far end as the objective and a second smaller lens near the viewing end as the eyepiece, securing them with tape or hot glue. Paint the inner tube black to reduce reflections. Point at the Moon, look through the eyepiece, and slowly slide tubes to focus. Use a tripod or steady surface and adjust for sharpness; try nearby trees before night observi
What materials do I need to make a cardboard tube telescope?
You'll need two cardboard tubes (like a paper-towel tube and a mailing tube), two lenses (a larger convex magnifying-glass lens for the objective and a smaller lens for the eyepiece), strong tape or glue, scissors or a craft knife (adult use), black paint or paper to line the tube, ruler and marker for measuring, and optional: tripod, rubber bands, and safety goggles. Choose lenses that are clean and free of scratches for the best image.
What ages is a cardboard tube telescope suitable for?
This activity suits ages 6 to 8 with adult supervision. Children 6 to 8 will need help cutting, gluing, and aligning lenses; ages 9 to 12 can assemble and focus more independently, learning about magnification and focal length. Teens can experiment with lens spacing and better optics. Always supervise night use and handling of blades or glass. Adjust complexity to the child's attention span and skill level.
What are the benefits of making and using a cardboard telescope with children?
Making and using a cardboard telescope teaches children basic optics—how lenses magnify and how focal length affects focus—while boosting curiosity about astronomy. It develops fine motor skills, problem-solving, measurement practice, and observational habits. The project is low-cost and encourages outdoor family time, record-keeping like sketching lunar phases, and patience with scientific tinkering. These benefits support STEM learning and long-term interest in science.
Watch & Learn
Need help?
What can we use instead of the larger and shorter focal length lenses or black construction paper if those are hard to find?
Substitute two magnifying glasses of different strengths for the larger focal-length objective and the shorter focal-length eyepiece, and use black paint or black electrical tape in place of black construction paper while still lining the insides and taping the lenses as instructed.
The image stays blurry even after sliding the small tube—what might be wrong and how can we fix it?
Check that both lenses are centered and taped flat to the tube ends, the insides are dark from the black construction paper to prevent stray light, and the small tube can slide freely with about a two centimeter overlap—if it sticks or rubs, sand or trim the cut edges so it moves smoothly, then re-mark the sharp focus with the marker and masking tape.
How can we adapt this telescope activity for a 4–6 year old versus a 10–12 year old?
For 4–6 year olds have an adult measure and cut the large tube to ~30 cm and the small tube to ~25 cm and pre-attach lenses while the child helps line the tubes and slides to focus, whereas 10–12 year olds can do the measuring and cutting with supervision, experiment with different lens combinations, and record their Moon observations to share on DIY.org.
How can we improve or personalize our telescope after building it?
Personalize and enhance it by painting the exterior, adding a smartphone holder over the eyepiece to photograph the Moon, mounting it on a simple tripod for steadier viewing, and labeling the focus mark with decorative tape before sharing a photo or description on DIY.org.