Make a Scrapbook Journal
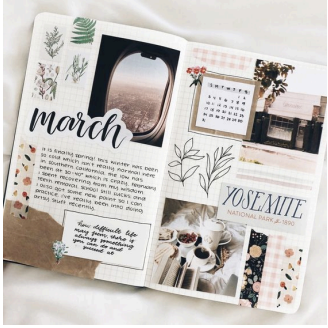
Make a personalized scrapbook journal using paper, photos, stickers, and glue; arrange memories, add captions, drawings, and decorations to tell your story.
About this activity
Make a personalized scrapbook journal using paper, photos, stickers, and glue; arrange memories, add captions, drawings, and decorations to tell your story.
What you need
Step by step
- 1
Step 1
Choose a theme or story for your scrapbook like family holidays school memories or pets.
- 2
Step 2
Clear a workspace and open your notebook to the first page.
- 3
Step 3
Gather your photos stickers and decorative paper into one pile so you can see everything.
- 4
Step 4
Pick one photo to start the first page.
- 5
Step 5
Position the photo on the page where you want it to go.
- 6
Step 6
Trim the photo with scissors if you want it smaller or a different shape.
- 7
Step 7
Apply glue to the back of the photo using the glue stick.
- 8
Step 8
Press the photo down on the page so it sticks flat and secure.
- 9
Step 9
Write a short caption under the photo with your pencil or marker to tell the story.
- 10
Step 10
Add stickers or pieces of decorative paper around the photo for extra color.
- 11
Step 11
Draw a doodle border or small illustration to match your memory.
- 12
Step 12
Repeat steps 4 to 11 for each page until your scrapbook has all the memories you want.
- 13
Step 13
Share your finished scrapbook on DIY.org
Fun facts
How do I make a scrapbook journal with my child?
Start by choosing a blank journal or binding cardstock into a book. Sort photos and mementos and decide a loose theme for each page. Trim pictures, arrange layouts before gluing, then secure items with glue sticks or photo corners. Add captions, dates, drawings and stickers to tell the story. Let your child lead creative choices, supervise cutting and glueing, and protect finished pages with clear sleeves or a sturdy cover.
What materials do I need for a scrapbook journal?
Gather a blank scrapbook or heavy cardstock, printed photos, plain and patterned paper, stickers, washi tape, markers, colored pencils, safe scissors, glue sticks or acid-free photo glue, double-sided tape and photo corners. Optional extras: ribbon, envelopes, stamps, labels, clear page protectors, and a bone folder for smoothing. Choose non-toxic supplies and child-safe scissors for younger children to keep crafting safe and durable.
What ages is a scrapbook journal suitable for?
Scrapbook journaling suits a wide range: toddlers (with heavy supervision) can stick photos and decorate, preschoolers (3–5) enjoy stickers and simple captions, primary kids (6–9) can cut, write short notes and plan layouts, and tweens/teens can design themed spreads and deeper journaling. Adapt complexity and tools to the child’s fine motor skills and attention span; always supervise sharp tools and adhesives for younger children.
What are the benefits of making a scrapbook journal?
Scrapbooking builds storytelling, memory-keeping and literacy skills while strengthening fine motor control and creativity. It encourages reflection as children caption photos and sequence events, boosts confidence through self-expression, and creates a tangible family keepsake. Doing it together enhances bonding and conversational skills. It can also become a calming, therapeutic activity for processing emotions and preserving milestones for years to come.
Watch & Learn
Need help?
What can I use if I don't have a glue stick or decorative paper for step 7 and step 10?
If you don't have a glue stick for step 7 use double-sided tape, glue dots, or a thin layer of white school glue, and replace decorative paper in step 10 with magazine cutouts, wrapping paper, washi tape, or fabric scraps.
My photo moved or curled after I glued it in step 7—how can I fix that?
If photos slide or curl after step 7, first position them with a small piece of removable tape as in step 5 before gluing, then press flat in step 8 and weight the page with a heavy book for 10–15 minutes to set them.
How can I adapt this scrapbook project for different ages while following steps like trimming, captioning, and decorating?
For toddlers skip trimming in step 6 and let them stick pre-cut photos and add stickers in step 10, for elementary kids encourage short captions in step 9 and simple doodles in step 11, and for older kids have them cut photos into shapes in step 6, write longer stories in step 9, and repeat steps 4–11 to build themed sections.
What are simple ways to enhance or personalize the finished scrapbook before sharing on DIY.org?
To personalize before sharing on DIY.org add glued pockets or envelopes on a page from step 10 for tickets, write dates and tiny stories under the captions in step 9, and attach a printed QR code to the inside cover linking to a short memory video.