Make a ring from a coin
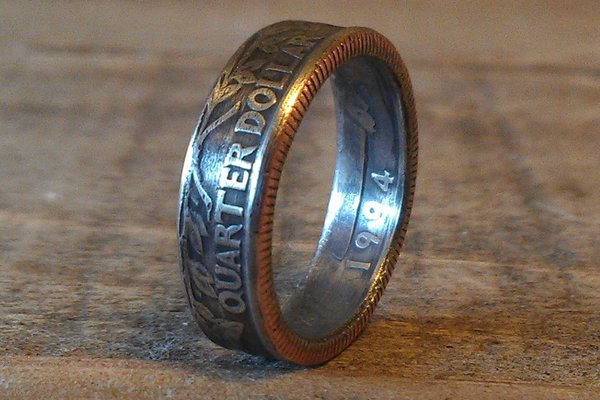
Make a wearable ring by shaping a soft coin around a dowel with pliers, smoothing edges, and decorating, all with adult supervision.
About this activity
Make a wearable ring by shaping a soft coin around a dowel with pliers, smoothing edges, and decorating, all with adult supervision.
What you need
Step by step
- 1
Step 1
Ask an adult to supervise and help set up a safe workspace.
- 2
Step 2
Pick a soft metal coin and place it flat on your workspace.
- 3
Step 3
Slide the coin onto the wooden dowel to check the finger size you want.
- 4
Step 4
Mark the dowel at the coin edge with a marker so you know where to wrap.
- 5
Step 5
Use the needle-nose pliers to pinch a small section of the coin and bend that section over the dowel.
- 6
Step 6
Keep bending the coin a little at a time around the dowel until it curves into a ring shape.
- 7
Step 7
Slide the partially formed ring off the dowel carefully.
- 8
Step 8
Use the pliers to gently squeeze the ring ends together so the ring closes to the size you marked.
- 9
Step 9
Smooth any sharp or rough edges by filing or sanding the inside and outside edges.
- 10
Step 10
Buff the ring with a polishing cloth until it shines.
- 11
Step 11
Decorate the outside of the ring using markers or paint to make it your own.
- 12
Step 12
Ask the adult to help adjust the fit with pliers if needed and try on your ring to check comfort.
- 13
Step 13
Share a photo and story about your finished coin ring on DIY.org.
Fun facts
How do you make a wearable ring from a coin?
To make a coin ring, first check local laws and consider using a replica or soft metal blank. With adult supervision, clamp a soft coin onto a dowel or ring mandrel. Use needle-nose pliers to gently bend the coin around the dowel, shaping it evenly. File and sand any sharp edges, then polish. Finish by decorating with paint, nail polish, or a clear sealant. Work slowly and wear safety glasses and gloves while shaping and filing.
What materials do I need to make a coin ring?
You’ll need a soft coin or metal ring blank (or a replica/token), a wooden dowel or ring mandrel, needle-nose pliers, a clamp or vise, fine files or sandpaper, safety gloves and goggles, and a polishing cloth. For decoration, add acrylic paint, nail polish, enamel pens or a clear topcoat. Optional items: small hammer and bench block for gentle shaping, and temporary sizing tape to test fit before final shaping.
What ages is a coin-ring craft suitable for?
This craft is best for kids aged about 8 and up with close adult supervision because it uses tools and can create sharp edges. Ages 12+ may handle more of the shaping with guidance. For younger children (4–7), adapt the idea using pre-made metal blanks, craft foam or polymer clay rings so they can decorate without metalworking tools.
What are the benefits and safety tips for making coin rings?
Making a coin ring boosts fine motor skills, problem solving and creativity. Safety tips: always use adult supervision, wear goggles and gloves, file and sand edges carefully, and avoid excessive force. Check local laws about altering currency and consider replicas if needed. Variations include using metal blanks, polymer clay, or painted wooden discs for a safer, kid-friendly version while keeping the decorating fun.
Watch & Learn
Need help?
What can we use if we don't have a wooden dowel or needle-nose pliers?
Use a rounded permanent marker (wrapped with tape) or a thick wooden paint stick as the dowel to slide the coin onto for sizing, and substitute small locking pliers or jewelry pliers for the needle-nose pliers when you pinch and bend the coin, with an adult supervising.
The coin won't bend or it cracks—what should we do?
If the coin resists bending or cracks while you keep bending a little at a time, stop and try a softer metal coin or have the adult use a larger pair of pliers and bend in smaller increments, then smooth any rough edges with the file or sandpaper before continuing.
How can we adapt the steps for different ages?
For younger kids have the adult handle the pinch-and-bend steps while the child picks the coin, marks the dowel, and decorates with markers or paint, and for older kids let them perform the dowel sizing, gradual bending with pliers, filing, and polishing under supervision.
How can we make the finished ring more special or personalized?
After you buff the ring with the polishing cloth and smooth the edges, personalize it by painting patterns with markers, wrapping thin colored wire around the outside, or gluing on a small flat-backed gem and sealing with a clear coat.