Make a mold
Make a simple plaster mold to cast a small toy or shape, measuring and mixing materials with adult help while learning about casting.
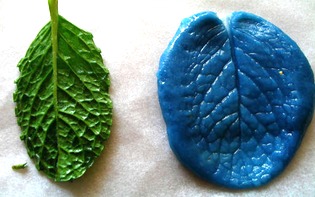
About this activity
Make a simple plaster mold to cast a small toy or shape, measuring and mixing materials with adult help while learning about casting.
What you need
Step by step
- 1
Step 1
Spread the wax paper on your table and put all materials on top so they are easy to reach.
- 2
Step 2
Flatten a piece of modeling clay into a disk about 1 centimeter thick on the wax paper.
- 3
Step 3
Press your small plastic toy gently halfway into the clay to make a clear impression.
- 4
Step 4
Carefully lift the toy straight up out of the clay so the cavity stays intact.
- 5
Step 5
Lightly brush a thin layer of vegetable oil into the clay cavity to help release the plaster later.
- 6
Step 6
Measure out plaster powder using the cup so you have two equal parts by volume.
- 7
Step 7
Measure out water using the cup so you have one part by volume matching the ratio two to one.
- 8
Step 8
Ask an adult to pour the water into the mixing bowl and slowly add the plaster powder while stirring until the mix is smooth about one to two minutes.
- 9
Step 9
With the adult helping if needed pour the mixed plaster slowly into the clay cavity until it is filled.
- 10
Step 10
Gently tap the clay on the table a few times to help any trapped air bubbles rise to the surface.
- 11
Step 11
Let the plaster sit undisturbed for 20 to 30 minutes to fully set.
- 12
Step 12
Gently peel the clay away from the hardened plaster to reveal your cast shape.
- 13
Step 13
Smooth any rough edges carefully with fine sandpaper if needed.
- 14
Step 14
Paint or decorate your plaster shape using colouring materials if you like.
- 15
Step 15
Take a photo and share your finished creation on DIY.org.
Fun facts
How do I make a simple plaster mold to cast a small toy at home?
To make a simple plaster mold, press a small toy or shape into soft modeling clay to create a negative impression; remove the toy. Build a low cardboard wall around the clay, apply a thin mold release (petroleum jelly), then mix Plaster of Paris with water following package ratios. Pour slowly, tap to release air bubbles, let set until firm (30–60 minutes), then remove plaster cast and clean edges. Always have an adult measure and mix.
What materials do I need to make a plaster mold and cast a toy?
Materials: Plaster of Paris (or casting plaster), disposable mixing cup and measuring cup, wooden stir sticks, modeling clay or playdough, a small toy or shape to copy, cardboard or plastic for a containment box, mold release (petroleum jelly or cooking spray), gloves and dust mask, water, sandpaper for finishing, drop cloth or newspaper, and optional acrylic paint to decorate the finished cast. Adult supervision required for measuring and mixing.
What ages is plaster mold casting suitable for, and when should adults help?
Suitable ages: This activity is best for children aged about 6 and up with close adult supervision; younger children (3–5) can participate in safe tasks like pressing clay or painting the finished cast. Children 8–12 can handle more measuring and pouring with guidance. Because plaster creates dust and heat as it sets, supervise all mixing and keep masks for older kids; adapt tasks to skill level and patience.
What are the safety tips, benefits, and easy variations for a kids' plaster casting activity?
Benefits, safety, and variations: Casting teaches measuring, following steps, and cause-effect. Safety first: use dust masks, gloves, cover surfaces, and always have an adult mix plaster—avoid inhaling dust and keep children away during mixing. Variations: make two-part molds for full toys, use silicone for reusable molds, or cast small ornaments and paint them. Allow ample drying time and sand edges gently before decorating.
Watch & Learn
Need help?
What can we use if we don't have plaster powder or modeling clay?
If you can't find plaster powder, use a quick-setting craft cement or a silicone mold kit, and if you don't have modeling clay, use firm playdough or air-dry clay flattened into the disk on the wax paper.
What should we do if the toy sticks to the clay or the cavity collapses when lifting the toy?
If the toy sticks when you lift it (step 4) or the cavity deforms, reflatten the clay (step 2), lightly brush vegetable oil into the cavity or onto the toy (step 5), press again and lift straight up slowly.
How can I adapt this mold-making activity for different age groups?
For toddlers have an adult do the measuring and mixing (steps 6–9) while the child presses the toy (step 3), for school-age kids let them measure the 2:1 plaster-to-water ratio and stir with supervision (steps 6–9), and for teens let them sand (step 11) and paint (step 12) independently.
How can we extend or personalize the finished plaster cast?
To personalize, stir powdered tempera or washable paint into the plaster before pouring (step 8), make several casts by pressing different toys into separate clay disks, and after sanding (step 11) glue on a magnet or hanger and then paint (step 12).