Make a Giant Paper Flower
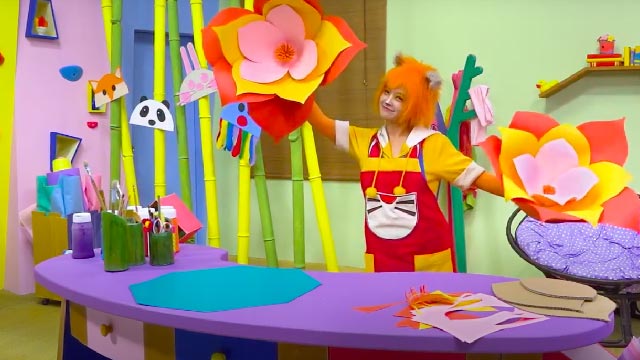
Make a giant paper flower using colored paper, scissors, glue, and a stem with adult help; learn cutting, layering, and simple assembly for decoration.
About this activity
Make a giant paper flower using colored paper, scissors, glue, and a stem with adult help; learn cutting, layering, and simple assembly for decoration.
What you need
Step by step
- 1
Step 1
Clear a flat workspace and lay out all your materials so everything is easy to reach.
- 2
Step 2
Choose one or two colors for the petals and one color for the flower center.
- 3
Step 3
Fold one sheet of petal-colored paper in half to make a symmetrical petal template.
- 4
Step 4
Draw a simple teardrop or oval petal shape along the folded edge with your pencil.
- 5
Step 5
Cut out the petal shape along the pencil line to make your petal template.
- 6
Step 6
Trace the petal template onto the petal-colored paper at least eight times to make many petals.
- 7
Step 7
Cut out all the traced petals carefully along the pencil lines.
- 8
Step 8
Cut a circle about the size of your palm from a different sheet to use as the flower base.
- 9
Step 9
Arrange a few petals around the edge of the circle to plan how the layers will look.
- 10
Step 10
Glue the first layer of petals around the circle base with the petal tips pointing outward.
- 11
Step 11
Glue a second layer of petals closer to the center so the petals overlap and the flower looks full.
- 12
Step 12
Cut a small circle from the center-color paper and make small cuts around the edge to create a fringed center.
- 13
Step 13
Glue the fringed center into the middle of the petals to finish the flower head.
- 14
Step 14
Put glue on one end of your stem and press it firmly to the back of the paper base to attach the stem; secure with tape if needed.
- 15
Step 15
Take a photo of your giant paper flower and share your finished creation on DIY.org.
Fun facts
How do I make a giant paper flower with my child?
Start by choosing a petal shape and tracing templates on colored paper. Cut several large petals and smaller inner petals. Layer petals from largest to smallest, overlapping and gluing at the base. For the center, roll a tight paper strip or make a fringed circle and glue it in place. Attach the finished blossom to a wooden dowel or floral wire wrapped in green paper or tape. An adult should help with cutting and attaching the stem.
What materials do I need to make a giant paper flower?
Gather colored cardstock or crepe paper, child-safe scissors, a glue stick or white craft glue, and tape. You’ll need a pencil and petal templates, plus a wooden dowel, floral wire, or a thick straw for the stem. Optional items: floral tape or green paper to wrap the stem, markers or glitter for decoration, and a hot glue gun (for adult use only) for stronger assembly. Protective table covering is helpful.
What ages is making a giant paper flower suitable for?
This activity works for many ages: toddlers (3–5) can help pick colors and glue pre-cut shapes with close adult supervision. Ages 6–8 can practice cutting simple petals, layering, and gluing with partial independence. Children 9 and up can design detailed petals, use more precise cutting, and attach stems with minimal help. Adjust tools and supervision to match each child’s cutting skill and attention span.
What are safety tips and creative variations for giant paper flowers?
Keep scissors child-safe and supervise cutting; reserve hot glue and sharp tools for adults. Protect surfaces with newspaper and teach safe handling of the stem (wrap wire ends). For variations, use tissue, crepe, or patterned scrapbook paper; make fringed centers, multiple layered petals, or a bouquet of different colors. Turn flowers into wall décor by gluing to cardboard backs or attach magnets for fridge display.
Watch & Learn
Need help?
What can I use if I don't have the specific colored paper or a stem called for in the materials?
If you don't have petal-colored construction paper, use tissue paper, magazine pages, or paint plain printer paper for petals and use a rolled cardboard tube, wooden skewer, or a wrapped pipe cleaner as the stem.
My petals look uneven or the flower falls apart—what should I do?
Refold the paper to remake a symmetrical petal template, retrace and cut at least eight matching petals, overlap and glue the second layer closer to the center, and press each glued petal and the stem attachment until dry or secure with tape where the stem meets the paper base.
How can I change the activity for different age groups?
For younger kids, pre-cut the petal templates and use a glue stick to attach fewer petals to the circle base, while older kids can design intricate petal shapes, cut more layers, make the fringed center with fine cuts, and add painted details before gluing.
How can we extend or personalize the giant paper flower once it's finished?
Personalize it by mixing two petal colors when tracing, adding a contrasting fringed center, gluing paper leaves to the stem, embellishing petals with glitter or paint, and then take a photo to share your finished creation on DIY.org.